4. Multi-Screen Projection
62
❸
Displaying a Picture Using [EDGE BLENDING]
A high resolution video can be projected on an even bigger screen by combining multiple projectors on the left, right,
top and bottom.
This projector is equipped with an “EDGE BLENDING Function” that makes the edges (boundaries) of the projection
screen indistinguishable.
NOTE:
• For projector throw distances, refer to “Throw distance and screen size” on page
• Before performing the Edge Blending function, place the projector in the correct position so that the image becomes square in
the appropriate size, and then make optical adjustments (lens shift, focus, and zoom).
• Adjust the brightness of each projector using [ADJUST] under [LIGHT MODE]. After adjusting the brightness, you can keep the
set brightness level by turning ON the [CONSTANT BRIGHTNESS] mode. In addition, use [REF. WHITE BALANCE] to adjust the
[CONTRAST] and [BRIGHTNESS].
Before explaining use of the Edge Blending function
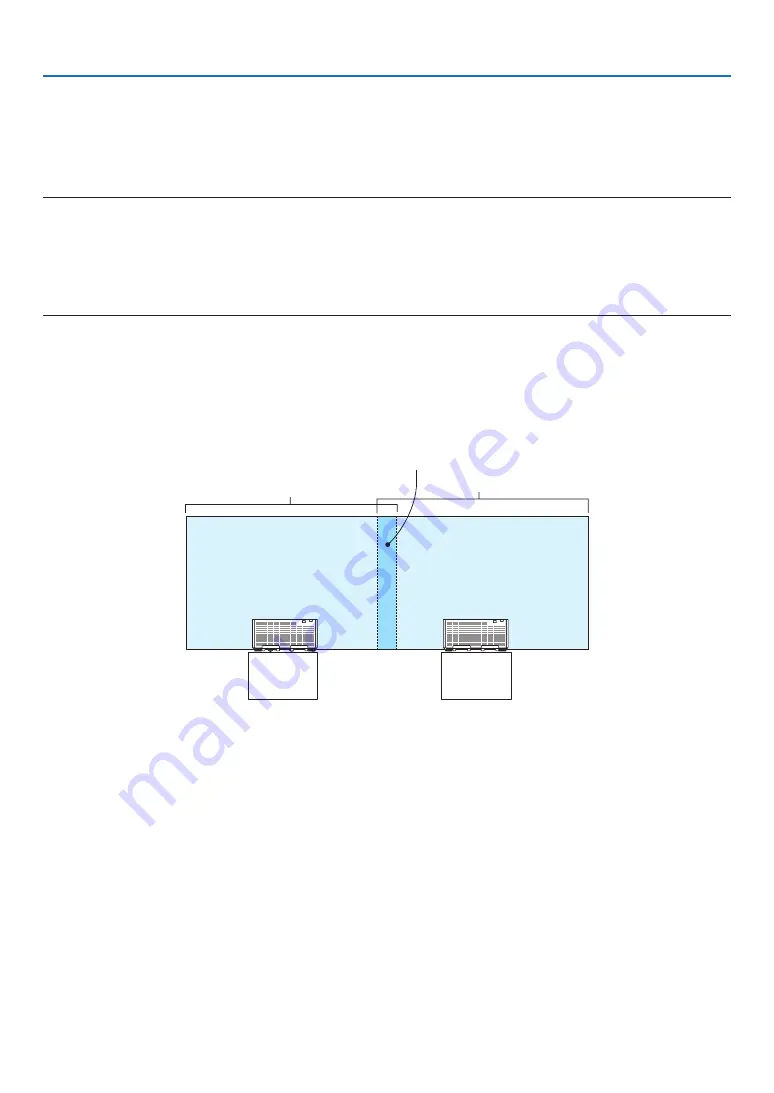
This section explains the case for “Example: Placing two projectors side by side”. As shown, the projected image on
the left is referred to as “Projector A” and the projected image on the right is referred to “Projector B”. Unless otherwise
specified hereinafter, the “projector” is used to mean both A and B.
Example: Placing two projectors side by side
Edge Blending area
Projected area
Projected area
Projector A
Projector B


