background image


 3


NEC Display Solutions of America, Inc.


www.necdisplay.com


OLR

-

501


IR Touch Overlay


Installation Guide for the OLR

-

501


Rev 1.0


6.0  Installation Procedure


6.1


Remove the overlay from the packaging.  Place the overlay face down on a padded surface and verify 


the material contents (see Equipment on Page 2).
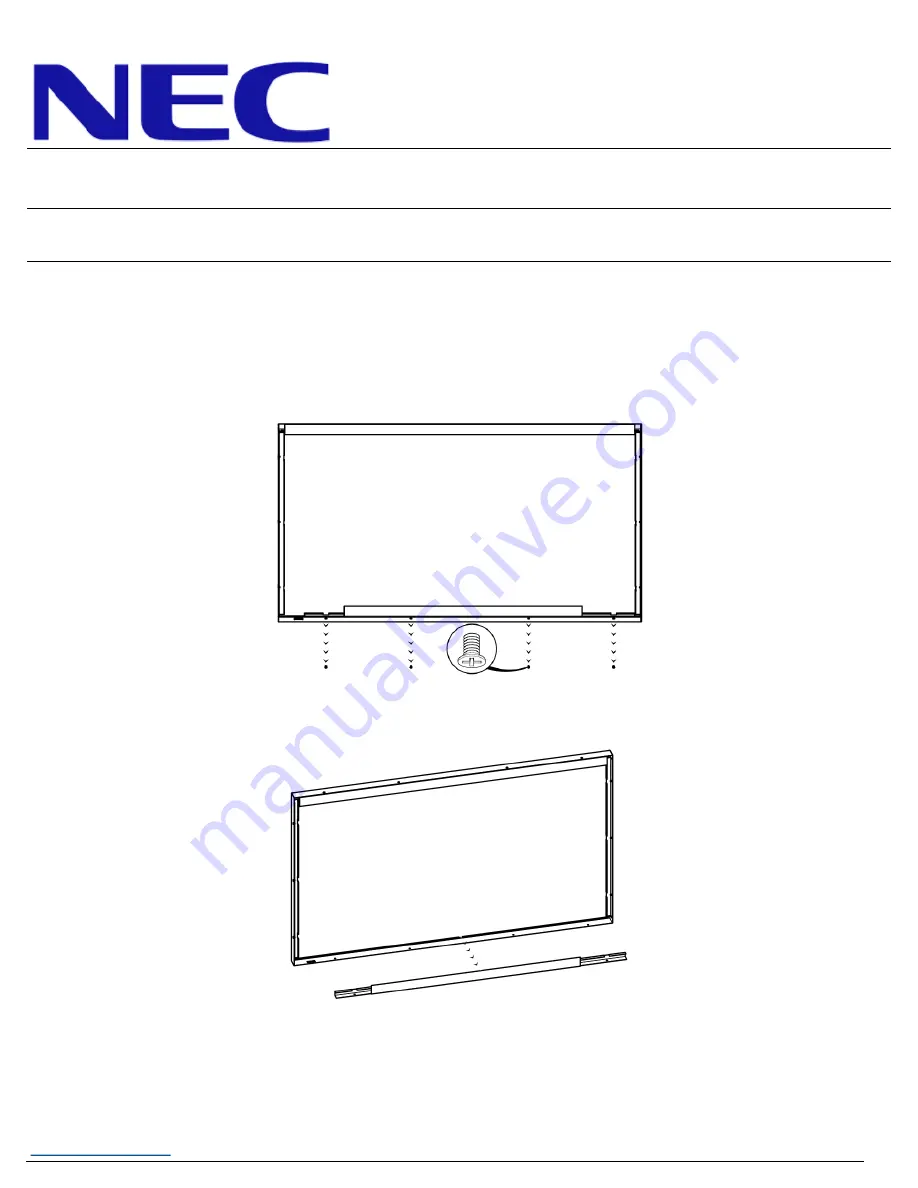
 

6.2


Use a #2 Philips screwdriver to remove the four (4) #6

-

32 flathead screws securing the bottom 


bracket to the overlay.


6.2.1   

Do NOT remove any remaining screws from the overlay.


6.4


Use a cloth and mild cleaner to clean


the monitor and inside surface of the overlay.


6.4.1   Do not use any chemical solvents, such as acidic or alkali solutions.


6.4.2   If available, use compressed air after cleaning to remove any lint or dust.


6.3


Remove the bottom bracket from the overlay.


6.3.1   Set the screws and bracket aside for reuse in steps 6.9 and 6.10.


Summary of Contents for OLR-501

Page 1: ...the bottom edge of the monitor 3 2 The overlay contains tempered glass Use caution when handling 3 3 The overlay has an integrated USB cable located along the bottom edge of the overlay Ensure the cable is not pinched crushed or damaged during installation 3 4 Installation requires two persons at all times to ensure the touch frame does not bend or torque 3 5 Once the touch screen is installed do ...

Page 2: ...play com OLR 501 NEC Display Solutions of America Inc IR Touch Overlay Installation Guide for the OLR 501 Rev 1 0 4 0 Equipment 5 0 Dimensional Drawings 1 C501 IR Overlay 1 Spare 6 32 Philips flathead machine screw ...

Page 3: ...ips screwdriver to remove the four 4 6 32 flathead screws securing the bottom bracket to the overlay 6 2 1 Do NOT remove any remaining screws from the overlay 6 4 Use a cloth and mild cleaner to clean the monitor and inside surface of the overlay 6 4 1 Do not use any chemical solvents such as acidic or alkali solutions 6 4 2 If available use compressed air after cleaning to remove any lint or dust...

Page 4: ...ace Step 6 5 1 Step 6 5 2 Step 6 5 3 6 6 Be sure the USB cable is toward the bottom of the monitor and is not crushed or pinched during installation 6 7 Be sure not to scratch or damage the monitor or glass surface while installing the overlay 6 8 Double check the monitor panel and overlay glass for dirt smudges or dust before securing the overlay to the monitor 6 9 Return the bottom bracket to it...

Reviews: