8
Correcting Horizontal and Vertical Keystone Distortion (Cor-
nerstone)
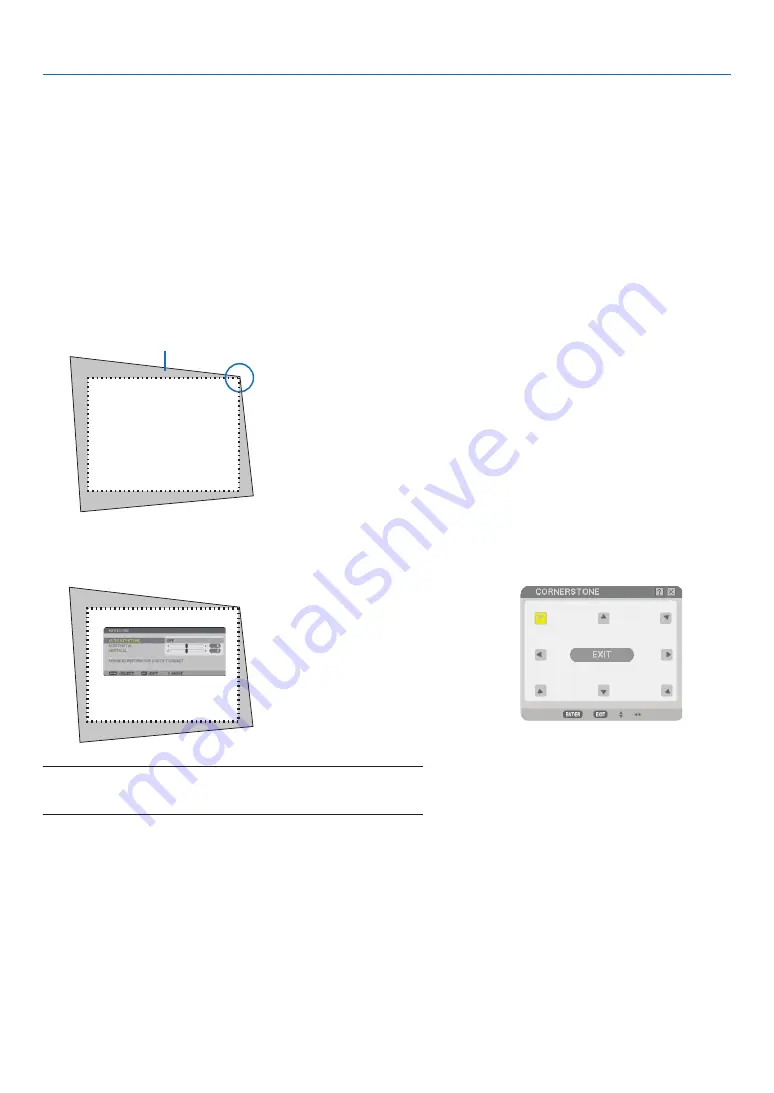
Use the 3D Reform feature to correct keystone (trapezoidal) distortion to make the top or bottom and the left or right
side of the screen longer or shorter so that the projected image is rectangular.
4. Convenient Features
Projected image
Cornerstone
1. Press and hold the 3D REFORM button for a minimum of 2 seconds to reset current adjustments.
Current adjustments for [KeYstOne] or [COrnerstOne] will be cleared.
2. Project an image so that the screen is smaller than the area of the raster.
3. Pick up any one of the corners and align the corner of the image with a corner of the screen.
the drawing shows the up-
per right corner.
4. Press the 3D REFORM button twice.
the Cornerstone adjustment screen is displayed.
5. Use the SELECT
button to select one icon (
) which points in the direction you wish to move the
projected image frame.
6. Press the ENTER button.
screen
NOTE: When the [CORNERSTONE] screen is displayed, the background
will temporarily turn black and a frame will appear as an adjusting
guide.
TIP:
If you are adjusting [KEYSTONE] or [GEOMETRIC CORRECTION],
[CORNERSTONE] will not be available. If this happens, press and hold
the 3D REFORM button for a minimum of 2 seconds to reset the [KEY-
STONE] adjustments.
the drawing shows the upper left
icon (
) is selected.
TIP:
NP905: When [WIDE SCREEN] is selected from [SCREEN TYPE], lines that show "16:9"
will be displayed. Click the outer corners.
NP901W: When [4:3 SCREEN] is selected from [SCREEN TYPE], lines that show "4:3"
will be displayed. Click the outer corners.


