background image

English

English-7

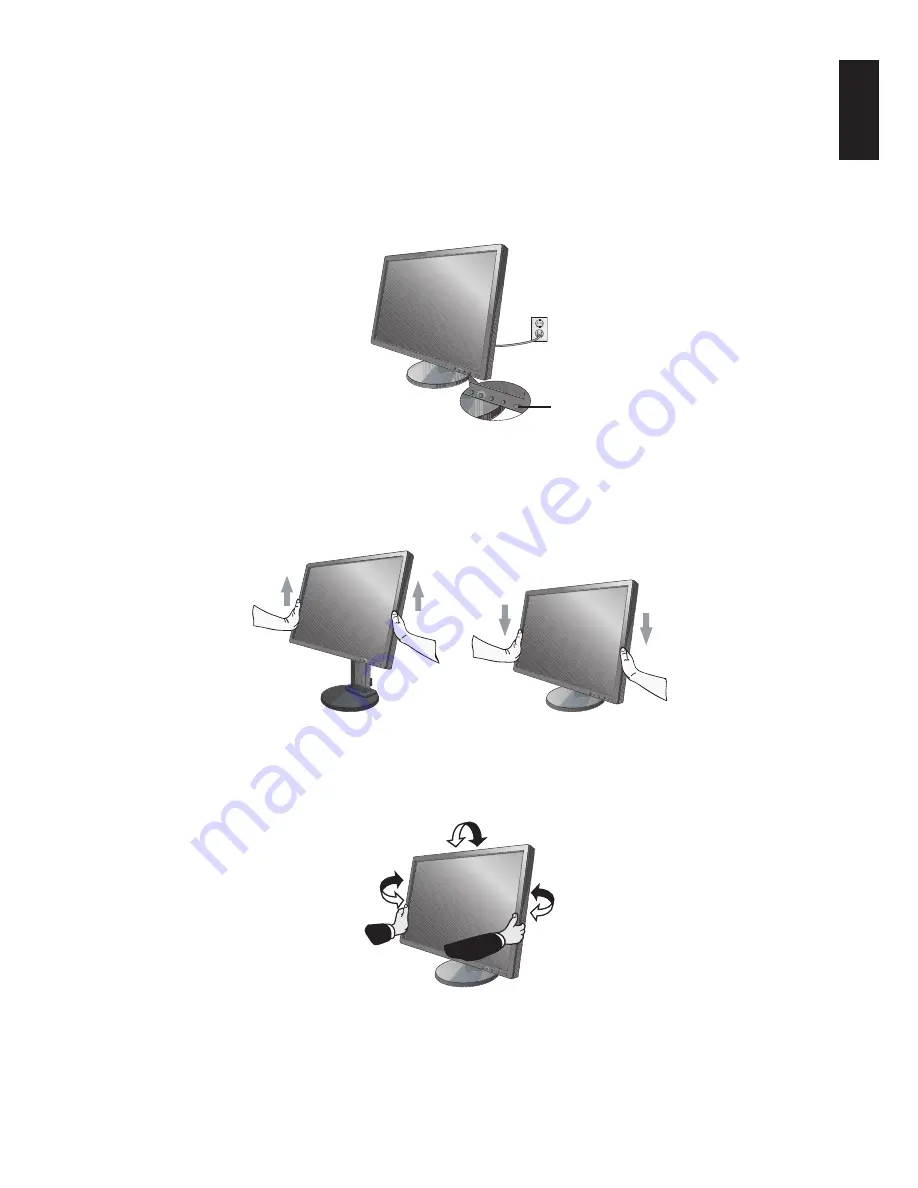
Figure C.1

Power Button

Figure RL.1

Raise and Lower Monitor Screen

The monitor may be raised or lowered. To raise or lower screen, place hands on each side of the monitor and lift or lower to
the desired height (

Figure RL.1

).

NOTE:

Handle with care when raising or lowering the monitor screen.

Tilt and Swivel

Grasp both sides of the monitor screen with your hands and adjust the tilt and swivel as desired (

Figure TS.1

).

NOTE:

Handle with care when tilting the monitor screen.

Figure TS.1

6. Connect the power cord to the power outlet (

Figure C.1

).

NOTE:

Please refer to 

Caution

 section of this manual for proper selection of AC power cord.

7. Turn on the monitor with the front power button and the computer (

Figure C.1

).

8. No-Touch Auto Adjust automatically adjusts the monitor to optimal settings upon initial setup for most timings.

For further adjustments, use the following OSD controls:

• Auto Adjust Contrast (Analog input only)

• Auto Adjust (Analog input only)

Refer to the 

Controls

 section of this User’s Manual for a full description of these OSD controls.

NOTE:

If you have any problems, please refer to the 

Troubleshooting

 section of this User’s Manual.

Summary of Contents for MultiSync L227HR

Page 1: ...MultiSync E222W User s Manual...

Page 2: ...English 1 Recommended use English 3 Contents English 5 Quick Start English 6 Controls English 10 Specifications English 13 Features English 14 Troubleshooting English 15 TCO Displays 5 0 English 16 Ma...

Page 3: ...TAGE COMPONENTS INSIDE REFER SERVICING TO QUALIFIED SERVICE PERSONNEL Declaration of the Manufacturer We hereby certify that the colour monitor MultiSync E222W L227HR is in compliance with Council Dir...

Page 4: ...receiver is connected Consult your dealer or an experienced radio TV technician for help If necessary the user should contact the dealer or an experienced radio television technician for additional su...

Page 5: ...the wall outlet and refer servicing to qualified service personnel under the following conditions When the power supply cord or plug is damaged If liquid has been spilled or objects have fallen into t...

Page 6: ...image persistence after image effects Get regular eye checkups Ergonomics To realize the maximum ergonomics benefits we recommend the following Adjust the Brightness until the background raster disapp...

Page 7: ...al Cable 15 pin mini D SUB male to 15 pin mini D SUB male Video Signal Cable DVI D to DVI D Setup Manual Power Cord Type of power cord included will depend on the where the LCD monitor is to be shippe...

Page 8: ...with Analog output Connect the 15 pin mini D SUB signal cable to the connector of the display card in your system Figure A 2 Tighten all screws For the MAC Connect the Macintosh cable adapter to the c...

Page 9: ...r screen Figure TS 1 6 Connect the power cord to the power outlet Figure C 1 NOTE Please refer to Caution section of this manual for proper selection of AC power cord 7 Turn on the monitor with the fr...

Page 10: ...on Before rotating the screen must be raised to the highest level to avoid knocking the screen on the desk or pinching with your fingers To raise the screen with one hand grip the top of the display b...

Page 11: ...al attach the arm to the monitor Figure F 1 NOTE 1 When mounting use ONLY the screws 4 pcs that were removed from the stand to avoid damage to the monitor or stand 2 The LCD monitor should only be use...

Page 12: ...ed by reducing the brightness level OFF Set brightness variable from 0 to 100 ON Set brightness variable range from 0 to 60 When this function is set to ON a bar for CARBON FOOTPRINT appear under the...

Page 13: ...s priority of input signal to one of the following pair 1360 x 768 1680 x 1050 or 1280 x 768 1680 x 1050 or 1024 x 768 1400 x 1050 1360 x 768 1680 x 1050 Determines the resolution to 1360 x 768 1680 x...

Page 14: ...tion in kg The carbon footprint factor in the carbon saving calculation is based on the OECD 2008 Edition OSD Warning OSD Warning menus disappear with Exit button NO SIGNAL This function gives a warni...

Page 15: ...75 Hz NEC DISPLAY SOLUTIONS cites recommended 1680 x 1050 60 Hz resolution for optimal display performance Active Landscape Horiz 473 8 mm 18 7 inches Display Area Vert 296 1 mm 11 7 inches Portrait...

Page 16: ...on by allowing the monitor to send its capabilities such as screen size and resolutions supported directly to your computer automatically optimizing display performance IPM Intelligent Power Manager S...

Page 17: ...mple if an image was on the monitor for one hour and a residual image remains the monitor should be turned off for one hour to erase the image NOTE As with all personal display devices NEC DISPLAY SOL...

Page 18: ...ndards at an impartial laboratory Electric and magnetic fields emissions as low as normal household background levels Low acoustic noise emissions Some of the Environmental features of the TCO Certifi...

Page 19: ...nec display com in Japan or http www necdisplay com in USA Energy Saving This monitor features an advanced energy saving capability When a VESA Display Power Management Signalling DPMS Standard signa...

Reviews: