background image

3 of 7

ISSUED: 03-26-10  SHEET #: 125-9106-3  08-04-10

F

Tools Needed for Assembly

• stud finder ("edge to edge" stud finder is recommended)

• phillips screwdriver

• drill

• 1/4" bit for concrete and cinder block wall

• 5/32" bit for wood stud wall

• level

Accessories

• 4 piece Metal Stud Fastener Kit (ACC 415) (Not UL listed)

C

A

B

D

E

J

Before you begin, make sure all parts shown are included with your product.

Parts may appear slightly different than illustrated.

I

G

H

K

L

M

PARTS LIST

#

 t

r

a

P

.

y

t

Q


n

o

it

p

i

r

c

s

e

D

A

7

9

7

1

-

0

0

2

1

e

t

a

l

p


ll

a

w

B

4

0

7

1

-

1

0

2

1

t

e

k

c

a

r

b


t

li

t


t

f

e

l

C

3

0

7

1

-

1

0

2

1

t

e

k

c

a

r

b


t

li

t


t

h

g

i

r

D

3

0

C

-

5

1

0

-

1

S

5

4

w

e

r

c

s


d

o

o

w


5

.

2


x


4

1

#

E

0

2

3

0

-

0

9

5

4

r

o

h

c

n

a


e

t

e

r

c

n

o

c

F

6" - 4 mm security allen wrench                    

1

560-9646

G

0

5

0

1

-

0

2

5

4

w

e

r

c

s


n

i

p


t

e

k

c

o

s


m

m


2

1


x


6

M

H

4

5

5

9

-

0

2

5

4

w

e

r

c

s


n

i

p


t

e

k

c

o

s


m

m


0

2


x


6

M

I

6

3

0

1

-

0

8

5

4


r

e

h

s

a

w


i

t

l

u

m

J

8

6

0

1

-

0

2

5

4

w

e

r

c

s


n

i

p


t

e

k

c

o

s


m

m


5

1


x


8

M

K

M5 x 6 mm socket pin serrated washer head screws 

8

510-1114

L

1

1

7

1

-

1

0

2

2

s

t

e

k

c

a

r

b


n

o

i

s

n

e

t

x

e

M

5

4

1

1

-

0

6

5

1


h

c

n

e

r

w


n

e

ll

a


y

t

i

r

u

c

e

s


m

m


4


-


"

4

1

Summary of Contents for E321

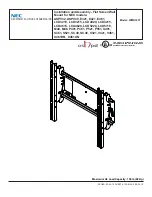
Page 1: ...and Assembly Flat Screen Wall Mount for NEC models ASPV32 ASPV40 E321 E421 E461 LCD3210 LCD3215 LCD4020 LCD4215 LCD4615 LCD4620 LCD5220 LCD5710 M40 M46 P401 P461 P521 P551 S401 S461 S521 SC40 SC46 V32...

Page 2: ...s make sure that mounting screws are anchored into the center of the studs Use of an edge to edge stud finder is highly recommended Always use an assistant or mechanical lifting equipment to safely li...

Page 3: ...i r c s e D A 7 9 7 1 0 0 2 1 e t a l p l l a w B 4 0 7 1 1 0 2 1 t e k c a r b t l i t t f e l C 3 0 7 1 1 0 2 1 t e k c a r b t l i t t h g i r D 3 0 C 5 1 0 1 S 5 4 w e r c s d o o w 5 2 x 4 1 E 0...

Page 4: ...gure 1 2 Skip to step 2 on page 6 Installation to Double Wood Stud Wall 1 Installer must verify that the supporting surface will safely support the combined load of the equipment and all attached hard...

Page 5: ...density concrete may not hold concrete anchor Make sure that the supporting surface will safely support the combined load of the equipment and all attached hard ware and components WARNING Always atta...

Page 6: ...wn in fig 2 2 Note Be sure to attach tilt brackets with handles facing outward as in figure 2 2 Align tilt brackets to screen mounting holes as recommended by chart below Attach the tilt brackets to t...

Page 7: ...r while hooking tilt brackets to wall plate A Slowly hook tilt brackets B C onto wall plate A and swing screen down as shown in fig 3 1 Tilt bracket hooks must fully engage wall plate Using phillips s...

Reviews: