Kit Instructions
High Mount XL10 Customer Display Bracket, CX
7772-K475Issue A
Page 1: ...Kit Instructions High Mount XL10 Customer Display Bracket CX 7772 K475 Issue A...
Page 2: ...luded It is the policy of NCR Corporation NCR to improve products as new technology components software and firmware become available NCR therefore reserves the right to change specifications without...
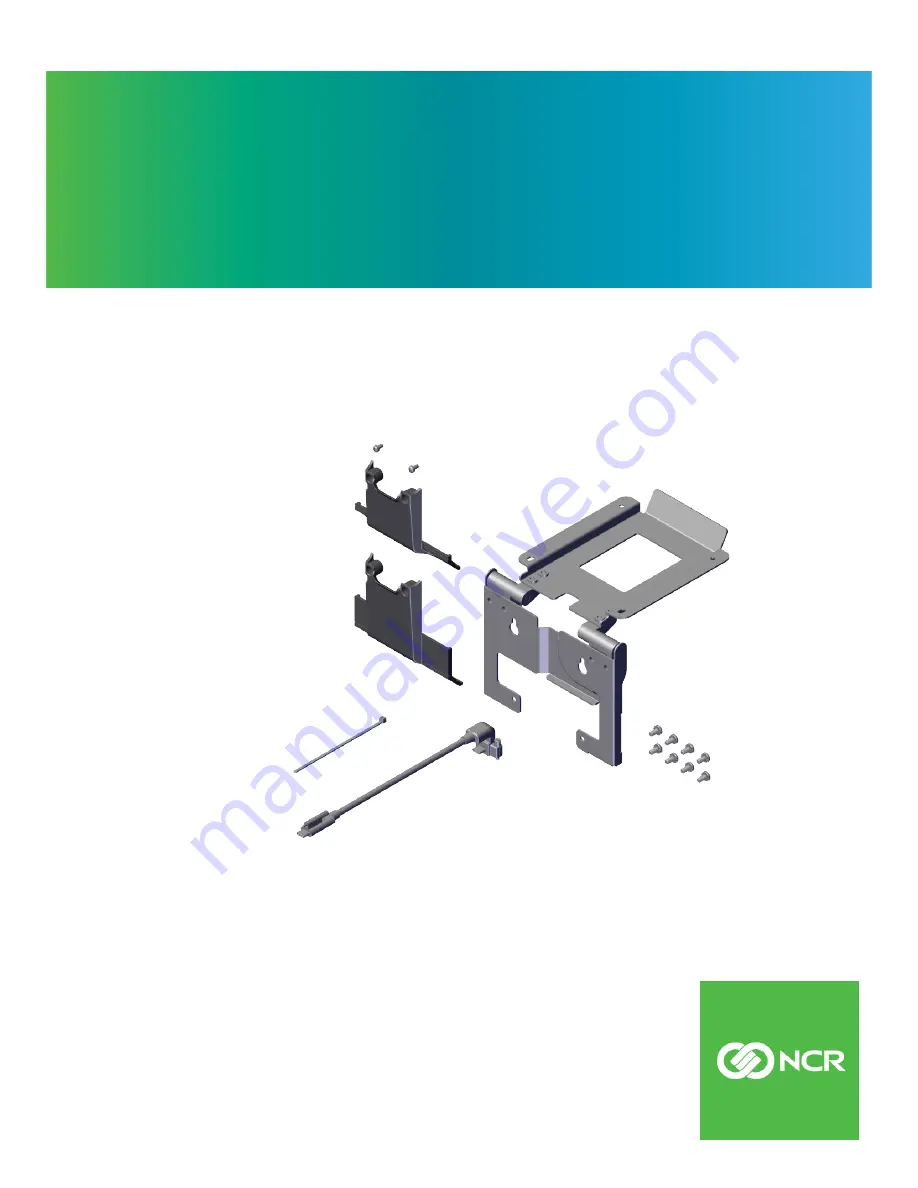
Page 3: ...cket Assembly XL10 Display High Mount CX 2 006 8627600 Screw M4x8 Phillips Cross Recessed Pan Head Machine Screw with External Tooth Lock Washer Black Zinc 3 497 0529413 Cable USBC 10 Customer Display...
Page 4: ...nds before servicing the terminal 1 Lay the Display face down on a flat surface Note Always use a soft material cloth foam to protect the display screen when placing the terminal face down 2 Remove th...
Page 5: ...clarity the Neck is not shown in the illustration below and in the succeeding illustrations 4 Install the new Cable Cover The new Cable Cover has a hole on the side to allow cable routing a Hook the...
Page 6: ...nt XL10 Customer Display Bracket CX 5 Partially install two 2 screws on the back of the CX7 Display in the location shown 6 Hook the Bracket on the partially installed screws Ensure the Cable is route...
Page 7: ...isplay Bracket CX 5 7 Tighten the two 2 partially installed screws and install two 2 screws on the bottom of the Bracket 8 Connect the other end of the Cable to the back of the XL10 Customer Display a...
Page 8: ...Display Bracket CX 9 Secure the Cable on the side of the bridge lance using a cable tie as shown 10 Install the XL10 Customer Display on the Bracket 4 screws Ensure the Cable is routed through the ga...
Page 9: ...High Mount XL10 Customer Display Bracket CX 7 11 Pivot the XL10 Customer Display into position...