I/O Expansion, RS232 COM3
3
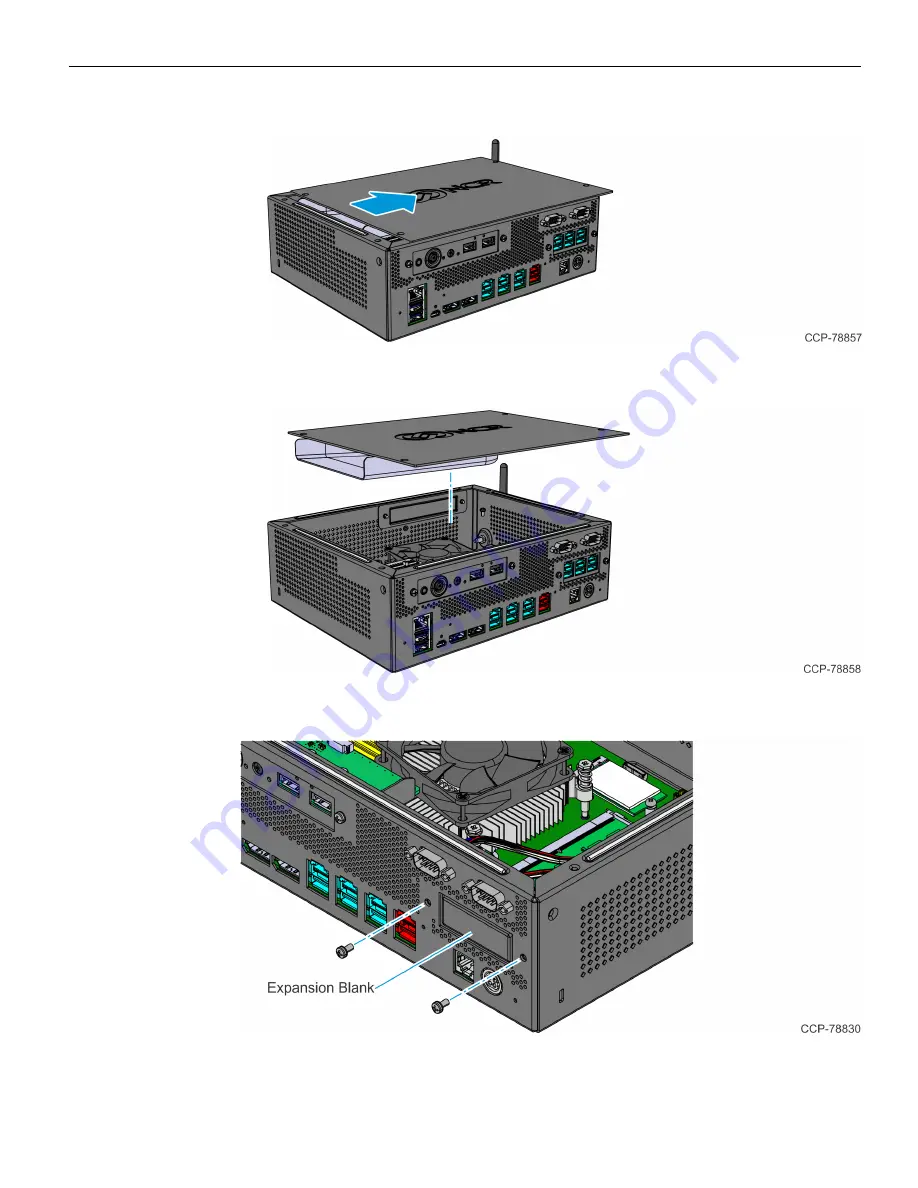
b. Slide the Top Cover in the direction shown.
c. Lift the Top Cover away from the chassis.
2. Remove the Expansion Blank from the chassis (2 screws).
Page 1: ...Kit Instructions I O Expansion RS232 COM3 7736 K900 Issue A...
Page 2: ...are and firmware become available NCR therefore reserves the right to change specifications without prior notice All features functions and operations described herein may not be marketed by NCR in al...
Page 3: ...I O Expansion RS232 COM3 This kit provides a RS232 COM3 for the NCR CX8 POS 7736 Kit Contents...
Page 4: ...OM3 Installation Procedure 1 Remove the Top Cover Top Cover without Duct a Remove the four 4 screws securing the Top Cover to the chassis Top Cover with Duct a Remove the four 4 screws securing the To...
Page 5: ...I O Expansion RS232 COM3 3 b Slide the Top Cover in the direction shown c Lift the Top Cover away from the chassis 2 Remove the Expansion Blank from the chassis 2 screws...
Page 6: ...I O Expansion RS232 COM3 3 Connect the Harness to the Motherboard 4 Install the RS232 COM3 on the inside of the chassis 2 screws 5 Connect the Harness to the RS232 COM3 Board 6 Reinstall the Top Cove...