7) Update the software. For Ethernet interface to
function properly, use any of the following RPSW
(Retail Platform Software for Windows):
•
RPSW 4.0.6.0 or later (32-bit)
•
RPSW 5.0.3.0 or later (64-bit)
These releases contain all the enhancements and
bug fixes for Ethernet. Download the latest RPSW
patches from the NCR Support Site
(
). The base versions of RPSW
can be requested through the website.
If you are using Microsoft Win32 Printer API, the latest
NCR Windows Printer Driver that support Ethernet
(LAN) can also be found on the same site.
8) Configure the software. If you are previously using a
USB / RS-232 printer, configure your printer to any of
the following options for it to be compatible with
Ethernet:
•
For OPOS/JavaPOS, change the
Port
type to
LAN
and add
IP Address
of/to the printer.
•
For Windows Printer Driver, change the interface
in the properties page to
Ethernet
and add
IP
Address
of/to the printer. For more information,
refer to
Windows Printer Driver Installation Guide
.
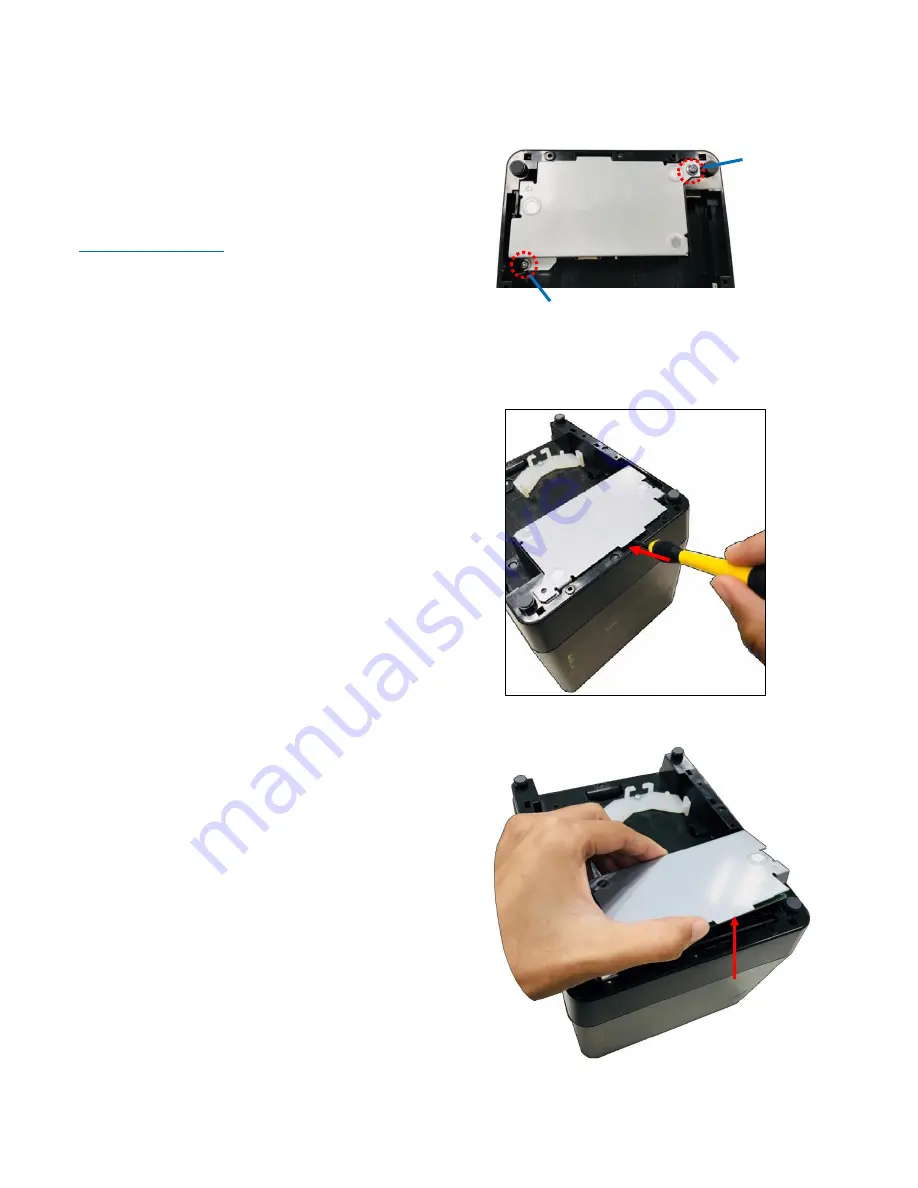
Removal Procedure
1) Remove M3X6 Flange Screw and M3X8 Flange
Screw.
2) Slightly insert the tip of the flat-head screwdriver in
the metal tab and gently push it upward until the
module disconnects from the printer.
3) Remove the module from the printer.
M3X6 Flange
Screw –
497-0507677
M3X8 Flange Screw –
497-0507678


