8
1668-K105 (Display Mount, SpacePole, Back-to-Back)
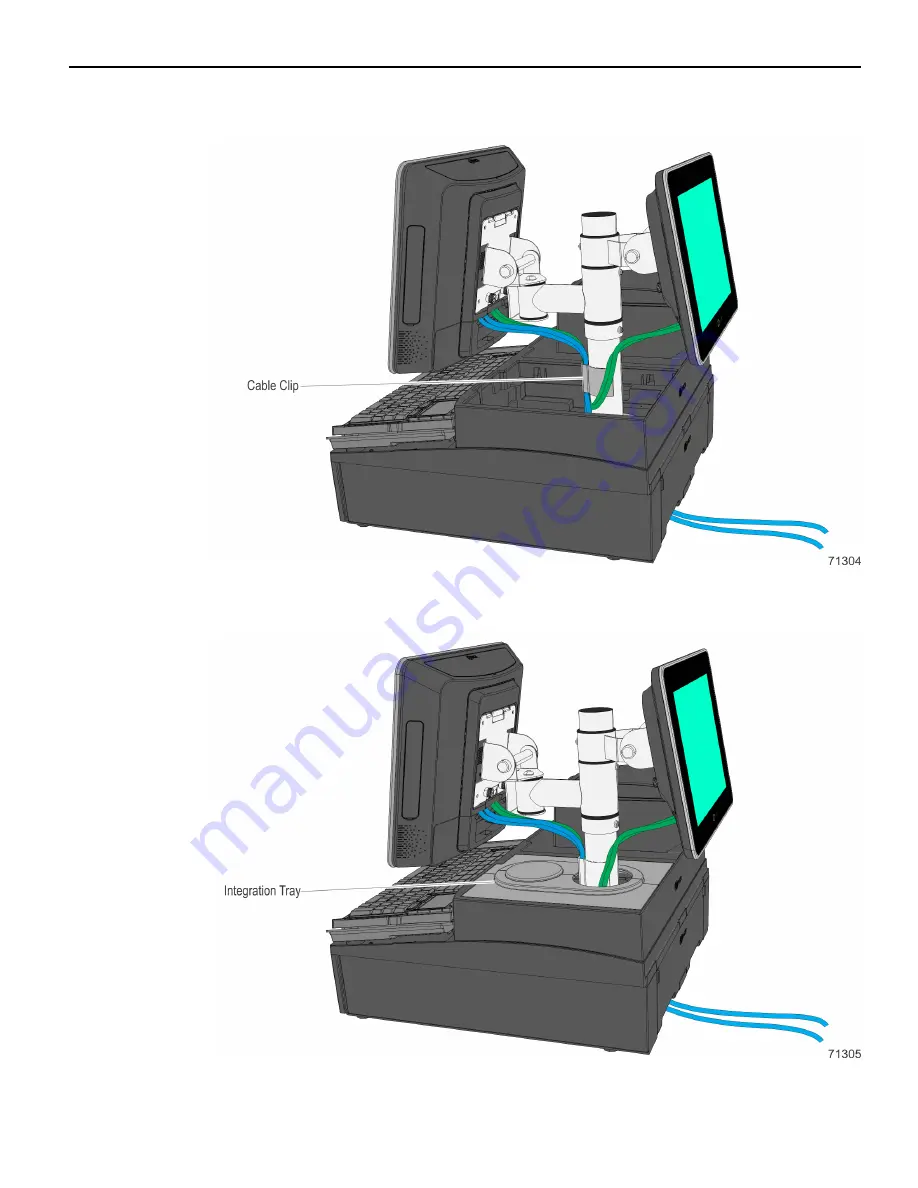
11. Install the Cable Clip to secure the cables.
12. Add the integration tray cover.
Page 1: ...KIT INSTRUCTIONS SpacePole Display Mount Back to Back Release 1 0 1668 K105 Issue A...
Page 2: ...ce must be included It is the policy of NCR Corporation NCR to improve products as new technology components software and firmware become available NCR therefore reserves the right to change specifica...
Page 3: ...SpacePole Display Mount Back to Back Introduction This kit provides the components to install the SpacePole Display Mount Back to Back Kit Contents...
Page 4: ...rill four holes for the mounting bolts in the desired location Use the SpacePole Mount base as a template for locating the holes Install the SpacePole Display Mount Back to Back and secure with screws...
Page 5: ...unt SpacePole Back to Back 3 3 Attach the P Series POS main display to the SpacePole arm by sliding the bracket tabs into the head slots 4 Tighten the thumbscrews 2 at the bottom of the bracket to sec...
Page 6: ...y Mount SpacePole Back to Back 5 Attach the customer display to the SpacePole arm by sliding the bracket tabs into the head slots 6 Tighten the thumbscrews 2 at the bottom of the bracket to secure the...
Page 7: ...lay Mount SpacePole Back to Back 5 7 Pivot the main display towards the back 8 Loosen the screw on the Terminal Cable Cover To open press the indentations in the Cable Cover to unlatch the cover then...
Page 8: ...6 1668 K105 Display Mount SpacePole Back to Back 9 Route the customer display cables to the main display and connect to the corresponding connectors Close the Cable Cover...
Page 9: ...1668 K105 Display Mount SpacePole Back to Back 7 10 Route the cables from the display down the SpacePole Mount and out of the integration tray or countertop...
Page 10: ...8 1668 K105 Display Mount SpacePole Back to Back 11 Install the Cable Clip to secure the cables 12 Add the integration tray cover...