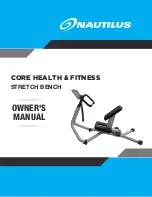
Nautilus 9NP-B7524 Series Owner'S Manual Download Page 14

Page 13

7. 

Assemble the seat and leg 
assembly using 4 each of the M8 
flat washer, M8 split lock washer, 
and M8 x 25mm socket head cap 
screw per pad and one each to 
install the bump stop 731-8901. 
For the seat pad the bracket 731-
8926-XX goes between the pad 
and the frame as shown.

8. 

Install the seat frame assembly 
into the seat bracket, then secure 
using the axle 731-8917 ensuring 
that the axle is centered.

731-8901

731-8926-XX

731-5330

730-1179

730-0910

731-8917

Fig. 14

9. 

Slide a pedal 731-8918 onto the 
right side of the axle.

10. 

Secure the right pedal to the axle 
using the provided e-clip 140-
3773. Ensure that the clip is fully 
seated inside the groove located 
on the axle 731-8917.

11. 

Repeat for left pedal.

12. 

Check to ensure the pedals are 
centered through the seat frame 
and properly secured to the axle. 
This will allow the pedals to be 
evenly spaced and can spin freely 
without binding.

13. 

Tighten the set screws 110-4305 
located on the seat bracket.

110-4305

731-8918

731-8917

140-3773

Fig. 15

Summary of Contents for 9NP-B7524 Series

Page 1: ...OWNER S MANUAL CORE HEALTH FITNESS STRETCH BENCH...

Page 2: ...E OF CONTENTS IMPORTANT SAFETY INSTRUCTIONS 2 IMPORTANT LABEL LOCATIONS 4 PRODUCT SPECIFICATIONS 6 PART IDENTIFICATION 7 ASSEMBLY 8 OPERATION 15 MAINTENANCE 16 TOOLS 16 MAINTENANCE SCHEDULE 18 SUPPORT...

Page 3: ...ny required local codes or regulations www access board gov ada 2 This equipment is designed for use in a commercial gymnasium or health club To ensure the proper use of the equipment in a safe manner...

Page 4: ...oper exercise clothing and athletic shoes during a workout Avoid wearing loose clothing Tie back long hair and keep towels away from the moving parts Face forward at all times and never attempt to tur...

Page 5: ...g process It is critical that owners maintain the integrity and placement of these stickers If you find any stickers missing or damaged the replacement numbers are shown on the support site and follow...

Page 6: ...11 STICKER NAUTILUS DECO 45MMX191MM 050 5771 STICKER WARNING Nautilus Stretch Bench 050 5772 STICKER WARNING Nautilus Stretch Bench 050 5767 XXX STICKER DIRECTIONS FOR STRETCH BENCH Notice images are...

Page 7: ...Page 6 Fig 3 PRODUCT SPECIFICATIONS SKU 9NP B7524 XXXXX Desc Stretch Bench Unit Weight Width Length Height Max User Weight 60 lbs 27 kg 28 in 71 cm 52 in 132 cm 36 in 91 cm 250 lbs 1130 kg...

Page 8: ...Page 7 H A D F B C G E Fig 4 Stretch Bench Features PART IDENTIFICATION Part Part Part A Instructional Placard D Knee Pad G Rear Stabilizers B Handlebar E Foot Rest H Wrist Straps C Seat F Frame...

Page 9: ...ean all threads and holes apply no more than 3 4 drops per bolt Thru Holes Blind Holes PACKAGING REMOVAL Unit is heavy and requires two people for assembly Carefully remove all packaging materials tha...

Page 10: ...OW 731 0355 140 3773 EXTERNAL RETAINING RING E STYLE 11 15mm SHAFT 98317A233 WASHER M8 LOCKING SS 730 1179 730 0910 WASHER PLAIN M8 SS SCREW M8 X 1 25 30MM SHC HK CS 731 0421 NUT M8 NYLON PATCH SS 740...

Page 11: ...at washers and two 2 pieces each of the M8 x 130mm socket head cap screw and M8 nylock nut DO NOT FULLY TIGHTEN 731 8914 731 0355 110 4306 740 4068 731 8916 Fig 5 2 Finish securing the seat bracket to...

Page 12: ...Page 11 3 Assemble the wrist straps Follow the sequence shown in Fig 7 thru Fig 11 to properly wrap the handles Fig 7 Fig 8 Fig 9 Fig 10 Fig 11...

Page 13: ...en secure using two 2 pieces each of the M8 flat washer M8 split lock washer and M8 x 30mm socket head cap screw DO NOT FULLY TIGHTEN 731 0421 730 1179 730 0910 731 8953 Fig 12 6 Ensure that the handl...

Page 14: ...ntered 731 8901 731 8926 XX 731 5330 730 1179 730 0910 731 8917 Fig 14 9 Slide a pedal 731 8918 onto the right side of the axle 10 Secure the right pedal to the axle using the provided e clip 140 3773...

Page 15: ...used install it after this step Shim any mounting surface that does not rest thoroughly on the floor using flat washers DO NOT force the foot to contact the ground with anchors Fasteners must have a...

Page 16: ...Page 15 Fig 17 OPERATION...

Page 17: ...ency For general cleaning A solution of 10 mild soap with warm water applied with a soft damp cloth OR Formula 409 applied to a cloth then wiped onto the upholstery Note do not use cleaners that conta...

Page 18: ...ent to the long term care of your product Fasteners hardware and attachments should be checked monthly for looseness Tighten as required using appropriate tools Handgrips should be checked for wear or...

Page 19: ...ity of this machine can only be maintained when the equipment is regularly examined for damage and wear and repaired It is the sole responsibility of the owner of this equipment to ensure that regular...

Page 20: ...ts Orders or any Customer Service needs please contact us by phone email or through our 24 hour support site PHONE EMAIL SUPPORT AVAILABLE MONDAY FRIDAY 6AM 5PM PST 4400 NE 77th Avenue Suite 250 Vanco...

Page 21: ...ed Star Trac the Star Trac logo and StairMaster are registered trademarks of Core Health Fitness LLC Schwinn and Nautilus are registered trademarks of Nautilus Inc used under license to Core Health Fi...

Reviews: