Toddler Climber
Installation Instructions
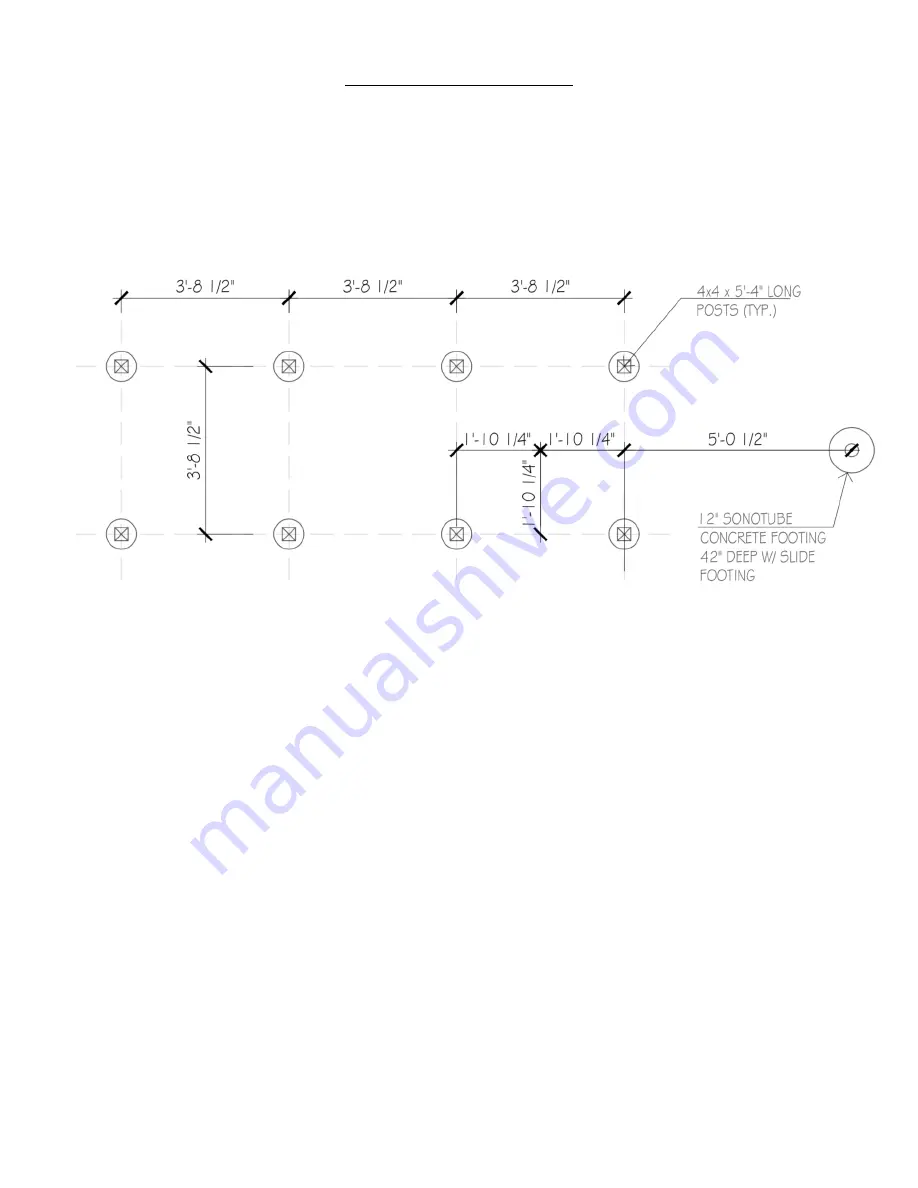
4. Now you’ll mark and dig the footings. Move toddler climber deck/post assembly to desired location (It is
recommended to cross brace the posts roughly 5ft up from the bottom). Position the assembly so the posts
are close to the location you want and mark the location of the post bottoms, referencing the foundation plan
below.
5. Move the deck/post assembly away from marked locations to give you room to dig post holes, using an
auger or a post hole shovel/digger.
6. Set the eight post hole diameters and one slide foot hole to 1’-0,” and hole depths to approximately
4’-0” (depending on region). The bottom of hole should “flare” out a little to create a bell shape to prevent
frost heaving the post where applicable. Check local codes for the frost line in your area.
7. Using the hand tamp, compact any loose material at the bottom of the holes.
8. Fill the bottom 6” of holes with drainage stone (for the deck post holes only, NOT the slide foot. We’ll
concrete the slide foot later). Insert sonotubes into holes and fill with fast setting concrete mix adding water
per instructions on bag. Using a laser level, make sure all footings are at the same height. Let concrete
cure for 24 hours.
9. Place toddler climber deck/post assembly onto footings. Using a bubble level, check the level of the
toddler climber horizontally by placing the level across the deck horizontally from front to back, and left to
right, in three different evenly spaced spots. Make any adjustments needed.
10. Next, plumb the toddler climber posts in both directions by placing the level on two adjacent sides of each
post. Plumb one post first, then plumb the second, and so on.
11. Secure the posts to the footings using Simpson Strong-Tie galvanized retrofit post base, or similar. Attach
the strong-ties to the posts, then predrill the holes to secure the strong-tie to the footing using a masonry
bit, then attach with redhead anchor bolts or similiar.
Page of
3
6


