background image

REAKTOR SPARK – 18

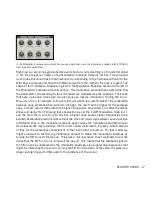
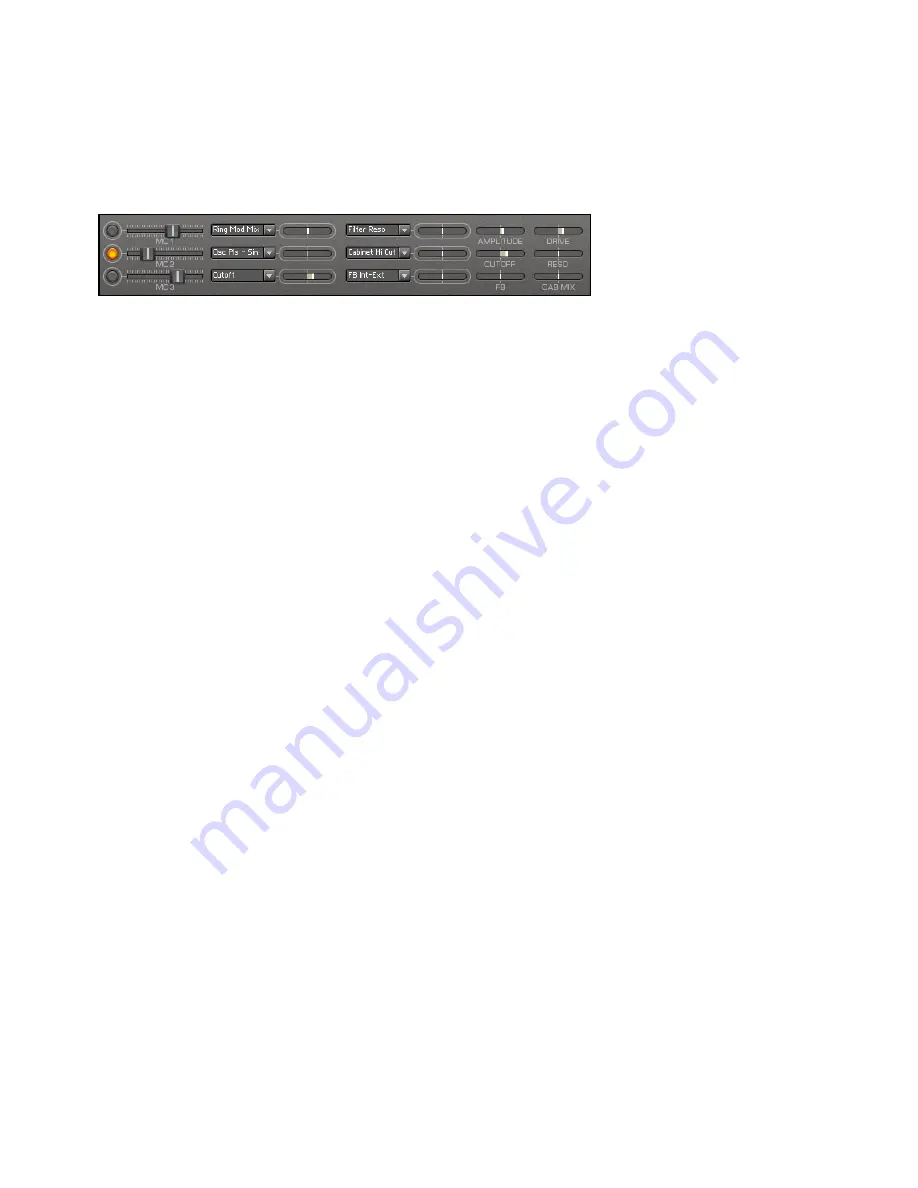
The LFO modulates the 

Mc2 F

aDer

 which is assigned to change the 

S

tatic

 F

ilter

 c

utoFF

 p

araMeter

.

We remember that we liked to have a rippling effect as part of our synth lead, and until now 
we have only been working on the core substance of the sound. How could we add a periodic 
rippling into the mix? The key lies in the word period, for that is exactly what we started out 
with in this tutorial, looking at periodic movements of the 

D

elay

 t

iMe

 K

nob

, controlled by 

the


M

acro

 c

ontroller

 3

, which in turn was controlled by the LFO. 

In order to add a rippling effect, we will use the 

M

acro

 c

ontroller

 2

. Activate the LFO control 

of 

Mc2

 by clicking the button left of the 

Mc2 F

aDer

 and turn the 

lFo a

Mount

 K

nob

 to 0.5 to 

have a substantial modulation of MC2 by the LFO. You should be able to see the 

Mc2 F

aDer


move as it is modulated by the LFO. Now we will set the destination parameter that should 
be controlled by the LFO, hence by 

Mc2

. Now go to the 

c

utoFF

 S

liDer

 that is in the same 

row as

 Mc2 

and


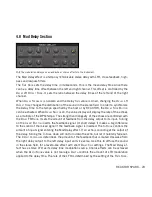
on the very right of the screen. Move it about halfway to the right, as seen 

in the figure, to determine the amount of modulation that the 

F

ilter

 c

utoFF

 p

araMeter

 should 

receive from

 Mc2

. Moving the slider to the left of its mid-point will cause negative modula-

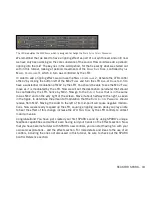
tions. Now we are ready to speed up the LFO, causing a rippling sound: while you play a note 
to hear the effect of this change, increase the

 lFo r

ate

 K

nob

 by the LFO controls to almost 

maximum value. 
Congratulations! You have just created your first SPARK sound by using SPARK’s unique 
feedback capabilities and without even having laid your hands on the Effects section. Now 
that you have become familiar with SPARK’s new controls, you can start having fun with your 
own sonic explorations – and the effects section. For more details and ideas to the use of all 
controls, including the ones not discussed in this tutorial, be sure to check out the SPARK 
Control Reference section.

Summary of Contents for Reaktor Spark

Page 1: ...MANUAL...

Page 2: ...cation may be copied reproduced or otherwise transmitted or recorded for any purpose without prior written permission by Native Instruments GmbH hereinafter referred to as Native Instruments All produ...

Page 3: ...rlin Germany info native instruments de www native instruments de USA Native Instruments North America Inc 5631 Hollywood Boulevard Los Angeles CA 90028 USA sales native instruments com www native ins...

Page 4: ...20 4 2 Ring Mod Filter Section 22 4 3 Shaper Section 24 4 4 Special Section 25 4 5 Mixer Section 26 4 6 Cabinet Section 27 4 7 8 Pole Filter Section 28 4 8 Mod Delay Section 29 4 9 Reverb Section 30 4...

Page 5: ...om percussive keyboards to floating soundscapes It is a diverse collection of dynamic and expressive sounds based on the innovative SPARK ensemble saucy synth leads vibrant percussive sounds and quasi...

Page 6: ...ept behind SPARK is to allow dramatic real time influence on the sound source Like a natural instrument it needs to be played expressively in order to reach its full potential SPARK s secret lies in t...

Page 7: ...ithout knowledge of the signal flow According to the figure on the following page we will go through the main aspects of SPARK s signal flow The names of the different parts of the signal flow that di...

Page 8: ...Ringmod Filters section Again the modulating signal again is the feedback signal Amplitude modulation reduces the presence of the carrier signal harmonics but adds the harmonics of the modulation sign...

Page 9: ...rocessed by the Effects section The effects are always running and the degree that the output of the Mixer section is processed by a certain effect unit is controlled by the unit s Mix Knob The feedba...

Page 10: ...controller use the orange Value Display located above the Cabinet saturator unit If you just want to check what value a controller has click on it and press the up or down arrow key on your keyboard...

Page 11: ...ow the chorus type effect is created and how we can change its timing As we play the note we notice that the movement of the horizontal fader labelled MC3 on the top part of the screen coincides with...

Page 12: ...to the right of the MC3 Fader in the menu the item Delay Time has been chosen Also the slider on the right of the menu determines the extent of the change of the Delay Time Parameter with a movement o...

Page 13: ...ne FM to around 0 8 Now we turn the Sine Knob down again and turn up the Pulse Knob A characteristic parameter for the Pulse waveform is the Pulse Width As we turn the PW Knob to its vertical position...

Page 14: ...semitones clicking and draggin behind the decimal point transposes the pitch in cents So we can also detune the Sine oscillator by dragging the digits behind the decimal point in the Pitch Value Edit...

Page 15: ...rking towards To smooth the sound turn the Amplitude Modulation Parameter to 0 3 Now play around with the Ring Modulation Mix Notice that with the feed back activated the sound gains complexity and su...

Page 16: ...n the sound We can also tap into the filter outputs directly and selectively using the Mixer section The knobs labelled LP 2 LP 4 BP 2 BP 4 HP 2 and HP 4 determine the amount of signal from the 2 pole...

Page 17: ...right the cutoff will be higher for the envelope peak In most natural instruments the higher frequencies are excited a bit after the attack phase and decay first Following that observation we set the...

Page 18: ...he destination parameter that should be controlled by the LFO hence by MC2 Now go to the Cutoff Slider that is in the same row as MC2 and on the very right of the screen Move it about halfway to the r...

Page 19: ...olyphonic voices and the right number shows the number of unison voices of the instrument When the number of available voices is exceeded by polyphonic playing that is the number of keys that are simu...

Page 20: ...of the Pulse oscillator With the Knob set in its vertical position a symmetrical Pulse signal with only odd harmonics is generated Turning the Static PW Knob either to the right or to the left the Pu...

Page 21: ...s the reproducabilty of sounds when the same notes are successively played With the Key Sync Button turned on the Sine and Pulse Oscillators restart at zero with each note on event received from the M...

Page 22: ...Modulator This parameter usually has a subtle effect With the AM Knob you control the amount of amplitude modulation applied to the mixed outputs of the Oscillators section and the feedback signal Th...

Page 23: ...type for both filters The Filter Slope Knob controls how much the frequencies outside of the filter s pass interval are damped before the signal is passed to the Shaper section Turn the Filter Slope...

Page 24: ...he Sat Sine Knob lets you crossfade between two characteristic sounds resulting from two wave shaping curves a parabolic saturation curve and a Sine curve which folds back the waveform of larger signa...

Page 25: ...uencies entering the Frequency Shifter unit to be changed by that amount This usually results in an inharmonic or phasing sound Depending on the setting of the Frequency Shift Amount Knob the frequenc...

Page 26: ...obs control the amounts of the various filter outputs coming from the Ringmod Filter section LP 2 and LP 4 determine how much of the 12 dB octave and 24 dB octave lowpass filter outputs respectively g...

Page 27: ...ends on the setting of the Tilt Knob The Lo Cut Freq Knob is useful to avoid a mess with the bass frequencies It determines the cutoff fre quency below which the frequencies of the input signal are si...

Page 28: ...erence cutoff frequency This offset is controlled by the Gap Knob Since the two filters are running in parallel and their output signals are mixed the result of a positive Gap is a band rejection With...

Page 29: ...iple of the BPM tempo The strength and longevity of the echoes are controlled with the Delay FB Knob It sets the amount of feedback from the delay output to its input Turning on the Invert Button inve...

Page 30: ...The Size Controller of the Reverb effect controls both main characteristics of the reverb effect the room size and the reverb decay time Higher settings of the Size Knob will make the reverb sound lon...

Page 31: ...tain level is the final amplitude level of the oscillator envelope that stays constant as long as the key remains pressed You can change it by using the Sustain Knob The time that the amplitude level...

Page 32: ...depend on the note that is being played Set the Level Scale Fader to positive values for higher levels at higher notes When set to 1 0 the amplification is 12 dB per octave For negative values of the...

Page 33: ...ction This envelope and its controls work in the same way as the oscillator amplitude envelope except that instead of modulating the oscillator amplitudes the modulation envelope modulates the 8 param...

Page 34: ...The FB Filt Knob is the most influential parameter of this section It has great control over the self oscillation of the synthesizer When FB Filt is set to zero self oscillations would continue indep...

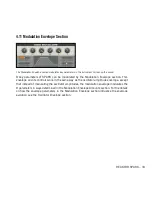
Page 35: ...0 means that no modulation takes place and a setting of 1 0 means that the HP 2 and Del FS signals are multiplied by the modulation envelope signal 4 13 Modulation Macro Controller Section The Modula...

Page 36: ...osen as the modulation destination for MC2 from the drop down menus The preset modulation destinations of the Modulation Controller 3 are the amount of the feedback signal at the input of the Ringmod...

Page 37: ...se of 1 corre sponds to the zero crossing of the waveform s falling ramp Similarly 0 5 corresponds to the lower peak of the LFO waveform 0 to the zero crossing of the rising ramp 0 5 to the upper peak...

Page 38: ...nd SFX Dietrich Pank Ema Jolly Eoin Rossney Gustavo Bravetti J rg H ttner Jeremiah Savage Martin Backes Matthias Fuchs Visophon Stephan Schmitt Thomas Binek Tasmodia Thomas Koot Tobias Menguser SPARK...

Reviews: