background image

HEAVY-DUTY DUST COLLECTOR

INSTRUCTION MANUAL

Caution: Read Manual Before Operating Machine

043014

Rev A

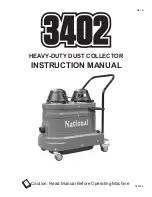
Summary of Contents for 3402

Page 1: ...HEAVY DUTY DUST COLLECTOR INSTRUCTION MANUAL Caution Read Manual Before Operating Machine 043014 Rev A...

Page 2: ......

Page 3: ...Maintenance 11 14 Standard Filter Inspection 11 Standard Filter Removal 11 Standard Filter Installation 12 HEPA Filter Replacement Procedure 13 Motor Brushes Inspection 14 Troubleshooting Guide 15 Par...

Page 4: ...high cfm for fast pick up of airbone particles 2 Inlet 2 inlet attaches 25 crushproof vacuum hose Heavy Duty Locking Casters allows maneuverability on any sur face with self locking casters Steel Han...

Page 5: ...binding of moving parts improper mounting broken parts and any other conditions that may affect operation If abnormal noise or vibration occurs turn the tool off immediately and have the problem corr...

Page 6: ...RY AILMENTS USE APPROVED NIOSH OR OSHA RESPIRATOR SAFETY GLASSES OR FACE SHIELDS GLOVES AND PROTECTIVE CLOTHING PROVIDE ADEQUATE VENTILATION TO ELIMINATE DUST OR TO MAINTAIN DUST LEVEL BELOW THE THRES...

Page 7: ...to an electrically live terminal Your tool must be plugged into an appropriate outlet properly installed and grounded in accordance with all codes and ordinances The plug and outlet should look like t...

Page 8: ...nto outlet Do not remove bend or modify any metal prongs or pins of cord Do not use excessive force to make connections Do not connect a three prong plug to a two hole cord Avoid overheating Uncoil co...

Page 9: ...the dust container is empty and that no one else is standing under the lifted machine Risk of per sonal injury and material damage CAUTION MACHINE IS DESIGNED FOR INTERMITTENT USE I E NOT MORE THEN 2...

Page 10: ...rce as indicated on the machine s serial tag 3 Start the machine by pushing the power switches on the motors to the ON posi tion one at a time See Figure C 4 Turn the machine off by pushing the power...

Page 11: ...ground wire from the subsequent assembly via the push on terminal 6 Disconnect the three power cord wires from the terminal block on the underside of the motor deck Figure G 7 Remove the motor deck 8...

Page 12: ...er housing spacer assembly via push on terminal 6 Seat the HEPA adapter assembly and housing spacer if so equipped on the pre ceding housing component oriented as removed make sure to connect the comp...

Page 13: ...ring flat gasket material on the HEPAfilter frame if not already done so to cushion the HEPA filter brackets 13 Replace the HEPA filter brackets and ring to tab terminal then thread the locking nuts o...

Page 14: ...p via the built in hooks on both sides of each motor brush TIP Dislodge one side of a cap first then the other 8 Remove the motor brush retainers via the 2 phillips screws per brush 9 Remove each of t...

Page 15: ...to place the unit under vacuum pressure then inspect for air leaks Material in exaust or on top side of filter Poor filter seal or torn filter Follow Filter Inspection Procedure See Page 11 Unusual or...

Page 16: ...asket for Motor Head 1 9 34817A M6 Blind PEM 4 10 20020 Hold Down Bracket for WS Motor 2 11 26603 Knob for Motor Hold Down M6 2 12 27003 8 x 2 Phil Pan Head Zinc 6 13 8021 Protection Scree Motor Head...

Page 17: ...rene Sponge Gasket 2 7 27001 Motor Head Aluminum 2 8 27004 Gasket for Motor Head 2 9 34817A M6 Blind PEM 6 10 90223WNS Motor Deck Red WNS 2 Motor 1 11 20020 Hold Down Bracket For WS Motor 4 12 26603 K...

Page 18: ...nationalequipment com 18 1 27017 Switch Toggle WS 1000 1200 1 2 25211 Male IEC Plug 1 3 34905A Ground Wire From Plug to Motor 2 4 2005531 Power Cord 12 3 SJO w Molded 110V Plug 1 5 25209 Female IEC Pl...

Page 19: ...otor 4 4 34993 Ground Cable 16 Gauge Green 2 5 34960 PG 09 Cable Grip 2 6 25048 8 32x3 4 Phillips Flat Head 2 7 25049 8 32 Hex Nut 2 8 34961 Strain Relief 90 Deg 1 2 NPT 1 9 2005531 Power Cable 1 10 2...

Page 20: ...Parts List and Diagrams Fax 763 535 8255 info nationalequipment com 20...

Page 21: ...Filter 1 25 34998 Ground Connection For Bolt 2 26 34876 M6 Lock Nut Zinc 1 27 34871 Plastic Plug 4 5 13 4 28 34815 M6 x 30 Flat Socket Cap Screw 4 PART DESCRIPTION QTY PART DESCRIPTION QTY 1 34823 Ho...

Page 22: ...Foot WS DS1 1 5 32903 M6x1 0x20 Hex Cap Screw Zinc 4 6 34947 HEPA Adapter Plate DS1 1 7 20039 M6 Split Lock Washer 4 8 34949 HEPA Hold Down Bracket WS 4 9 32835 Housing Spacer Large Black 1 10 34820 H...

Page 23: ...8 25037 M8 Washer HEPA Machines have 5 6 9 25054 M8 x 25 Hex Bolt 4 10 25085 Dual Casters Fixed 75MM w Stud 2 11 20070 Gasket Dust Pan Lower Housing 20x15MM 1 12 34813 Dust Pan 35LTR Red 1 13 25038 M8...

Page 24: ...M6 Flat Washer 4 6 20027 Flat Steel Pivot 2 7 34853 Dust Pan Lever Bearing 2 8 34852 Dust Pan Tension Lever 2 9 34922 Pin D 6X 19MM 2 10 20044 M8 Hex Nut 8 4 11 34882 M8 Flat Washer 6 12 25053 M8 x 3...

Page 25: ...RIPTION QTY 1 30007 Inlet 70MM Aluminum 1 2 34821 Gasket 70MM Inlet 1 3 30008 Deflector 70MM Aluminum 1 4 32866 M5 8x30 Socket Cap Allen Head 3 5 32863 M5 8x20 Socket Cap Screw 1 6 32867 M5 EXT Tooth...

Page 26: ......

Page 27: ...nd shall be the sole and exclusive remedy available to the purchaser Correction of defects in the manner and for the period of time described herein shall constitute complete fulfillment of all liabil...

Page 28: ...LOORING EQUIPMENT 9250 Xylon Avenue N Minneapolis MN 55445 U S A Toll free 800 245 0267 Phone 763 315 5300 Fax 800 648 7124 Fax 763 535 8255 Web Site www nationalequipment com E Mail info nationalequi...

Reviews: