


NI WSN-3295 Outdoor IP Enclosure Installation Guide
4
ni.com
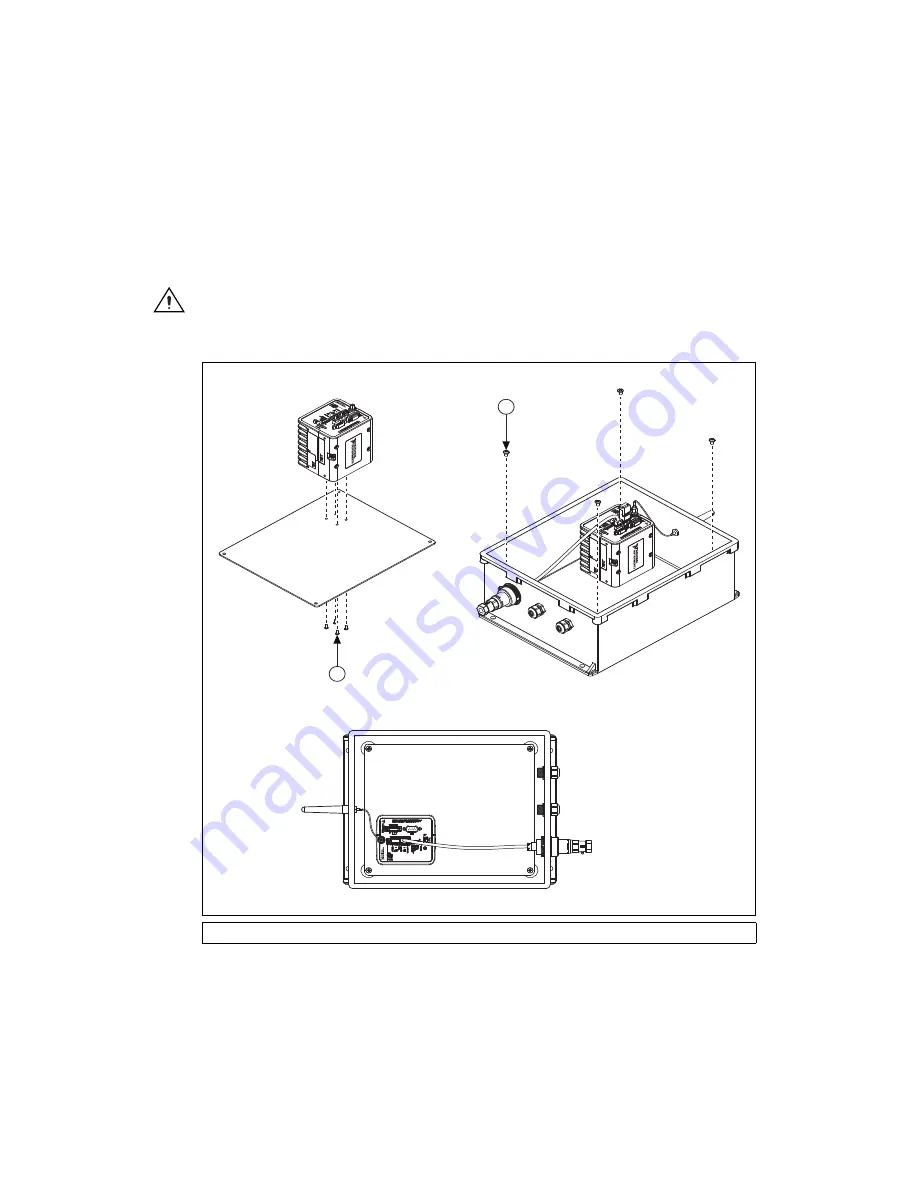
Step 2: Install the NI 9792 WSN Real-Time Gateway
Complete the following steps to install the NI 9792 WSN Real-Time Gateway:
1.
Open the quick release latches on the NI WSN-3295 cover.
2.
The NI WSN-3295 ships with an installed internal mounting plate. Remove the plate by
unscrewing the 10–32 screws.
3.
Mount the NI 9792 WSN Real-Time Gateway to the internal mounting plate using the included
4–40 screws.
Caution
Using screws longer than 4–40 can damage the NI 9792 WSN Real-Time Gateway.
4.
Reinstall the internal mounting plate with the attached NI 9792 WSN Real-Time Gateway into the
enclosure using the 10–32 screws as shown in Figure 3.
Figure 3.
Installing the NI 9792 Real-Time Gateway
1
4–40 Screws
2
10–32 Screws
1
2


