SCXI-1317 Terminal Block Installation Guide
6
ni.com
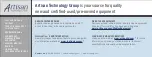
Figure 4.
SCXI-1317 Circuit Parts Location Diagram
6.
Tighten the terminal screws to a torque of 0.57 to 0.79 N
⋅
m
(5 to 7 lb - in.).
7.
Reinstall the strain-relief bar and tighten the strain-relief screws.
8.
Reinstall the top cover and tighten the top cover screws.
9.
Attach the SCXI-1317 to the SCXI-1521/B using the thumbscrews.
10. Refer to the
SCXI Quick Start Guide
to power on the SCXI chassis and
configure the system in software.
Specifications
All specifications are typical at 25 °C unless otherwise specified.
Mechanical
Dimensions .............................................15.0 cm by 7.9 cm by 3.1 cm
(5.9 in. by 3.1 in. by 1.2 in.)
Maximum Working Voltage
Maximum working voltage refers to the signal voltage plus the
common-mode voltage.
Channel-to-earth .....................................42 V
rms
, Installation Category I
Channel-to-channel.................................42 V
rms
, Installation Category I
Note
Refer to the
SCXI-1521/B User Manual
for valid input specifications.
R1
RPJ
R2
R3
UJ
J2
J3
J4
J5
SCXI-1317
S/N
J6
J7
J8
J9
J1
ASSY191141A-01
QUARTER–BRIDGE STRAIN
CH0
EX+
QTR
AI
GND
EX+
EX+
AI
QTR
AI
GND
QTR
EX+
QTR
AI
GND
EX+
EX+
AI
QTR
AI
GND
QTR
EX+
QTR
AI
GND
EX+
EX+
AI
QTR
AI
GND
QTR
EX+
QTR
AI
GND
EX+
EX+
AI
QTR
AI
GND
QTR
EX+
QTR
AI
GND
EX+
EX+
AI
QTR
AI
GND
QTR
EX+
QTR
AI
GND
EX+
EX+
AI
QTR
AI
GND
QTR
EX+
QTR
AI
GND
EX+
EX+
AI
QTR
AI
GND
QTR
EX+
QTR
AI
GND
EX+
EX+
AI
QTR
AI
GND
QTR
EX+
QTR
AI
GND
EX+
EX+
AI
QTR
AI
GND
QTR
CH1
CH2
CH3
CH4
CH5
CH6
CH7
CH8
CH9
CH10
CH11
CH12
CH13
CH14
CH15
CH16
CH17
CH18
CH19
CH20
CH21
CH22
CH23