


©
National Instruments Corporation
3
NI PXI-8250 Installation Guide
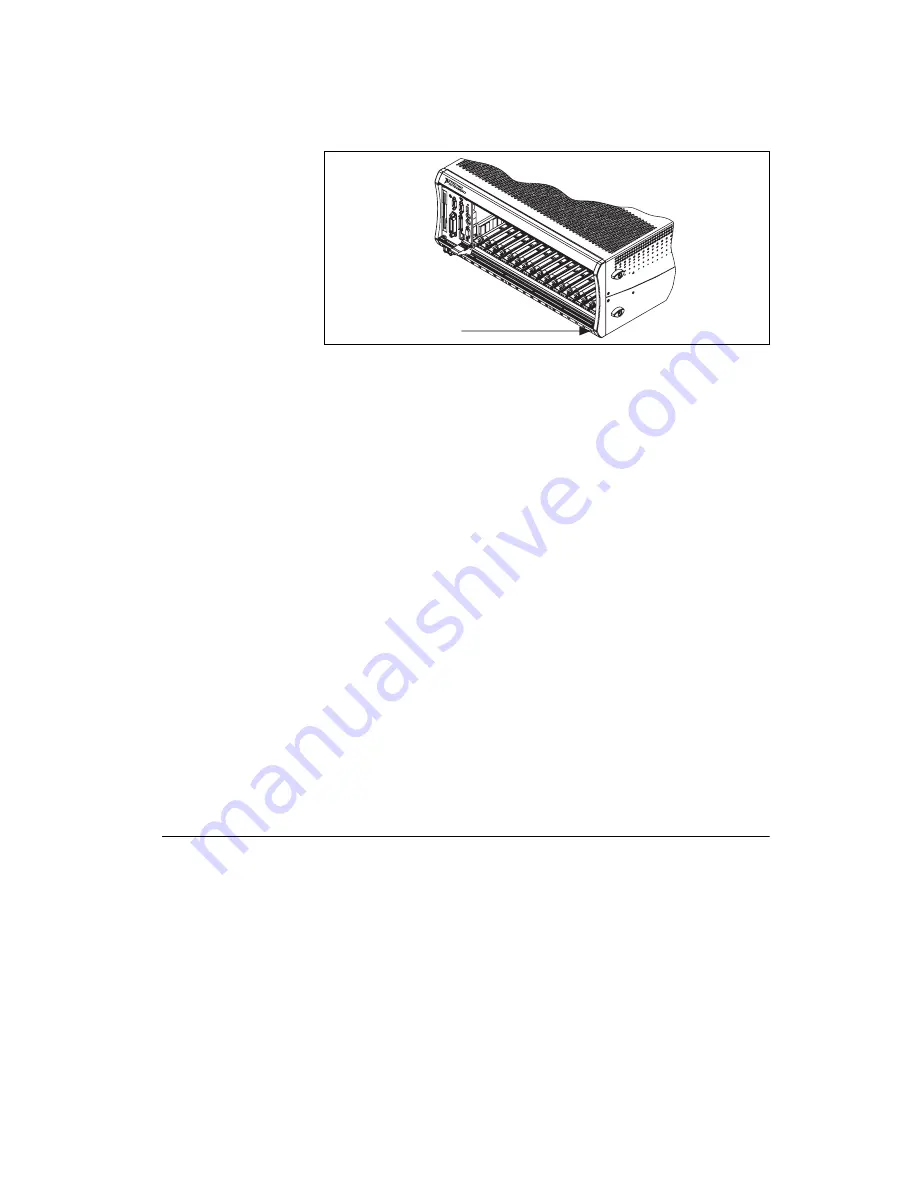
Figure 2.
Location of NI PXI-1045 Slot for NI PXI-8250 Support
3.
Touch a metal part on the chassis to discharge any static electricity that
might be on your clothes or body. Static electricity can damage the
hardware.
4.
Insert the NI PXI-8250 module into the rightmost slot of a
NI PXI-1042/1042Q or NI PXI-1045. The correct position is slot 8 for
the NI PXI-1042/1042Q and slot 18 for the NI PXI-1045, as shown in
Figure 1 and Figure 2, respectively. Use the injector/ejector handle to
fully inject the device into place.
5.
Screw the front panel of the NI PXI-8250 to the front panel mounting
rails of the chassis.
6.
Install a system controller or verify that a system controller has been
installed in the controller slot.
7.
Plug in and power on the chassis.
8.
Plug in and power on the host computer if using a remote controller in
the chassis.
9.
Allow the operating system to properly detect and identify the
NI PXI-8250 module.
10. Launch Windows Device Manager and refresh the view.
The NI PXI-8250 module should be visible in Windows Device Manager.
NI PXI-8250 Configuration
The NI PXI-8250 module is fully compatible with the industry standard
PXI Specification, Revision 2.2
, and the
PCI Local Bus Specification,
Revision 3.0
, respectively. This compatibility allows the PXI system to
automatically perform all bus-related configuration and requires no user
interaction. Since the NI PXI-8250 does not require configuration in MAX
it does not show up in MAX.
Slot 18
NI PXI-
1045


