VXI-MXI-Express Series Installation Guide
4
ni.com
Cautions
Having more than one device configured as system controller can damage the
VXI system. For VXI systems that include VME devices, ensure that the VME devices are
not configured in the upper 16 KB (starting from 0xC000) of the A16 address space. This
region is reserved for VXI device configuration registers, which are used for initializing,
configuring, and interacting with VXI devices. The VXI-MXI-Express Series controller
also uses this region for this purpose.
Also ensure that no other VXI devices in your system are manually configured for the same
logical address as your controller. The default shipping configuration is that the card
auto-detects if it is in Slot 0.
To install the VXI-MXI-Express Series controller in Slot 0 of your VXI
chassis, complete the following steps.
1.
Power off the chassis.
2.
Verify that the backplane connector is intact and that there are no bent
or missing pins on the controller.
3.
Insert the VXI-MXI-Express Series controller into the chassis in
Slot 0, as shown in Figure 2.
4.
Firmly press the VXI-MXI-Express Series controller into the mating
connectors to ensure the module is fully inserted and seated in the
connector.
5.
Tighten the two ejector handle screws.
6.
Power on the chassis.
The VXI system controllers operate certain VXI lines as required for
VXI systems. Verify that any other VXI devices with system controller
capability that are in the same chassis are not configured as system
controller.
Installing Your NI PCIe-8361/NI PCIe-8362 x1 PCI Express to
MXI-Express Interface Card
To install your NI PCIe-8361/NI PCIe-8362 x1 PCI Express to
MXI-Express module, complete the following steps.
1.
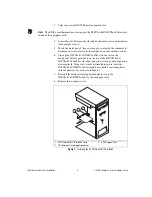
Power off your computer, but leave it plugged in while installing the
NI PCIe-8361/NI PCIe-8362. The power cord grounds the chassis and
protects it from electrical damage while you install the card.
Caution
To protect both yourself and the computer from electrical hazards, your computer
should remain off until you finish installing the NI PCIe-8361/NI PCIe-8362.
2.
Open the host computer or remove the top cover to gain access to the
host computer PCIe expansion slots.


