National Geographic 327NC, User Manual
The National Geographic 327NC is an extraordinary camera designed for capturing the wonders of the natural world. Capture breathtaking landscapes and stunning wildlife shots with ease. User manual available for free download at manualshive.com, ensuring quick access to instructions and maximizing your photography capabilities.
Share
Download


Reviews:
No comments
Related manuals for 327NC

707
Brand: Omega Engineering Pages: 3

AT2103
Brand: AccuMed Pages: 14
6700
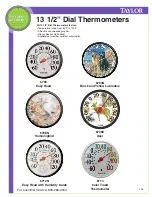
Brand: Taylor Pages: 3
1730
Brand: Taylor Pages: 7
115
Brand: BabyOno Pages: 124
740
Brand: Keithley Pages: 56
DT200
Brand: UEi Pages: 6

517
Brand: Salter Pages: 12

111
Brand: Ecco Pacific Pages: 4

TM-201A
Brand: jablotron Pages: 6

9306
Brand: Taylor Pages: 6
FP Series
Brand: Labom Pages: 4
CT-200
Brand: Daga Pages: 38

SC 25
Brand: Vega Technologies Pages: 2

AT2102
Brand: AccuMed Pages: 13

WF-2000
Brand: B.Well Pages: 32

8888
Brand: Zenith Pages: 10

Elle TENS
Brand: Babycare TENS Pages: 2


