National Flooring Equipent 5700 Service Manual Download Page 6

6

Safety

6

CAUTION:

 THE RETURN CAPACITY WHEN CHARGING THE BATTERY IS NOT 1-TO-1. ENSURE THAT BATTERY IS ALLOWED TO 

CHARGE FOR A GREATER PERIOD OF TIME THAN IT WAS USED (IF NOT COMPLETING A FULL CHARGE).  FOR MAXIUMUM BAT-

TERY LIFE, FULLY RECHARGE BATTERY (LED WILL APPEAR SOLID GREEN) AT LEAST TWICE PER WEEK. FAILURE TO DO SO MAY 

RESULT IN SHORTER RUNTIMES AND PREMATURE BATTERY FAILURE. 

WARNING: 

ONLY USE BATTERY/CHARGER CONFIGURATIONS SPECIFICALLY APPROVED BY NFE. USE OF A DIFFERENT OR 

INCORRECT CONFIGURATION HAS A HIGH RISK OF LEADING TO FIRE, PREMATURE BATTERY FAILURE, DAMAGE TO MACHINE, 

AND/OR BODILY INJURY.

WARNING: 

GRINDING/CUTTING/DRILLING OF MASONRY, CONCRETE, METAL AND OTHER MATERIALS CAN GENERATE DUST, 

MISTS AND FUMES CONTAINING CHEMICALS KNOWN TO CAUSE SERIOUS FATAL INJURY OR ILLNESS, SUCH AS RESPIRATORY 

DISEASE, CANCER, BIRTH DEFECTS OR OTHER REPRODUCTIVE HARM.  IF YOU ARE UNFAMILIAR WITH THE RISKS ASSOCIATED 

WITH THE PARTICULAR MATERIAL BEING CUT, REVIEW THE MATERIAL SAFETY DATA SHEET AND/OR CONSULT YOU EMPLOYER, 

THE MATERIAL MANUFACTURER/SUPPLIER, GOVERNMENTAL AGENCIES SUCH AS OSHA AND NIOSH AND OTHER AUTHORI-

TIES ON HAZARDOUS MATERIALS.  CALIFORNIA AND SOME OTHER AUTHORITIES, FOR INSTANCE, HAVE PUBLISHED LISTS OF 

SUBSTANCES KNOWN TO CAUSE CANCER, REPRODUCTIVE TOXICITY, OR OTHER HARMFUL EFFECTS.  CONTROL DUST, MIST 

AND FUMES AT THE SOURCE WHERE POSSIBLE.  IN THIS REGARD USE GOOD WORK PRACTICES AND FOLLOW THE RECOM-

MENDATIONS OF THE MANUFACTURER/SUPPLIER, OSHA/NIOSH, AND OCCUPATIONAL AND TRADE ASSOCIATIONS.  WHEN THE 

HAZARDS FROM INHALATION OF DUST, MISTS AND FUMES CANNOT BE ELIMINATED, THE OPERATOR AND ANY BYSTANDERS 

SHOULD ALWAYS WEAR A RESPIRATOR APPROVED BY OSHA/MSHA FOR THE MATERIAL BEING CUT.

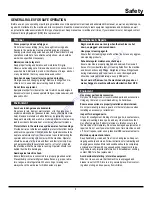
Charger Operation

Ensure proper use of charger.

•  Once connected and plugged into AC power, the LED will in-

dicate whether or not it is charging. Refer to manufacturer’s 

charger manual. 

•  Only use charger on branch circuits protected by a circuit 

breaker or fuse that can carry the power of the charger.

•  Do not use charger if it shows signs of physical stress, or if 

DC output leads or connector feel hot when used. 

•  Do not disconnect DC output clamps or connector from bat-

teries while charger is on. This could cause an explosion.

•  Failure to unplug AC power before moving equipment will 

damage cords, plugs, and receptacles. 

•  Do not over-discharge batteries, this could cause batteries 

to fail. Re-charge as soon as possible after discharge; if they 

are warm, first allow them to cool.

•  Charger is not water proof, only resistant, and cannot with-

stand immersion, continuous exposure, or heavy rain.

•  A drive lockout option will disable the drive mechanism of 

the machine while the charger is plugged in. 

•  There is a built-in Low Voltage Interrupter that continuously 

monitors for low voltage and will sound when voltage falls. At 

44V the alarm will sound; stop immediately and recharge. At 

43.5V the machine will auto-disconnect and shut down; let 

machine sit until batteries recover enough to drive to outlet. 

•  Chargers are equipped with a grounding plug.

Note:

 Leaving the charger plugged in does not harm the battery 

and is preferred to leaving the battery in a state of discharge.

Scraping

Do not drive machine along hills or uneven surfaces.  

The weight of the machine may become distributed differently if on 

an uneven surface. Too much of an angle could make the machine 

unsafe or cause it to tip over. Always keep the front of the machine 

facing downward while traveling up or down ramps or inclines. Do 

not run the machine in unsafe environments. 

Inspect work area for potential hazards prior to operation.
Observe location of electrical supplies and extension cords. 

Do not allow cutting heads to come into contact with any electrical 

supply or extension cord. 

Operator must be seated before starting machine and should 

stay seated until motor has stopped running.  

This machine is equipped with a safety switch under the seat, 

which requires the operator to be seated before the machine can 

be operated. Do not attempt the start-up procedure without first 

being seated on the machine. 

Batteries and Chargers

Use caution; risk of explosive gases. 

Batteries generate explosive gases during normal operation. Do 

not use near fuels, grain, dust, solvents, or other flammables; 

never smoke near the machine, battery, or charger.

Inspect battery and charger regularly.  

Disconnect charger from wall outlet before operating. Machine 

should be off before connecting to a power source. Periodically 

inspect batteries, cables, charger, and all plug connections. Be 

extremely cautious when working with batteries. Do not open or 

tamper with batteries; doing so could cause electrical shock.  

WARNING:

 BE CAUTIOUS WHEN WORKING WITH 

BATTERY. IF ELECTROLYTIC  ACID GETS IN THE EYES, 

IMMEDIATELY FLUSH OUT WITH COLD, FRESH WATER 

FOR AT LEAST 10 MINUTES AND GET MEDICAL HELP.

RIDE-ON SCRAPER SAFETY GUIDELINES

Go 

to 

Discount-Equipment.com 

to 

order 

your 

parts

Summary of Contents for 5700

Page 1: ...Read Manual Before Servicing Machine 402965 Rev E 5700 ALL DAY BATTERY RIDE ON SCRAPER SERVICE MANUAL G o t o D i s c o u n t E q u i p m e n t c o m t o o r d e r y o u r p a r t s...

Page 2: ...ith a quote for the right part that your machine needs We sell worldwide for the brands Genie Terex JLG MultiQuip Mikasa Essick Whiteman Mayco Toro Stone Diamond Products Generac Magnum Airman Haulott...

Page 3: ...ssembly 15 Foot Peg Assembly 15 Spool and Hose Parts Dual Lift 16 Spool and Hose Parts Manual Lift 16 Filter and Tank Parts 16 Suction Assembly 17 Gear Pump Assembly 18 Motor Parts 18 Control Lever Pa...

Page 4: ...0XXXX 110 50 Silver Vein Dual Lift 5700 15XXXX 230 50 Orange Dual Lift 5700ML 13XXXX 230 50 Silver Vein Manual Lift 5700 26XXXX 230 50 Silver Vein Dual Lift 5700 28XXXX 100 50 60 Silver Vein Dual Lift...

Page 5: ...ay cause decreased control Keep hands away from all moving parts and tooling Wear gloves when changing tooling Remove tooling when ma chine is not in use and or lower cutting head to the floor Do not...

Page 6: ...e batteries to fail Re charge as soon as possible after discharge if they are warm first allow them to cool Charger is not water proof only resistant and cannot with stand immersion continuous exposur...

Page 7: ...conditions Leaking pres surized hydraulic fluids may develop a mist or fine spray that can flash or explode upon contact with a source of ignition These explosions can be very severe and could result...

Page 8: ...in tank strainers Replace hydraulic fluid Recommended to be replaced at the same time you replace the batteries on the machine It is recommeneded to perform initial maintenance during the break in pe...

Page 9: ...ver after each job Machine is making rattling noises Loose hardware on machine Inspect and tighten bolts as needed Charger is hot Charger is in use This is normal Fluid is leaking from machine Hose co...

Page 10: ...10 Loosen the pinch bolt from the lower right side of the frame 11 Remove the lock nut from securing bolts at the top of the slide plate 12 Remove the socket head screws at the top of the dual slide f...

Page 11: ...tely 5 Remove four 1 2 wheel motor securing nuts 6 Pull out on wheel motor to remove REMOVE REPLACE FOOT PEG 1 Insert a socket wrench into foot peg and secure bolt head 2 Remove nut 3 Remove bolt and...

Page 12: ...loor 4 Remove five 1 2 lug nuts with an extended arm wrench remove wheel 5 Replace wheel 6 Replace five lug nuts and tighten making sure lug nuts are very tight 7 Raise cylinder to raise machine off o...

Page 13: ...sting on the blocks and the wheel on the side that is blocked up is raised off the ground 4 Remove the cotter pin and loosen the center wheel hub nut 5 To loosen the wheel from the wheel motor shaft y...

Page 14: ...RIGHT ORANGE 5700 15XXXX ONLY 1 401560 SV PANEL SIDE RIGHT SILVER VEIN 5700 10XXXX 11XXXX 13XXXX 17XXXX 18XXXX 20XXXX 21XXXX 23XXXX 26XXXX ONLY 1 18 401561 G PANEL SIDE LEFT GREEN 5700 12XXXX ONLY NOT...

Page 15: ...oodruff Key 1 3 73402 Nut Nylock 1 2 13 4 4 5110 117 Wheel Hub 1 5 73430 Nut NyLock 1 2 20 5 6 5110 405 Wheel Rim and Tire 18 1 7 5110 117 2 Hub Nut 1 8 401433 Pin Cotter 1 8 x 1 75 1 FOOT PEG ASSEMBL...

Page 16: ...OSE CYLINDER 1 8 5110 237 FILTER SCREEN 2 9 5110 234 1 PIPE RELIEF VALVE 1 10 5110 157 PLUG DRAIN FILLER 2 11 70653 FITTING FILTER 2 12 5700 67 PLUG TANK 1 13 70654 FITTING REDUCER 1 14 5700 70 T FITT...

Page 17: ...1 7 70655 PIPE MALE 10 X 3 4 1 8 5700 93 GASKET 1 9 400099 HOSE SUCTION 1 2 X 20 W FITTING 2 10 5110 237 FILTER SCREEN 2 11 73310 SCREW SHC 5 16 18 X 7 8 8 12 73303 WASHER SPLIT LOCK 5 16 8 PART DESCR...

Page 18: ...905 D4 PUMP DOUBLE MARZOCCHI 1 70905 D5 PUMP DOUBLE MARZOCCHI 5700 18XXXX ONLY 1 2 5200 1G GASKET PUMP 1 3 72816 FITTING ELBOW 90 DEGREE 3 8 2 4 6280 118 FITTING SUCTION HOSE TO PUMP 2 5 73263 WASHER...

Page 19: ...5 2 8 73227 Screw Set 3 8 24x1 4 9 73235 Nut Hex Jam 3 8 24 4 10 401796 Bracket Wldt Valve RH 1 11 401832 Valve Metered Dual Spool Low PSI 2 ITEM NO PART NUMBER DESCRIPTION QTY 12 400034 Fitting FF12...

Page 20: ...am 3 8 24 3 10 401796 Bracket Wldt Valve RH 1 11 401832 Valve Metered Dual Spool Low PSI 1 ITEM NO PART NUMBER DESCRIPTION QTY 12 400034 Fitting FF1231 06 08 8 13 73320 Bolt Socket Head Cap 5 16 18x2...

Page 21: ...1 6 5110 250 Cylinder NN16 2 7 6500 31 Pin Lower Middle 1 8 80084 E Clip 1 2 shaft 2 9 402542 Pin Upper Hydraulic Cylinder 1 10 80083 E Clip 1 shaft 4 11 400132 Bolt Hex Head 1 2 13 x 4 Grade 8 1 12...

Page 22: ...de 8 1 8 73402 Nut Nylock 1 2 13 1 9 402576 Pin Cylinder Guard Upper 1 10 402574 Shield Cylinder 1 11 400296 Gasket EPDM Foam 1 12 73536 5 8 Hitch Pin Clip 2 1 2 3 ITEM NO 5700 10XXXX 5700 12XXXX 5700...

Page 23: ...1 11 74508 SCREW PHILLIPS PAN HEAD MACHINE 6 32X1 2 2 PART DESCRIPTION QTY 1 5213 2 BATTERY 8 VOLT 2900 12 2 401674 ROD HOLD DOWN BATTERY 3 3 5700 56 SPACER BATTERY NOT SHOWN 4 4 5700 100 WIRE SET PA...

Page 24: ...ION TUBE 1 3 74425 NUT KEPS LOCK 10 32 2 PART DESCRIPTION QTY INSTRUCTION TUBE ASSEMBLY 1 3 3 2 1 401476 RISER BATTERY TUB FRONT 1 2 401477 RISER BATTERY TUB REAR 1 PART DESCRIPTION QTY BATTERY RISERS...

Page 25: ...600 66 BUMPER HOOD 2 3 73002 WASHER SPLIT LOCK 1 4 2 PART DESCRIPTION QTY PART DESCRIPTION QTY BACKUP BEEPER ASSEMBLY HOOD BUMPER ASSEMBLY 1 5110 100 TRANSPORT WHEEL 1 2 5110 100W CASTER ASSY 5 TRANSP...

Page 26: ...QTY HOUR METER 1 2 1 5200 261 1A CLAMP 2 2 5200 261 1B BODY ONLY CLAMP 4 3 73063 BOLT HEX HEAD CAP 1 4 20X1 3 4 2 4 73002 WASHER SPLIT LOCK 1 4 2 PART DESCRIPTION QTY HOSE CLAMP ASSEMBLY 2 2 2 2 4 4...

Page 27: ...SCRIPTION QTY WEIGHTS 1 4 2 3 1 401631 ADJUSTER FORE AFT SEAT 1 2 5110 111 SEAT RIDE ON 1 3 400321 ARM RESTS KIT FOR SEAT 1 4 73322 NUT NYLOC 5 16 18 NOT SHOWN 4 PART DESCRIPTION QTY SEAT ASSEMBLY 1 1...

Page 28: ...T CHARGER WET 1 9 L309 LABEL A 6 10 L310 LABEL B 6 11 L311 2 LABEL BATTERY 12 12 L33B LABEL CAUTION MOVING PART 1 13 L33C LABEL INSTRUCTION MANUAL 1 14 L33D LABEL AUTHORIZED PERSONEL ONLY 1 15 L38 LAB...

Page 29: ...ACKUP ALARM 6 5 4 3 7 8 1 2 See Sheet 3 Relay WHITE RED 1 BLUE 1 BLACK 1 RED 2 BLACK 2 RED 3 CHARGER BATTERY LOCKOUT A B BLUE 2 YELLOW THERMAL PROBE A B BLACK 2 RED 3 BLACK 4 BLACK 5 BLACK 6 SMALL BLU...

Page 30: ...3 5700 7700 BATTERY WIRING BIG BLUE PLUG SMALL BLUE PLUG BIG BLUE PLUG BIG BLUE PLUG 1 1 4 9 11 6 7 1 1 1 1 1 2 5 1 1 SHEET 2 OF 3 BLACK 2 RED 3 BLACK 4 BLACK 5 BLACK 6 See Sheet 1 G o t o D i s c o u...

Page 31: ...EET 1 HOUR METER Brown Brown WHITE RED 1 BLUE 1 BLACK 1 RED 2 BLACK 2 RED 3 BLUE 2 5700 7700 SEAT WIRING SHEET 3 OF 3 YELLOW Drive Lock out A Battery Battery LVA Drive Lock out B G o t o D i s c o u n...

Page 32: ...ith a quote for the right part that your machine needs We sell worldwide for the brands Genie Terex JLG MultiQuip Mikasa Essick Whiteman Mayco Toro Stone Diamond Products Generac Magnum Airman Haulott...

Page 33: ...G o t o D i s c o u n t E q u i p m e n t c o m t o o r d e r y o u r p a r t s...

Reviews: