background image

18  

www.napoleongrills.com

EN

KEEP YOUR RECEIPT AS PROOF OF PURCHASE TO VALIDATE YOUR WARRANTY.

Ordering Replacement Parts

Warranty Information

MODEL:

DATE OF PURCHASE:

SERIAL NUMBER:

(Record information here for easy reference)

Before contacting the Customer Care Department, check the NAC Website for more extensive cleaning, 

maintenance, troubleshooting and parts replacement instructions at www.napoleongrills.com.  Contact 

the factory directly for replacement parts and warranty claims.  Our Customer Solutions Department is 

available between 9 AM and 5 PM (Eastern Standard Time) at 1-866-820-8686 or fax at 1-705-727-4282.  

To process a claim, we must be provided with the following information:


1. Model and serial number of the unit.


2. Part number and description.


3. A concise description of the problem (‘broken’ is not sufficient).


4. Proof of purchase (photocopy of the invoice).

In some cases the Customer Care Representative could request to have the parts returned to the factory 

for inspection before providing replacement parts. These parts must be shipped prepaid to the attention 

of the Customer Solutions Department with the following information enclosed:


1. Model and serial number of the unit.


2. A concise description of the problem (‘broken’ is not sufficient).


3. Proof of purchase (photocopy of the invoice).


4. Return Authorization Number - provided by the Customer Care Representative.

Before contacting customer care, please note that the following items are not covered by the warranty:

•  Costs for transportation, brokerage or export duties.  
•  Labor costs for removal and reinstallation.
• 

Costs for service calls to diagnose problems.

•  Discoloration of stainless steel parts.
•  Part failure due to lack of cleaning and maintenance, or use of improper cleaners (oven 

cleaner).

Summary of Contents for PRO825

Page 1: ...Customer Solutions 1 866 820 8686 or grills napoleonproducts com N415 0306CE GB DE FEB 20 15 Notice to Installer Leave these instructions with the grill owner for future reference Adults and especial...

Page 2: ...hostile environments accident alterations abuse or neglect and parts installed from other manufacturers will nullify this warranty Discoloration to plastic parts from chemical cleaners or UV exposure...

Page 3: ...nnected from the grill and stored outdoors in a well ventilated area disconnected cylinders must not be stored in a building garage or other enclosed area Inspect the gas line hose before each use If...

Page 4: ...56 145cm LID OPEN 17 43cm 36 1 2 93cm OVERALL WIDTH 94 1 4 239cm OVERALL DEPTH 25 1 4 64cm GRILL HEIGHT 36 91cm PRO825 GRILL GRILL SIZE 500 in 2 3265 cm 2 325 in 2 2160 cm 2 WARMING RACK SIZE 255 in...

Page 5: ...om shelf Only cylinders connected to the appliance may be stored in the enclosure or close to the appliance Spare cylinders must not be stored in the enclosure or in close proximity of an operating un...

Page 6: ...kW 560 g hr Rear 1 25mm 5 5 kW 400 g hr Side 76 1 1mm 5 3 kW 291 g hr Smoker 67 2 5 kW 182 g hr Warming 67 2 5 kW 182 g hr Certified Gases Pressures Check rating plate to ensure that it corresponds w...

Page 7: ...or cannot be adjusted There is a pressure tap located on the side of the regulator It can be used by a qualified service person when servicing the grill to determine if the regulator is functioning pr...

Page 8: ...or light with a match 4 If the pilot and burner will not ignite within 5 seconds turn the control knob to the off position and wait 5 minutes for any excess gas to dissipate Either repeat steps 2 and...

Page 9: ...High winds adversely affect the cooking performance of the gas grill In extreme circumstances when consistent high winds come from directly behind the unit heat can vent underneath the control panel T...

Page 10: ...nts wash thoroughly with warm soapy water and store indoors Direct Cooking Place food to be cooked on the grill directly over the heat This method is generally used for searing or for foods that do no...

Page 11: ...giving the food its delicious grilled taste The Napoleon infrared burner cooks in the same way In each burner 10 000 ports each with its own tiny flame cause the surface of the ceramic tile to glow re...

Page 12: ...s to Napoleon s woodchip smoker Chicken pieces High setting 2 min each side then medium low to low setting 20 25 min The joint connecting the thigh and the leg from the skinless side should be sliced...

Page 13: ...The Gas Grill Remove the cooking grids Use a brass wire brush to clean loose debris from the casting sides and underneath the lid Scrape the sear plates with a putty knife or scraper and use a wire br...

Page 14: ...due to cooking debris and corrosion use an opened paperclip or the supplied port maintenance bit to clean them Drill out blocked ports using this drill bit in a small cordless drill The ports are eas...

Page 15: ...cape the burners can become deprived of oxygen causing them to back flash If this occurs repeatedly the ceramic could crack Never cover more than 75 of the cooking surface with solid metal i e griddle...

Page 16: ...by a qualified gas installer Main burner will not light with the igniter but will light with a match Jet fire outlet is dirty or clogged Clean jet fire outlet with a soft bristle brush Humming regula...

Page 17: ...nic Ignition not working Unit not connected to power Blown Fuse Faulty transformer Terminals on switch or circuit board are corroded or loose Faulty igniter Dirty or corroded electrodes Plug power cor...

Page 18: ...ption of the problem broken is not sufficient 4 Proof of purchase photocopy of the invoice In some cases the Customer Care Representative could request to have the parts returned to the factory for in...

Page 19: ...N he dieses oder anderer Ger te d rfen weder Benzin noch andere brennbaren Fl ssigkeiten oder Gase gelagert werden Dies gilt auch f r nicht angeschlossene Gasflaschen Ein Nichtbefolgen dieser Anleitu...

Page 20: ...len anderer Hersteller erlischt die vorliegende Garantie Verf rbungen von Plastikteilen durch den Einsatz von chemischen Reinigungsmitteln oder die Einwirkung von Sonnenlicht sind in dieser Garantie n...

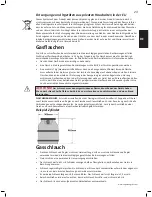
Page 21: ...asgrills mit einem vom Hersteller empfohlenen Schlauch ersetzt werden Ersatz Propangasflaschen niemals unter oder in der N he des Grills aufbewahren Die Gasflasche niemals mehr bis als 80 f llen Versu...

Page 22: ...m 56 145cm LID OPEN 17 43cm 36 1 2 93cm OVERALL WIDTH 94 1 4 239cm OVERALL DEPTH 25 1 4 64cm GRILL HEIGHT 36 91cm PRO825 GRILL GRILL SIZE 500 in 2 3265 cm 2 325 in 2 2160 cm 2 WARMING RACK SIZE 255 in...

Page 23: ...en Seitenablage auf ebenem Boden stehen Kleinere Flaschen k nnen innerhalb der Einfassung in der Aussparung im unteren Regal stehen Nur ang eschlossene Gasflaschen d rfen in der Einfassung oder nahe a...

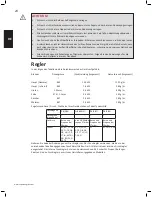
Page 24: ...nschlusswerte des Ger ts aufgef hrt Brenner D sengr sse Grob Leistung Insgesamt Gasverbrauch Insgesamt I I I Haupt Flamme 60 15 2 kW 1120 g hr Haupt Infrarot 60 7 6 kW 560 g hr Hinten 1 25mm 5 5 kW 40...

Page 25: ...ruckregler nur durch entsprechend geschulten Servicetechniker Elektrische Schutzma nahmen WARNUNG Nichtbefolgung dieser Anweisungen kann zu Sachsch den K rperverletzung oder Tod f hren 230 240V AC 50H...

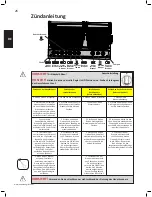
Page 26: ...Dr cken und drehen Sie den Drehregler des Heckbrenners in die h chste Position 3 Dr cken und halten Sie den Z nd Knopf der elektronischen Z ndung bis sich der Brenner entz ndet oder entz nden Sie ihn...

Page 27: ...abschneiden oder mit niedrigerer Temperatur grillen Wenn es zum Aufflammen kommt legen Sie das Fleisch von der Flamme weg zur Seite und stellen die Temperatur herunter Lassen Sie die Haube offen Eine...

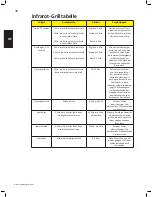
Page 28: ...in der Infrarot Grilltabelle aufgef hrt ist Je nach Geschmack k nnen Sie entweder auf dem Infrarotbrenner auf h chster mittlerer oder niedriger Stufe weitergrillen und das Grillgut fter wenden oder Si...

Page 29: ...t ab wobei der Trocknungseffekt sehr gering ist Bratensaft und le die dem Grillgut entweichen tropfen hinunter in die Holzkohle sodass ein Rauch aufsteigt der dem Grillgut den herrlichen Grillgeschmac...

Page 30: ...Seite auf h chster Stufe dann mittlere bis unterste Stufe 20 25 Min Gelenk zwischen Ober und Unterschenkel auf der hautlosen Seite durchschneiden damit das Fleisch flach auf dem Grill liegt So wird es...

Page 31: ...r schwer zu entfernende Flecke Stahlwolle verwenden Rostfreistahlroste erhalten bei normalem Betrieb des Grills wegen der hohen Temperatur eine permanente Verf rbung Bedienleiste Die Bedienleistenbesc...

Page 32: ...dicht und frei von Fusseln und sonstigem Schmutz sein Auch die Ventild sen m ssen sauber sein Es ist darauf zu achten dass die D sen beim Reinigen nicht vergr ert werden Brenner wieder einbauen Beim E...

Page 33: ...rfl che kommen Dies u ert sich als wei e Flecke auf dem Guss Gussteile s ubern und mit feinem Sandpapier abschmirgeln Schmirgelstaub abwischen und Gussteile mit temperaturbest ndiger Grillfarbe lackie...

Page 34: ...einem professionellen Gasinstallateur durchgef hrt werden Brenner last sich nicht mit der Z ndvorrichtung aber mit einem Streichholz entfachen Jet Fire Ventil ist schmutzig oder verstopft Jet Fire Ven...

Page 35: ...rhafter Transformator Anschl sse am Schalter oder Schaltplatte sind korrodiert oder locker Fehlerhafter Z nder Verschmutzt oder korrodierte Elektroden Stecken Sie das Transformator Kabel an eine Steck...

Page 36: ...er des Ger ts 2 Teilenummer und beschreibung 3 Vollst ndige Beschreibung des Problems kaputt ist nicht ausreichend 4 Kaufnachweis Fotokopie der Rechnung In manchen F llen kann der Kundendienstbeauftra...

Page 37: ...sch digten oder fehlenden Teilen wenden Sie sich an unseren Kundendienst unter 1 866 820 8686 zwischen 9 Uhr und 15 Uhr Eastern Standard Time Zangen 10 mm schraubenschl ssel oder ring maulschl ssel Ha...

Page 38: ...38 www napoleongrills com 1 2 Two people are required for this step F r diesen schritt Sind zwei personen erforderlich...

Page 39: ...com 3 8 10mm Remove Lifting Brackets 4 x N570 0087 1 4 20 X 7 8 Werksseitig vorinstalliert L sen um das Seitenregal zu installieren Pre installed at factory Loosen to install the side shelf Entfernen...

Page 40: ...ig in die Aussparungen der Seitenablage eingesetzt Tabs located on either side of ice bucket must engage notches in side shelf 3 8 10mm 3 8 10mm 4 x N570 0087 1 4 20 X 7 8 Werksseitig vorinstalliert L...

Page 41: ...41 www napoleongrills com Attach the wire to the side burner electrode Draht vom Verteiler mit der Elektrode des Seitenbrenners verbinden...

Page 42: ...he lower position in order to close the lid Verwendung des Power Brenner Grillrosts Der Grillrost kann auf zwei Arten eingesetzt werden Die nach oben gew lbte Seite ist f r den Gebrauch von T pfen und...

Page 43: ...43 www napoleongrills com 1 2 3 4...

Page 44: ...is sitting on uneven ground For easy hinge adjustment follow the illustrations outlined below Die Grillt ren wurden werkseitig bereits ausgerichtet Eine neuerliche Adjustierung kann notwendig sein wen...

Page 45: ...45 www napoleongrills com...

Page 46: ...46 www napoleongrills com...

Page 47: ...47 www napoleongrills com Disposable grease tray Fett Auffangbeh lter Einweg 4 X N570 0086 14 x 1 2 3 8 10mm Propane Only Propan Nur...

Page 48: ...otisserie Kit Assembly Instruction optional Assemble rotisserie kit components as shown Anweisungen f r die Montage des Drehspie Sets optionale Komponenten des Drehspie Sets wie gezeigt montieren Sich...

Page 49: ...r touch hot surfaces Strominstallation f r die integrierte Beleuchtung ACHTUNG Um sich gegen Stromschlag zu sch tzen schlie en Sie dieses Gasgrillger t f r den Au engebrauch nur an einen Stromkreis mi...

Page 50: ...50 www napoleongrills com...

Page 51: ...t hole in the right side panel Gasflaschen mit einem Gewicht von 7 kg oder mehr au erhalb des Schranks unter dem rechten Seitenregal ebenerdig aufstellen Die Schlauchinstallation muss durch die vorges...

Page 52: ...ructions provided below for the appropriate regulator hose FIG 1 FIG 2 FIG 3 FIG 4 Cylinder Connection Flaschenanschluss HINWEIS Einige Druckminderer Schlauch Sets haben eine Mutter und ein Linksgewin...

Page 53: ...o not smoke while performing this test and remove all sources of ignition See Leak Testing Diagram for areas to check Turn all burner controls to the off position Turn gas supply valve on Brush a half...

Page 54: ...e Z ndquellen sind zu entfernen Die zu pr fenden Stellen sind auf der Leckagepr fzeichnung aufgef hrt Alle Brenner abstellen Flaschenventil aufdrehen Seifenwasser halb Wasser halb Fl ssigseife auf all...

Page 55: ...x 20 N655 0183 base stiffener x 21 N570 0042 screw 10 24 x 3 8 x 22 N570 0008 8 x 1 2 screw x 23 N475 0329 control panel x 24 N570 0078 screw M4 x 8mm x 25 N010 0794 manifold p 26 N720 0071 manifold...

Page 56: ...serie mount x 65 N200 0110 light wire cover x 66 N570 0112 screw 10 24 x 5 8 x 67 N570 0013 8 x 5 8 screw x 68 N735 0002 1 4 lock washer x 69 N570 0015 lid pivot screw x 70 N570 0024 1 4 20 x 1 2 scre...

Page 57: ...N750 0029 harness igniter switch x N750 0031 harness LED x N750 0032 harness wire switch x N750 0034 wire connector igniter x N750 0035 wire electorde extension x W200 0390 sleeve wire x N215 0016 la...

Page 58: ...45 22 47 7 56 46 56 7 22 8 44 55 42 9 43 56 10 44 46 7 4 2 56 3 3 2 1 54 67 52 65 66 54 58 60 22 44 55 51 55 61 36 34 24 23 17 26 4 56 2 64 7 56 7 46 48 74 48 75 22 15 2 13 14 11 73 56 56 51 22 65 54...

Page 59: ...el left front x 121 N655 0175 stiffener door hinge x 122 N475 0342 GY1SG panel cabinet rear x 123 N010 0817 panel inner cabinet x 124 N585 0094 GY1SG heat shield x 125 N080 0330 GY1SG bracket rear cov...

Page 60: ...x 7 8 screw x 153 N735 0001 washer side shelf x 154 N200 0113 GY1SG back cover x 155 N402 0016 cabinet light x 156 Z080 0012 bottle opener x 157 N080 0318 GY1SG bracket drip pan guide x 158 N160 0002...

Page 61: ...57 112 111 110 158 128 116 123 116 116 123 116 155 133 132 134 131 112 111 157 116 115 155 151 144 150 145 116 121 118 117 102 116 116 116 128 133 132 112 110 128 120 116 116 143 143 127 127 116 134 1...

Page 62: ...N455 0072 side burner IR orifice 76 x 222 N455 0074 side burner orifice 1 1mm x 223 N320 0005 side burner insect guard x 224 N120 0013G side shelf end cap left x 225 N570 0038 1 4 20 x 1 2 screw x 22...

Page 63: ...PART NUMBER DESCRIPTION PRO825 248 N385 0144 prestige logo x 249 N485 0009 push pin x 250 N185 0003 ice bucket x 251 N590 0189 cutting board x 252 N255 0061 quick disconnect nipple x x standard ac ac...

Page 64: ...217 213 203 204 218 213 215 213 214 209 211 212 216 213 214 211 212 213 209 235 238 209 239 229 229 237 233 227 234 228 224 242 213 213 222 223 225 241 232 230 220 244 229 236 212 231 212 225 221 212...

Page 65: ...65 www napoleongrills com Notes...

Page 66: ...66 www napoleongrills com Notes...

Page 67: ...67 www napoleongrills com Notes...

Page 68: ...N415 0306CE GB DE...

Reviews: