background image

12 

WWW

.N

AKAYAMA

T

OOLS

.

COM

7. Operation


STARTING ENGINE


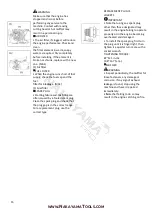
WARNING


Keep the blades clear of the


surrounding as they will start moving


upon starting of the engine.


1. When first


starting up after

putting fuel

 int

o the machine, push 

the priming


pump until fuel runs out 

in the clear


tube. Then close the 

choke. Choking


may not be 

necessary when re

-

starting


right 

after stopping the engine. (OP1)


(1) Primer pump


(2) Choke lever


(3) CLOSE


(4) OPEN


2. Pull the throttle lever and push

the lock


button to set the lever in 

the START


position. (OP2)


(1) Throttle lever


(2) Lock button


3. Slide the ignition switch to the

engi

ne 

side to set it in the ON 

position. (OP3)


4. Rest the


unit on a firm place. Pull

the


starter knob quickly. (OP4)


NOTE


Avoid pulling the rope to its end or

returning


it by releasing the knob. 

Such


actions can cause starter 

failures.


5. When the engine has started,

gradually


open the choke.


6. Allow the engine to warm up for a

half


minute before starting 

operation.


NOTE


If the engine won't start after

several


attempts, open the choke 

and repeat


pulling the rope or remove the spark


plug and dry it.


STOPPING ENGINE


1. Release the throttle lever and run the

engine at idling speed for a half minute.


2. Slide the ignition switch to the STOP

Position.


IMPORTANT


Except for an emergency, avoid

stopping the engine while pulling the


throttle lever.


NOTE 

If the engine won't stop when setting

the ignition switch to the stop position,


close the choke lever and stop the


engine.


In this case, please repair the machine


at yo

ur nearest servicing dealer.


ADJUSTING IDLING SPEED 

1

. When the engine tends to stop

frequently at idling mode, turn the idle


set screw clock

-

wise.


NOTE 

(1) Idle set screw


2. When the cutting blades keep moving

after releasing the throttle trigger, turn


the idle set screw counter

-

clockwise.


Warm up the engine before adjusting

the idling speed.


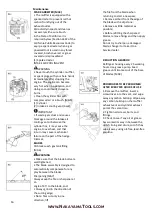
HOW TO USE


This machine is designed so as to

cut twigs up

 to 

28 

mm (0.3 inches)


thick. 

Cutting too thick twigs or


metal wires can 

not only break the


blade teeth


but also 

give damage to


the drive mechanism.


When trimming leaves and thin twigs,

guide the blades as drawing a half


circle 

on 

the surface, and you will get a


better 

finish.


Running the engine at high speed with

the blades Jammed up can shorten the


life of clutch parts. When the blades


have been jammed by thick twigs, stop


operation at once and draw your unit


off the objects after stopping the


engine. When clipping comparatively


Summary of Contents for PRO PH2500

Page 1: ...WW BORMANNTOOLS COM en User Manual el fr Manuel de l Utilisateur it Manuale d uso bg srb nmk ALB Manuali i perdoruesit slo Navodila za uporabo hr Korisni ki priru nik WWW NAKAYAMATOOLS COM PH2500 v2 1...

Page 2: ...2 WWW NAKAYAMATOOLS COM GR 1 2 3 4 5 6 7 8 9 10 11 12 13 14 15 16 17 18 19 20 21 22 23 24 25 26 27 28...

Page 3: ...3 WWW NAKAYAMATOOLS COM 29 30 31 1 2 3 4 5 6 7 8 9 1 2 2 2 25 1 4 3 23CC 1HP 7500RPM 2800 280RPM 4200 350R MIN 0 35L DUAL 4 6KG 600MM...

Page 4: ...4 WWW NAKAYAMATOOLS COM 1 15 2 Start 3 5 3 Start 5 4 Stop 1 2 3 4 Stop 5...

Page 5: ...5 WWW NAKAYAMATOOLS COM 3 8 1 2 Stop 3 4 5 6 1 2 3 4 5 6 1 2 3 4 5...

Page 6: ...instructions which must be followed in order to prevent accidents which could lead to serious bodily injury or death IMPORTANT This mark indicates instructions which must be followed or it leads to me...

Page 7: ...soiled and impossible to read you should contact the dealer from which you purchased the product to order new labels and affix them in the required location s Warning Never modify your hedge trimmer W...

Page 8: ...other times when your field of vision might be limited and it would be difficult to gain a clear view of the working area c During rain storms during lightning storms at times of strong or gale force...

Page 9: ...recommended by the manufacturer And use only for tasks explained in the manual 1 Grip the handles firmly with both hands using your whole hand Place your feet slightly apart slightly further apart th...

Page 10: ...fter cooling the engine 4 Wipe spilled fuel completely using a dry rag if any fuel spillage occurs during refueling 5 After refueling screw the fuel cap back tightly onto the fuel tank and then carry...

Page 11: ...rs that dont contain oil 6 Indicate the contents on outside of container for easy identification FUELING THE UNIT 1 Untwist and remove the fuel cap Rest the cap on a clean surface 2 Put fuel into the...

Page 12: ...e throttle lever and run the engine at idling speed for a half minute 2 Slide the ignition switch to the STOP Position IMPORTANT Except for an emergency avoid stopping the engine while pulling the thr...

Page 13: ...t In order to get the best cutting results slightly tilt the blade 5 10 towards the cutting direction OP8 Cut slowly especially with thick hedges WARNING Always follow the safety precautions The hedge...

Page 14: ...sary idle adjusting screw see adjusting idling speed replace carburetor if necessary spark plug clean and readjust plug gap GAP 0 65 mm replace if necessary cylinder fins intake air cooling vent clean...

Page 15: ...e and mis firing are often caused by a fouled spark plug Clean the spark plug and check that the plug gap is in the correct range For a replacement plug use the correct type REPLACEMENT PLUG IS LD L8R...

Page 16: ...blades each gas tank filling MA6 WARNING Make sure that the blade bolts are well tightened The blade assembly is designed to automatically compensate for any play between the blades Sharpening MA7 Al...

Page 17: ...lure CHECK PROBABLE CAUSES ACTION fuel tank incorrect fuel drain it and with correct fuel fuel filter fuel filter is clogged clean carburetor adjustment screw out of normal range adjust to normal rang...

Page 18: ...DISPOSE OF PACKAGING RESPONSIBLY DO NOT DISPOSE OF ELECTRICAL GOODS IN HOUSEHOLD WASTE...

Reviews: