background image


19


WWW

.N

AKAYAMA

T

OOLS

.

COM


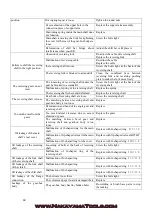
Oil leakage of the fork shaft 

of the clutch 

Malfunction of O-shaped ring 


Replace with O-shaped ring 

1.2×1.8


Oil leakage of the shift shaft  Malfunction of O-shaped ring 


Replace with O-shaped ring 

1.2×1.8


Oil leakage of the flange 

connection 

The bolts are loose there 

Screw the bolts tight 

The vulcanized paper board is damaged there  Replace 

Leakage of the gear-box 

body 

The gear-box body has tiny hidden holes 

Re-welding or brush base paint to stop 

the leaking 


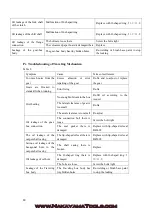
Ⅳ. Troubleshooting of Traveling Mechanism


Table 8 

Symptom 

Cause  

Terms of settlement 

Too  much noise from the 
gear 

Excess abrasion or error 
repairing of the gear 

Re-fix and re-adjust or replace 
the gear 

Gears are blocked to 
standstill when running 

Error fixing  

Re-fix 

Overheating  

No enough lubricant in the box 

Re-fill oil according to the 
request 

The lateral clearance of gear is 
too small  

Re-fix 

The axial clearance is too small   Re-adjust  

Oil leakage of the gear-
box connection 

The connection bolt there is 
loose 

Screw the bolt tight 

The seal gasket there is 
damaged 

Replace with lip-shaped oil seal 
B45628 

The oil leakage of the 
output shaft casing 

The lip-shaped oil seal there is 
damaged 

Replace with lip-shaped oil seal 
B45628 

Serious oil leakage of the 
hexagonal hole in the 
output shaft casing 

The shaft casing there is 
broken 

Replace 

Oil leakage of oil hole 

The O-shaped ring there is 
damaged 

Replace with O-shaped ring 

10×1.8


The bolts are loose  

Screw the bolts tight 

Leakage of the Traveling 
box body 

The Traveling box body has 
tiny hidden holes 

Re-welding or brush base paint 
to stop the leaking 


Summary of Contents for Doragon MB9000

Page 1: ...MB9000 Σκαπτικό Μετάφραση του πρωτοτύπου των οδηγιών χρήσης Owner s manual Art Nr 008453 WWW NAKAYAMATOOLS COM CE tl ...

Page 2: ...ΠΡΟΣΟΧΗ Εάν δεν ακολουθήσετε τις αναγραφόμενες οδηγίες θα προκαλέσετε ζημιά στο μηχάνημα Πριν την χρήση του μηχανήματος θα πρέπει να διαβάσετε και να κατανοήσετε καλά τις οδηγίες χρήσης και ασφάλειας Προσοχή Όταν ξεκινάτε την μηχανή να βάζετε πάντα τις ταχύτητες στην θέση νεκρά Όταν η μηχανή δουλεύει δώστε ιδιαίτερη προσοχή στη ασφάλεια Προσέξτε τις περιστρεφόμενες λεπίδες γιατί μπορεί να σας τραυ...

Page 3: ...ξει καλά τον άξονα άλλα και τα μαχαίρια με τις κατάλληλες βίδες Το σκαπτικό είναι τώρα έτοιμο για χρήση Μαχαίρια εκσκαφής 2 Για να τοποθετήσετε τον αυλακωτήρα ή τον πατατοεξαγωγέα αυτά τα δύο εξαρτήματα ΔΕΝ περιλαμβάνονται στη συσκευασία αφαιρέστε το ρυθμιστή βάθους και τοποθετήστε το ανάλογο εξάρτημα στην θέση του 3 Σε περίπτωση που θέλετε να μεταφέρεται το σκαπτικό τοποθετήστε το ρυθμιστή βάθους...

Page 4: ... χειριστήριο ανάλογα με τον χειριστή του σκαπτικού Στην συνέχεια τοποθετήστε τον κοχλία Μ16 Χ 140 και με το περικόχλιο που φέρει την λαβή στην λαβή και σφίξτε το πηδάλιο στην κατάλληλη θέση που επιθυμείτε Έπειτα τοποθετήστε επάνω στο πηδάλιο την ντίζα του συμπλέκτη τροφοδοσίας και την ντίζα επιλογής οπισθοπορείας του σκαπτικού 3 Τοποθέτηση του μοχλού επιλογής ταχυτήτων Όπως φαίνεται στην φωτογραφί...

Page 5: ...η μεταξύ του φίλτρου αέρος και του σωλήνα εισαγωγής Εικόνα 3 Γεμίζουμε το κάτω μέρος του φίλτρου αέρος με λάδι με την τρύπα που φαίνεται στην φωτογραφία Χρησιμοποιούμε λάδι φίλτρου αέρος 20W50 ή SAE30 Εικόνα 4 Τοποθετούμε το φίλτρο αέρος που έχουμε γεμίσει με λάδι στον σωλήνα εισαγωγής και σφίγγουμε τα παξιμάδια Εικόνα 5 r p l I ___ 1 _ r ...

Page 6: ...ας και έπειτα την μπαταρία Πάνω από την μπαταρία τοποθετούμε την βάση Γ και σφίγγουμε με τις βίδες Β Βλέπετε την τελική εικόνα της μπαταρίας μονταρισμένη Εικόνα 6 7 6 Τοποθέτηση καλωδίωσης Μέρη καλωδίωσης 1 Διακόπτης μίζας 2 Καλωδίωση μίζας 3 Καλώδιο μπαταρίας Σώμα 4 Καλώδιο μπαταρίας Θετικός 5 Καλώδιο τροφοδοσίας φώτων Ενώνουμε τις φίσες κάτω από το κάλυμμα του τιμονιού όπως φαίνεται στην φωτογρα...

Page 7: ... αρνητικός μπαταρίας α Τοποθετούμε το στην μπαταρία και την άλλη άκρη του την τοποθετείτε στην βίδα του καπακιού βαλβίδων Εικόνα 11 β Τοποθετούμε το στην μίζα όπως φαίνεται στην φωτογραφία Εικόνα 12 Τέλος δέστε τα καλώδια με τα δεματικά που παρέχονται στην συσκευασία Προσοχή Χρώματα και σχήματα εξαρτημάτων ενδέχεται να διαφέρουν ...

Page 8: ...σεις τοποθετήστε τα φτερά δεξιό και αριστερό αντίστοιχα και βιδώστε τα με τις βίδες που παρέχει η συσκευασία Τοποθέτηση και ρύθμιση των ντιζών χειρισμού 1 Ντίζα συμπλέκτη Χαλαρώστε το περικόχλιο που βρίσκεται στην βίδα ρεγουλατόρο ώστε να χαλαρώσει η ντίζα όσο περισσότερο γίνεται Βιδώστε την βίδα ρεγουλατόρο 1 που βρίσκεται στον βραχίονα 2 του συμπλέκτη μέχρι τέλος της περιστροφής της Κατόπιν πιέσ...

Page 9: ...λατόρου το συρματόσχοινο καθώς και το περίβλημα της ντίζας Ξεβιδώστε το ρεγουλατόρο της οπισθοπορείας μέχρι ο τζόγος να είναι λιγότερο από δύο χιλιοστά και στην συνέχεια σφίξτε το περικόχλιο Έλεγχος και τοποθέτηση καυσίμου 1 Ελέγξτε εάν όλες οι βίδες και όλοι οι σύνδεσμοι είναι τοποθετημένοι σωστά και ότι είναι σφιγμένοι σωστά 2 Ελέγξτε ότι οι λαβές στο σύστημα λειτουργίας είναι τοποθετημένοι σωστ...

Page 10: ...νεια και τοποθετήστε το λάδι στην οπή του κινητήρα τάπα 1 στην φωτογραφία Η ποσότητα πρέπει να 1750ml Ελέγξτε το επίπεδο λαδιού από το δείκτη λαδιού Ελέγχετε τα λάδια πριν από κάθε χρήση Τοποθετήστε λάδι στο φίλτρο του αέρα κάτω από το ειδικό προστατευτικό μέχρι να καλύψει την τρύπα 1 που φαίνεται στην φωτογραφία Τοποθετήστε περίπου 150ml λάδι ...

Page 11: ...συμπλέκτη Σε αυτή την περίπτωση το σκαπτικό θα δουλέψει σε υψηλή ταχύτητα 3 Όπισθεν Κρατήστε το συμπλέκτη με το αριστερό χέρι Ρυθμίστε την λαβή των ταχυτήτων στην θέση νεκρά Σιγά σιγά αφήστε το συμπλέκτη και το σκαπτικό θα κάνει προς τα πίσω 4 Εάν θέλετε να αλλάξετε ταχύτητα την ώρα που λειτουργείτε το μηχάνημα θα πρέπει να αφήσετε το μηχάνημα να επιβραδύνει και μετά να τραβήξετε το συμπλέκτη Θα π...

Page 12: ...ες ασφάλειας 1 Όταν χρησιμοποιείτε το σκαπτικό θα πρέπει να δίνετε ιδιαίτερη σημασία στην καλή λειτουργία όλων των μερών του μηχανήματος Σε οποιαδήποτε παράξενη λειτουργία θα πρέπει να σταματήσετε το σκαπτικό και να το ελέγξετε 2 Μην χρησιμοποιείτε το σκαπτικό με παραπάνω φορτίο από αυτό για το οποίο κατασκευάστηκε 3 Δώστε σημασία στο επίπεδο του λαδιού και του καυσίμου και του υγρού ταχυτήτων Ότα...

Page 13: ...κού Ελέγξτε το επίπεδο λαδιού και καυσίμου Καθαρίστε συχνά όλα τα μέρη του μηχανήματος 2 Έλεγχοι κάθε 150 ώρες λειτουργίας Πραγματοποιήστε όλους τους καθημερινούς ελέγχους Καθαρίστε το κιβώτιο ταχυτήτων και αλλάξτε τα λάδια της μηχανής Ελέγξτε τις λειτουργίες του συμπλέκτη της οπισθοπορείας και της τροφοδοσίας 3 Έλεγχοι κάθε 800 ώρες λειτουργίας Πραγματοποιήστε όλους τους παραπάνω ελέγχους Ελέγξτε...

Page 14: ...ς δεν ανοίγει και δεν κλείνει Ελάττωμα στο μοχλό του συμπλέκτη Επισκευάστε ή αλλάξτε το Ελάττωμα στη ντίζα του συμπλέκτη Αλλάξτε το Κακή ρύθμιση του συμπλέκτη Ρυθμίστε τον ξανά ή αλλάξτε το Αποτυχία σύνδεσης του δίχαλου του συμπλέκτη με το άξονα και το πλαίσιό του Επισκευάστε ή αλλάξτε το Παραμόρφωση ή σπάσιμο του δίχαλου του συμπλέκτη Αλλάξτε το δίχαλο του συμπλέκτη Ο δίσκος τριβής γίνετε άχρηστο...

Page 15: ...φίξτε τις βίδες Ο άξονας δεν έχει μπει σωστά Αλλάξτε το Οι ταχύτητες κάνουν υπερβολικό θόρυβο Ό άξονας των ταχυτήτων έχει στραβώσει Αλλάξτε τον Η ταχύτητες έχουν φορτωθεί πολύ Αλλάξτε ταχύτητα Ο άξονας των ταχυτήτων δεν έχει προσαρμοστεί καλά Προσαρμόστε τον Υπάρχει διαρροή λαδιού από το πίσω κάλυμμα του κεντρικού άξονα Το ο ring του κεντρικού άξονα είναι χαλασμένο Αλλάξτε το Η τσιμούχα του κεντρι...

Page 16: ...νητήρα Συμπληρώστε λάδι Το κενό στην ντίζα της τροφοδοσίας είναι πολύ μικρό Κάντε ξανά την εγκατάσταση Το κενό στον άξονα της τροφοδοσίας είναι πολύ μικρό Ρυθμίστε το ξανά Υπάρχει διαρροή λαδιού Οι βίδες έχουν χαλαρώσει Σφίξτε τις βίδες Η φλάντζα είναι χαλασμένη Αλλάξτε την φλάντζα Προβλήματα σε άλλα μέρη του σκαπτικού Φαινόμενο Αιτία Λύση Τα μαχαίρια είναι σπασμένα Έχουν έρθει σε επαφή με πέτρες ...

Page 17: ... rotary blades When grasp the reverse handle the shifting bar must be set to the neutral position Fuel and lubricant must be clean Clutch must be broken off when changing the shift Please read the contents of nameplate on the handle bar carefully before using the machine Must install the safety protecting board on the machine before using machine or after maintenance ...

Page 18: ...t Screw 4 Fender 5 Deep Furrowing Resistance Stick 6 Rotary Blade 7 Side Disc 8 Stepped Box Assy 9 Diesel Engine 10 Bumper 11 Throttle Switch 12 Battery base 13 Safety Device Dead man Handle 14 Locked handle up low 15 Locked handle left right 16 Shifting Bar ...

Page 19: ...the running part the machine can do a transportation The rated load is 250kg under normal rotated speed of the diesel engine speed of the fast shift is about 10km h and that of the slow shift is about 5 km h Ⅳ Multi Functional Working Dismount protection cover of the gear box No 2 in Figure 1 unscrew the bolts away from the rear part of the main shaft take the cover for keys out of shaft fasten th...

Page 20: ...f the Hexagonal output shaft and fix them with two M8 55 bolts and M8 nuts 4 Trailer fixing Fix the link group onto the trailer use the link shaft assembly for connection insert the split pin 3 26 and insert the velocity adjustment screw into square groove of the link group and fix it with M8 55 bolts and nuts 5 Handle bar fixing Two gear discs of the handle bar support aim at the discs of the han...

Page 21: ...6 6 SPRING WASHER 8 GB93 87 7 WASHER 8 GB95 85 8 STAND DIESEL 9 BRACKET RIGHT 10 NUT M6 GB41 86 11 SPRING WASHER 6 GB93 87 12 WASHER 6 GB95 85 13 BOLT M6 10 GB5781 86 14 FENDER FOR PADDY FIELD RIGHT 15 FIXTY OF SAFETY PROTECTION GUARD 16 SAFETY PROTECTION GUARD RIGHT 17 SAFETY PROTECTION GUARD LEFT 18 FENDER FOR PADDY FIELD LEFT 19 DOWEL 20 CONNECTING PLATE 21 BOLT M8 50 GB5781 86 22 CONNECTOR JOI...

Page 22: ...le See Figure 5 and 6 Unscrew the locknut of the tie rod Spin the tie rod clockwise until the exposed handle support is the shortest Get the joint of cable into the clutch wire socket of rear part of the gear box assembly and ensure the joint of cable goes into the hole of the socket Figure 5 Figure 6 Get the wire into the M8 hole on base of the clutch fork arm properly press ...

Page 23: ...ble into the narrow gap of the reversing wire socket besides the gear box and ensure the pipe head goes into the hole of the wire socket Unscrew the tie rod grasp and loosen the clutch handle until the spring force in the clutch can reset the handle then screw the locknut 3 Adjustment of the throttle cable See Figure 7 shift the throttle switch clockwise to minimum positioning Get wire of the thro...

Page 24: ...mechanism and gear box 35 40 Trailer unit 45 60 Set bolts of the diesel engine base 35 40 Set bolts of the handle support base 35 40 2 Check each handle of the manipulation system throttle switch clutch shifting bar and reversing bar to see whether they can move freely or not If they are out of the right positions make them at the right positions 3 Pull shift bar of the gear box to the neutral pos...

Page 25: ...d in chapter Four Entrance of lubricant Fill in machine oil from oil month when diesel engine is placed level and checking the oil level only needs a poke by dipstick rather than a rotation of dipstick Classification of maintenance for A P I diesel engine Lubricant shall be grade CC or CD Model 178F 186F 188F Litre British gallon 1 1 0 24 1 65 0 36 1 65 0 36 1 Using a slow shift The left hand gras...

Page 26: ...not quenching then makes the clutch separated When the machine stops running then shift 5 Change directions pull the handle to left or right to make the machine turn left or right Note pulling the wrong handle may lead to damage to the gears 6 The operation method of recoil electric starter and safety device Left hand close upon the red emergency stop handle with the handle bar draw back the clutc...

Page 27: ...topping the machine is generally conducted on the flat ground Ⅵ Connection use of Auxiliary Devices Tools 1 When cultivating is needed knock down the wheels fix the hexagonal union of the cultivating device onto two ends of the hexagonal shaft of the running part and axially fix them with M8 55 bolt Note cultivating blades are divided into two groups namely the left and the right Fixing the blades...

Page 28: ...eys out of the shaft fasten the self contained belt pulley or coupling onto the gear box s main shaft s rear part with screws Type A of common V belt is adopted for belt pulley s cross section Rated rpm of the belt pulley is 3000 rpm When the corresponding devices are equipped pumping water spraying threshing reaping generating electricity etc are realized 6 Hookup Electric Starter Ⅶ Training 1 Re...

Page 29: ...t if diesel is spilled do not attempt to start the engine but move the machine away from the area of spillage and avoid creating any source of ignition until diesel vapours have dissipated Replace all fuel tank and container caps securely 6 Replace faulty silencers 7 Before using always visually inspect to see that tools are not worn or damaged Replace worn or damaged elements and bolts in sets to...

Page 30: ...A cold machine is forbidden to do heavy load work immediately after the machine is just started especially for the new machines or the ones after overhaul 3 Pay attention to checking the oil levels of the diesel engine and gear box Refill the engine oil when it is not enough 4 It is not allowed to cool the diesel engine by watering 5 Be cautions about the machine s tilting when farming 6 The machi...

Page 31: ... an eye on the rotary parts do not be too close to the machine to avoid being hurt by the rotary blades 3 Keep the components of oil box away from fire and smoke 4 Keep this machine stabilization before use and read the instruction carefully 5 Please refuel in time ...

Page 32: ...rformance and extend its working life Ⅰ Breaking in 1 Refer to the instruction manual for the breaking in of the diesel engine 2 As for a new or overhauled power tiller it should be working for 1 hour under no load or 5 hours under light load then drain all the lubricant from the gear box and crankcase of the diesel engine refill appropriate fix of clean diesel and clean them at a slow speed for 3...

Page 33: ...s and smear on the machine and its parts 5 Keep a good farming record Clause Two the first rate service every 150 working hours 1 Do all the things listed for each work shift maintenance 2 Clean the gear box and Traveling box and change the engine oil 3 Check and adjust the clutch shift system and reversing gear system Clause Three The second rate maintenance every 800 working hours 1 Do all the t...

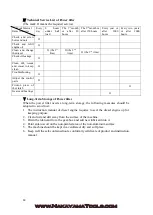
Page 34: ... O Troubleshooting O Adjust the control parts O Friction piece of the clutch O Gears and bearings O Ⅴ Long Term Storage of Power tiller When the power tiller needs a long term storage the following measures should be adopted to avoid rust 1 The instruction manual of diesel engine requires to seal the diesel engine up for keeping purpose 2 Clean dust and dirt away from the surface of the machine 3 ...

Page 35: ...d reduce adjustment padⅠ meanwhile the axial clearance of gear Ⅱ is 0 05 0 15mm or increase the adjustment padⅡ meanwhile ensure the axial clearance of gear Ⅰis 0 05 0 15mm Ⅱ Debugging Method of Reversing Gears and Cables When the power tiller s running backwards is not normal it is necessary to adjust the reversing gears and Cables see Chapter Three for the methods Note 1 Grasp and loosen the rev...

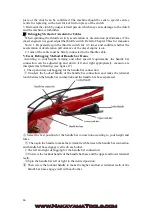
Page 36: ...e According to your height farming and other special requirements the handle bar connection can be adjusted up and down left and right appropriately measure are interpreted as following see figure 12 1 The up and down debugging for the handle bar connection Unscrew the Locked handle of the handle bar connection and make the terminal tooth between the handle bar connection and the handle bar base s...

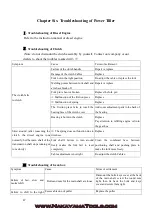
Page 37: ...the clutch cover Add some adjustment pads to the back of the bearing Bearing is burnt in the clutch Replace Pay attention to refilling engine oil into the gear box Skid around after loosening the clutch the diesel engine runs normally but the main shaft of the transmission shaft stops running or runs slowly The spring does not function due to tiredness Replace Fork shaft s failure to turn around f...

Page 38: ...ar bolts of reversing shaft are loose Screw the reversing shaft The matching between reversing shaft and gear box body is too loose Replace Too much noise from the gears Deformation and bend of the angle gear and reversing shaft Replace Too much lateral clearance due to excess abrasion of gears Replace the gears The matching between bevel gear and reversing shaft and gear box body is too loose Rep...

Page 39: ... blocked to standstill when running Error fixing Re fix Overheating No enough lubricant in the box Re fill oil according to the request The lateral clearance of gear is too small Re fix The axial clearance is too small Re adjust Oil leakage of the gear box connection The connection bolt there is loose Screw the bolt tight The seal gasket there is damaged Replace with lip shaped oil seal B45628 The...

Page 40: ...reform of the thousands year long traditional cow ploughing The phenomenon start working when the sun is rising stop working when the sun is going down will disappear because of the appearing of the machine Thank you for buying our power tiller as long as you use and manipulate the machine carefully according to our instruction manual you will enjoy obvious economic gains Moreover our company has ...

Reviews: