background image

PAGE 4

INTRODUCTION

IMPORTANT SAFETY INSTRUCTIONS

CAUTION : PLEASE READ AND OBSERVE ALL WARNINGS AND INSTRUCTIONS IN THIS OWNER’S MANUAL

AND THOSE MARKED ON THE UNIT. RETAIN THIS BOOKLET FOR FUTURE REFERENCE.

This set has been designed and manufactured to assure personal safety. Improper use can result in electric shock
or fire hazard. The safeguards incorporated in this unit will protect you if you observe the following procedures for
installation, use and servicing.
DO NOT REMOVE THE CABINET COVER, OR YOU MAY BE EXPOSED TO DANGEROUS VOLTAGE. REFER
SERVICING TO QUALIFIED SERVICE PERSONNEL ONLY.

1. Read owner’s manual

When  shipping  the  DVD  player,  always  use  the
original shipping carton and packing materials. 
For maximum protection, repack the unit as it was
originally packed at the factory.

2. Power Sources

This  product  should  be  operated  only  from  the
type  of  power  source  indicated  on  the  marking
label.  If  you  are  not  sure  of  the  type  of  power
supply  in  your  home,  consult  your  product  dealer
or local power company. 

3. Grounding or Polarization 

(North America versions only)
This  product  is  equipped  with  a  polarized
alternating  current  line  plug  (a  plug  having  one
blade  wider  than  the  other).  This  plug  will  fit  into
the  power  outlet  only  one  way.  This  is  a  safety
feature.  If  you  are  unable  to  insert  the  plug  fully
into  the  outlet,  try  reversing  the  plug.  If  the  plug
should  still  fail  to  fit,  contact  your  electrician  to
replace  your  obsolete  outlet.  Do  not  defeat  the
safety purpose of the polarized plug.

4. Heat

The  product  should  be  situated  away  from  heat
sources  such  as  radiators,  stoves,  or  other
products (including amplifiers) that produce heat.

5. Water and Moisture

Do  not  use  this  product  near  water-for  example,
near a bath-tub, wash bowl, kitchen-sink, or laundry
tub;  in  a  wet  basement;  or  near  a  swimming  pool
and the like.

6. Cleaning

Unplug  this  product  from  the  wall  outlet  before
cleaning.  Do  not  use  liquid  cleaners  or  aerosol
cleaners. Use a damp cloth for cleaning.

7. Power-Cord Protection

Power-supply cords should be routed so that they
are not likely to be walked on or pinched by items
placed  upon  or  against  them,  playing  particular
attention  to  cords  at  plugs,  convenience
receptacles,  and  the  point  where  they  exit  from
the product.

8. Overloading

Do  not  overload  wall  outlets,  extension  cords,  or
integral  convenience  receptacles  as  this  can
result in a risk of fire or electric shock.

9. Lightning

For  added  protection  of  this  product  during
storms,  or  when  it  is  left  unattended  and  unused
for  long  periods  of  time,  unplug  it  from  the  wall
outlet.  This  will  prevent  damage  to  the  product
due to lightning and power-line surges.

10.Object and Liquid Entry

Never  push  objects  of  any  kind  into  this  product
through  openings  as  they  may  touch  dangerous
voltage  points  or  short-out  parts  that  could  result
in a fire or electric shock. Never spill liquid of any
kind on the product.

11.Attachments

Do not use attachments not recommended by the
product manufacturer as they may cause hazards.

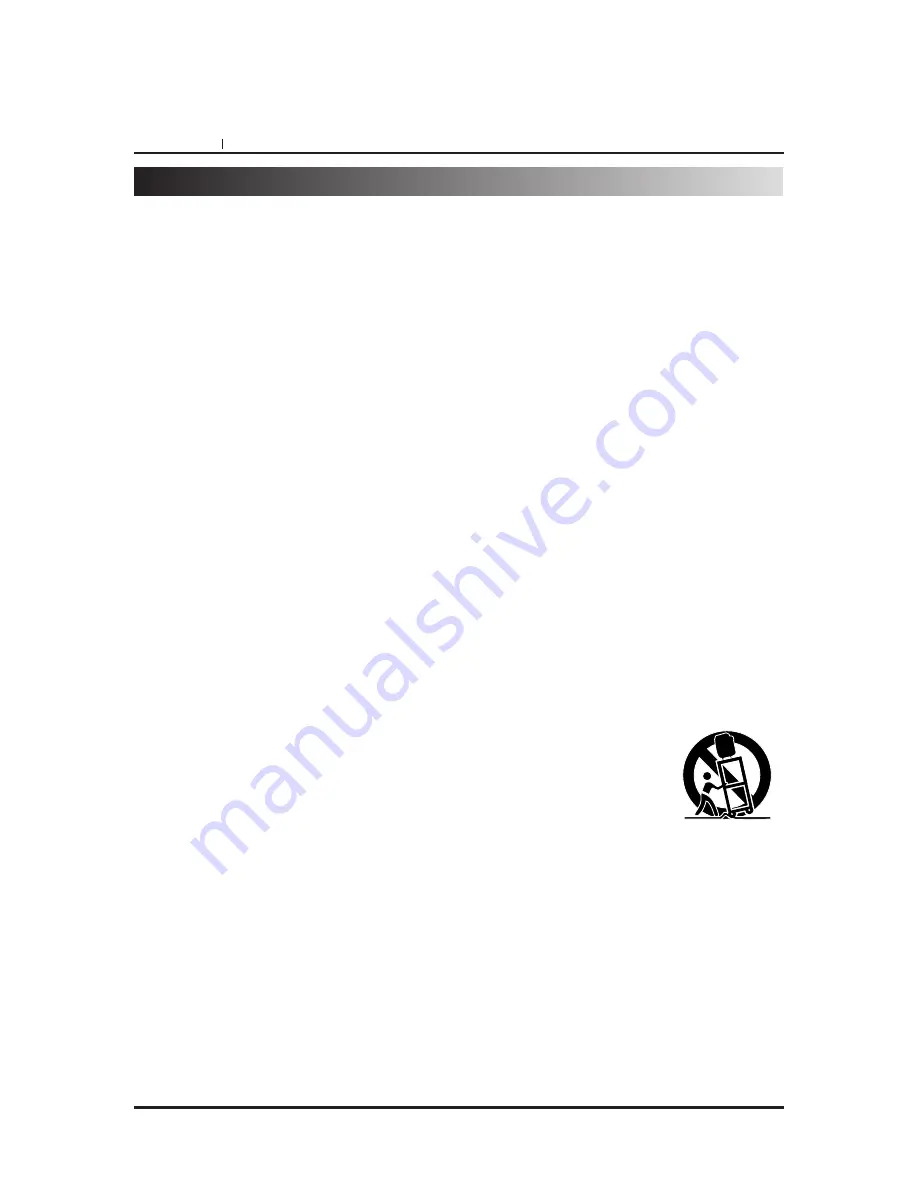
12.Accessories

Do not place this product on
an  unstable  cart,  stand,
tripod, bracket, or table. The
product  may  fall,  causing
serious  injury  to  a  child  or
adult,  and  serious  damage
to the product. Use only with
a  chart,  stand,  tripod,
bracket,  or  table  recommended  by  the
manufacturer,  or  sold  with  the  product.  Any
mounting  of  the  product  should  follow  the
manufacturer’s  instructions,  and  should  use  a
mounting  accessory  recommended  by  the
manufacturer.  A  product  and  cart  combination
should  be  moved  with  care.  Quick  stops,
excessive force, and uneven surfaces may cause
the product and cart combination to overturn.

13.Disc Tray

Keep your fingers well clear of the disc tray as it is
closing. It may cause serious personal injury.

PORTABLE CART WARNING

Summary of Contents for T550

Page 1: ...T550 DVD VIDEO CD CD Player OWNER S MANUAL GB E S P ...

Page 2: ...on against interference in a residential area This device generates and uses radio frequency energy and if not installed and used in accordance with the instructions it may cause interference to radio or TV reception If this unit does cause interference with TV or radio reception you can try to correct the interference by one or more of the following measures a Reorient or relocate the receiving a...

Page 3: ...20 23 Playing DVDs CDs Video CDs 20 Stopping Playing Switching Power Off 21 Skipping forward or back 21 Scanning forward or back 21 Viewing a still frame 22 Slow Playback Viewing a slow picture 22 Playing Frame by Frame 22 Resuming Playback from the Same Location 23 Advanced Operation Viewing Information about DISPLAY 24 Using a title menu DVD menu 25 Changing subtitle language 26 Viewing from ano...

Page 4: ...ry tub in a wet basement or near a swimming pool and the like 6 Cleaning Unplug this product from the wall outlet before cleaning Do not use liquid cleaners or aerosol cleaners Use a damp cloth for cleaning 7 Power Cord Protection Power supply cords should be routed so that they are not likely to be walked on or pinched by items placed upon or against them playing particular attention to cords at ...

Page 5: ...broken and may cause serious personal injury and product malfunction 21 Damage Requiring Service Unplug this product from the wall outlet and refer servicing to qualified service personnel under the following conditions a When the power supply cord or plug is damaged b If liquid has been spilled or objects have fallen into the product c If the product has been exposed to rain or water d If the pro...

Page 6: ...e as they may damage the surface of the DVD player If you use a chemical saturated cloth to clean the unit follow that product s instructions Warning Cleaning and adjustment of lenses and or other components of playback mechanism should be performed by a qualified service technician Notes on Moisture Condensation Moisture condensation damages the DVD player Please read the following carefully Mois...

Page 7: ...d the heat generated by the amplifier of other audio equipment CAUTION WHEN PLACING THE UNIT IN A STEREO RACK WITH GLASS DOORS Be sure there is ample space between the unit and the glass doors when opening the disc table using the remote control If the disc table opens against strong resistance such as a closed glass door damage to the unit may result CONDENSATION Moisture will form in the operati...

Page 8: ...c clean If you cannot wipe off the dust with a soft cloth wipe the disc lightly with a slightly moistened soft cloth and finish with a dry cloth Do not use any type of solvents such as thinner benzine commercially available cleaners or anti static for vinyl LPs They may damage the disc About This Owner s Manual This owner s manual explains the basic instructions of this DVD player Some DVD video d...

Page 9: ...isc information or player information and provide access to many major functions of this unit Reproducing stereo system is connected Dolby Digital 5 1CH DVD encoded software only Programming of up to 5 scenes in memory markers Parental lock settings to prevent play of discs unsuitable for some audiences DVD only Compatible with CD as well as DVD Disc formats supported by this player This unit can ...

Page 10: ...een color Display Window OPEN CLOSE button SKIP SCAN buttons STOP button PLAY button PAUSE button Disc Tray Front Panel RANDOM indicator PROGRAM indicator CHAPTER indicator TRACK indicator REPEAT indicator TITLE indicator PLAY indicator VCD CD indicator DVD indicator 5 1 CH indicator Display Window ...

Page 11: ...CH OUT jacks AUDIO MIXED OUT jacks S VIDEO OUT jack COMPOSITE VIDEO OUT jack Rear Panel Dust protection cap OPTICAL DIGITAL AUDIO OUT jack Remove the dust protection cap from the connector and connect the optical digital cable not supplied firmly so that the configurations of both the cable and the connector match Keep the dust protection cap and always reattach the cap when not using the connecto...

Page 12: ...H button 15 RESUME button 16 Numeric buttons 17 STOP button 18 PLAY button 19 SET UP button 20 ZOOM button 21 PROGRAM button 22 CLEAR button 23 ENTER button 24 MENU button 25 DISPLAY button 26 SLOW buttons 27 FWD REV SKIP buttons 28 SCAN STEP buttons TITLE button Use the TITLE button to display the title screen included on DVD video discs To operate a menu screen follow the instructions in Using a...

Page 13: ...of batteries together or mix old and new batteries If you do not use the remote control for a long period of time remove the batteries to avoid possible damage from battery corrosion If the remote control does not function correctly or if the operating range becomes reduced replace all batteries with new ones If battery leakage occurs wipe the battery liquid from the battery compartment then inser...

Page 14: ... units from the wall outlet before making any connections If your television set has one audio input connect the DVD player to a Y cable adapter not supplied and then connect to your TV Connect the DVD player to your TV directly If you connect the DVD player to a VCR the playback picture will be distorted because DVD video discs are copy protected Change the setting of speaker output in Initial Se...

Page 15: ...t sound of the DVD player has a wide dynamic range Be sure to adjust the receiver s volume to a moderate listening level Otherwise the speakers may be damaged by a sudden high volume sound Turn off the receiver before you connect or disconnect the DVD player s power cord If you leave the receiver power on the speakers may be damaged Change the setting of speaker output in Initial Setup from Multic...

Page 16: ...r s manual of your audio equipment as well When you connect the DVD player to other equipment be sure to turn off the power and unplug all of the equipment from the wall outlet before making any connections The output sound of the DVD player has a wide dynamic range Be sure to adjust the receiver s volume to a moderate listening level Otherwise the speakers may be damaged by a sudden high volume s...

Page 17: ...gital surround sound technology developed by Dolby Laboratories for theater like surround sound reproduction DVDs supporting Dolby Digital AC 3 technology feature the logo You can enjoy realistic theater like surround sound from DVD movie or music disc featuring this logo Two front one center and two rear speakers plus a subwoofer make up the 5 1 channel audio system that Dolby Digital AC 3 uses H...

Page 18: ... sound from the rear speakers will be monaural even if you connect two rear speakers With a receiver equipped with Dolby Digital AC 3 Connect the equipment the same way as described in Enjoying Dolby Digital AC 3 Sound on the previous page Refer to that receiver s owner s manual and set the receiver so you can enjoy Dolby Pro Logic Surround sound Warning Do not set the Audio Output of this DVD pla...

Page 19: ... Out COAXIAL or OPTICAL Like Dolby Digital DTS is a multichannel digital format with 6 discrete channels of sound Some DVDs are encoded using the DTS system Although the NAD T550 doesn t decode a DTS encoded DVD it will pass on the DTS digital signal through either the coaxial or optical digital output Connect either the coaxial or optical digital output to a decoder or receiver such as the NAD T7...

Page 20: ...E button on the front panel The disc table will close and depending on the disc playback begins automatically Select the item you want to view DVD only Select the item with the buttons then press the ENTER button 1 2 3 4 Turn the TV s power on and set its input to a position for DVD viewing VIDEO etc When this unit is connected to a stereo turn the power of the stereo components on and select the ...

Page 21: ...standby mode and the STANDBY indicator lights 1 2 3 4 Skipping forward to the next chapter track Press SKIP on remote control unit or button on the front panel Skipping back to the previous chapter track Press SKIP on remote control unit or button on the front panel Skipping forward or back Fast forward Press SCAN on remote control unit or button on the front panel Fast reverse Press SCAN on remot...

Page 22: ...BASIC OPERATION ...

Page 23: ...BASIC OPERATION ...

Page 24: ...ADVANCED OPERATION ...

Page 25: ...o and subtitle language Although the DVD menu s contents and operation differ from disc the following explains the basic operation when this feature is used Press MENU during play The DVD menu available on the disc is now displayed Pressing RETURN again resumes play from the scene when MENU was first pressed Press and press ENTER to select desired item The selected item is now executed 1 2 1 2 3 4...

Page 26: ...ess the ENTER button 1 2 3 SUBTITLE English Notes In some cases the subtitle language is not changed to the selected one immediately When a disc supporting the closed caption is played the subtitle and the closed caption may overlap each other on the TV screen In this case turn the subtitle off When the desired language is not selected even after pressing the button several times it means that the...

Page 27: ...sing the ANGLE button The recorded angles differ depending on the disc used ANGLE 1 ANGLE 2 ANGLE 3 Press ANGLE during playback Press ANGLE repeatedly until the desired angle is selected Press ENTER button 1 2 3 ANGLE 1 3 Notes This function only works for discs having scenes recorded at different angles The angle number can be programmed beforehand the angle will be switched to the selected numbe...

Page 28: ...1 Repeat 1 All Repeat Off Repeat of track being played Repeat of entire disc contents Cancel repeat mode normal play Press A B during play at the point where repeat play is to start A Repeat indicator RPT is blinking on the Display window Refer to page 10 Press A B during play at the point where repeat play is to be concluded B Repeat play of the selection between points A and B starts To return t...

Page 29: ...ess to select the marker to be recalled cleared Press PLAY or ENTER button to play from marker s point Press CLEAR to clear a marker Play resumes from the point corresponding to the selected marker or the selected marker is cleared MARKER and MARKER SEARCH can only be engaged with the DVD playing The markers are not retained when pressing OPEN CLOSE or after the unit was switched to standby 1 2 3 ...

Page 30: ...ADVANCED OPERATION ...

Page 31: ...s press CLEAR button Use the skip up down buttons to review program entered Press PLAY button to play in the program order 1 2 3 4 The player plays the tracks in the disc in an order you specify INTRO play Note Intro play function is possible only with audio CDs It does not work with DVD movie discs Press DISPLAY during stop mode The Intro playback screen appears on the TV screen Press numeric key...

Page 32: ...de Two Channel Stream PCM Theatrical Disc Audio Rating Disc Subtitle English Disc Menu English English Theatrical Common procedures of initial settings SET UP Menu CLEAR Before setting up the DVD player initially it is advised to restore the unit s default settings To set player to the factory default setting follow instructions below Open tray Press the buttons CLEAR 2 5 8 0 and CLEAR in this exa...

Page 33: ...n a wide screen TV set is connected Played in FULL size Setting the wide screen TV to FULL mode is also necessary Note TV mode selection function is not provided at this time Press to select FLD Brightness and press to select the desired value and press ENTER button To exit SET UP menu Press RETURN or SETUP button 1 2 3 Disc Audio Rating Audio Output Disc Subtitle English Disc Menu English Change ...

Page 34: ...sh Change Password Speaker Output English TV Aspect TV Mode Auto FLT Brightness 100 16 9 Wide Two Channel PCM only Theatrical Disc Audio Rating Audio Output Disc Subtitle English Disc Menu English Change Password Speaker Output English TV Aspect TV Mode Auto FLT Brightness 100 16 9 Wide Multichannel PCM only Theatrical At the SET UP screen Each DVD disc has a variety of audio output options Set th...

Page 35: ...tion SETUP MENU Clear 1 3 2 Disc Audio Rating Audio Output Disc Subtitle English Disc Menu English Change Password PASSWORD Speaker Output English TV Aspect TV Mode Auto FLT Brightness 100 16 9 Wide Two Channel PCM only Theatrical Disc Audio Rating Audio Output Disc Subtitle English Disc Menu English Change Password PASSWORD Speaker Output English TV Aspect TV Mode Auto FLT Brightness 100 16 9 Wid...

Page 36: ...press to select Disc menu language 1 2 3 4 Disc Audio Rating Audio Output Disc Subtitle English Disc Menu English Change Password Speaker Output English TV Aspect TV Mode Auto FLT Brightness 100 16 9 Wide Two Channel PCM only Theatrical Disc Audio Rating Audio Output Disc Subtitle Disc Menu English Change Password Speaker Output English TV Aspect TV Mode Auto FLT Brightness 100 16 9 Wide Two Chann...

Page 37: ...player this DVD CD player cannot play that disc The Region number of your player is displayed on the back panel for instance 1 USA CANADA Region Management Information Notes on Unauthorized Discs You may not be able play back some DVD video discs on this player if they were purchased from outside your geographic area or made for business purposes When you try to play back an unauthorized disc Inva...

Page 38: ... on some sections of the picture depending on the TV This is not a malfunction This player is compatible with analog copy protect technology copy guard Some discs include a copy prevention signal and the copy guard system will prevent proper playback The remote control is too far from the player or the angle with the remote sensor is too sharp The batteries are exhausted Some TVs that have wireles...

Page 39: ...Audio Signal Cable 2 Video Signal Cable 1 Battery 2 AC 120 V 60 Hz US CANADA AC 230 V 50 Hz EUR 22 W 435 x 95 x 313 mm 3 75 kg NTSC US CANADA PAL EUR Semiconductor laser wavelength 650 nm 2 Hz to 22 kHz More than 105 dB EIAJ More than 92 dB EIAJ 0 008 Below measurable level less than 0 001 W PEAK EIAJ Temperature 41 F to 95 F Operation status Horizontal 1 0 V p p 75 Ω negative sync RCA jack x 1 Y ...

Page 40: ...o part of this publication may by reproduced stored or transmitted in any from without the written permission of NAD Electronics Limited T550 Manual GB Printed in Korea WWW NAD CO UK 1999 NAD ELECTRONICS LTD LONDON ENGLAND ...

Reviews: