INTRODUCTION
GETTING STARTED
WHAT’S IN THE BOX
Packed with your M22 you will find
•
A detachable mains power cord
•
Four pieces of magnetic feet
•
USB flash drive
•
Cleaning cloth
•
Quick Setup Guide
NOTE
Connect supplied USB flash drive to any compatible device to view the
M22 owner’s manual and Quick Setup Guide.
QUICK SETUP GUIDE
In case you simply cannot wait to experience the performance of your new
NAD M22 Stereo Power Amplifier, the following QUICK SETUP GUIDE is
recommended to help you get started.
Ensure that the M22 is unplugged before making any connections. It is
also advisable to power-down or unplug all associated components while
making or breaking any signal or AC power connections.
1
Set the external source’s volume control to minimum level. External
source can be a preamplifier, processor, amplifier or any applicable
device.
2
Set SELECT switch to BALANCED or SINGLE-ENDED. It is important that
the selection for ANALOG AUDIO INPUT must be the same for both L
(left) and R (right) channels.
3
Connect the analog audio output of your external source to the M22
rear panel’s BALANCED or SINGLE-ENDED analog audio input.
4
Connect your speakers to the LEFT AND RIGHT SPEAKERS terminals of
M22.
5
Plug-in to a mains power source the M22’s supplied mains power cord.
Connect corresponding end of the mains power cord to the AC mains
input of M22 and the plug connected to a mains power source.
6
Plug-in also to a mains power source the external source’s mains power
cord. Power up the external source ahead of the M22.
7
Set to ON the rear panel POWER switch of M22. The M22 goes to
standby mode as shown by the amber status condition of the Power
indicator.
8
Press
o
(Standby)
button for the M22 to be switched ON from standby
mode. The Power indicator will turn from amber to bright/white color.
The M22 is ready for operation.
9
Adjust the external source’s volume control according to desired
listening level.
SAVE THE PACKAGING
Please save the box and all of the packaging in which your M22 arrived.
Should you move or otherwise need to transport your M22, this is by far the
safest container in which to do so. We’ve seen too many otherwise perfect
components damaged in transit for lack of a proper shipping carton, so
please: Save that box!
NOTES ON INSTALLATION
Your NAD M22 should be placed on a firm, level surface.
Avoid placing the unit in direct sunlight or near sources of heat and
damp.
•
Allow adequate ventilation.
Do not place the unit on a soft surface like a carpet.
Avoid placing the M22 inside a closed cabinet that is not well ventilated
as this may compromise the M22’s performance and reliability.
Ensure that the M22 is unplugged before making any connections.
For best performance, use quality speaker leads of 16 gauge (1.5mm
2
)
thickness or more.
If the unit is not going to be used for some time, disconnect the plug
from the mains power source.
Use a dry cloth for cleaning.
DO NOT REMOVE THE COVER; THERE ARE NO USER-SERVICEABLE
PARTS INSIDE.
BARE WIRES AND PIN CONNECTORS
WARNING:
The terminals marked with this symbol
are hazardous live. External wiring connected to these
terminals requires installation by an instructed person or
the use of ready-made leads or cords.
Bare wires and pin sockets should be inserted into the hole in the shaft
of the terminal. Unscrew the speaker terminal’s plastic bushing until the
hole in the screw shaft is revealed. Insert the pin or bare cable end into
the hole and secure the cable by tightening down the terminal’s bushing.
Ensure bare wire from the speaker cables does not touch the back panel or
another socket. Ensure that there is only 1/2” (1cm) of bare cable or pin and
no loose strands of speakers wire.
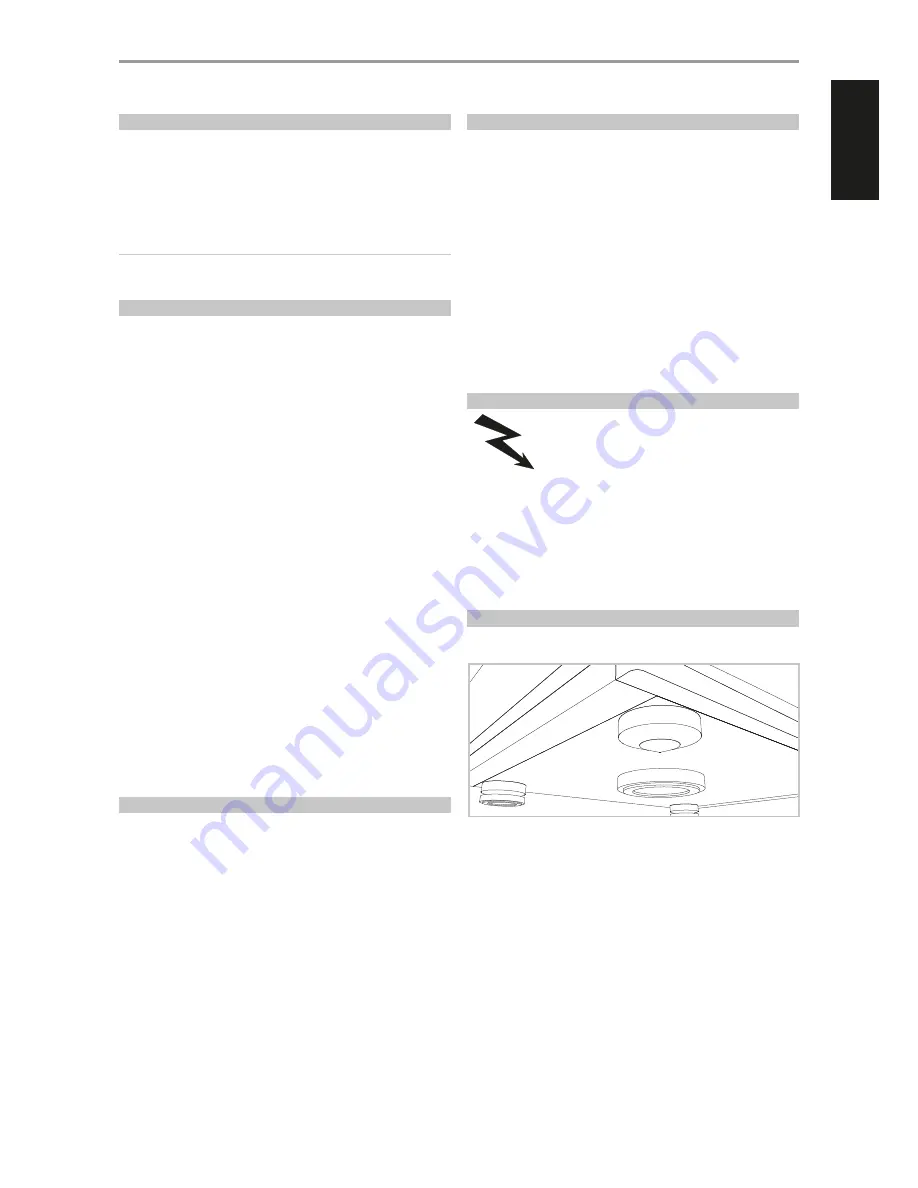
FEET INSTALLATION
The supplied magnetic feet can be easily installed by aligning and attaching
them to their corresponding foot shoe. Refer to the illustration below.
^
5
ENGLISH
FR
ANÇ
AIS
ESP
AÑOL
IT
ALIANO
DEUT
SCH
NEDERL
ANDS
SVENSK
A
РУ
ССКИЙ


