background image

5

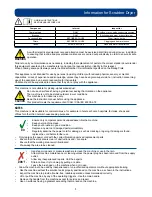
As with all electrical equipment care and attention must be exercised at all times during its use, in addition 

to ensuring that routine and preventative maintenance is carried out periodically in order to ensure its safe 

operation.


Failure to carry out maintenance as necessary, including the replacement of parts to the correct standard could render 

this equipment unsafe and the manufacturer can accept no responsibility or liability in this respect.

When ordering spare parts always quote the Model Number / Serial Number specified on the Rating Plate.

This appliance is not intended for use by persons (including children) with reduced physical, sensory or mental 

capabilities, or lack of experience and knowledge, unless they have been given supervision or instruction concerning 

use of the appliance by a person responsible for their safety.

Children should be supervised to ensure that they do not play with the appliance.

This machine is not suitable for picking-up hazardous dust.

Do not use on surfaces having a gradient exceeding that marked on the appliance.

The machine is not to be stored outdoors in wet conditions.

This machine is for indoor use only.

Read the instruction manual before using the appliance.

This product meets the requirements of CAN / CSA IEC 60335-2-72

NOTES

This machine is also suitable for commercial use, for example in hotels, schools, hospitals, factories, shops and 

offices for other than normal housekeeping purposes.

• 

 Ensure only competent persons unpack/assemble the machine.

• 

 Keep your machine clean.

• 

 Keep your brushes in good condition.

• 

 Replace any worn or damaged parts immediately.

• 

 Regularly examine the power cord for damage, such as cracking or ageing. If damage is found,         


 replace the cord before further use.

• 

Only replace the power cord with the correct Numatic approved replacement parts.

• 

 Ensure that the work area is clear of obstructions and / or people.

• 

 Ensure that the working area is well illuminated.

• 

 Pre-sweep the area to be cleaned.

• 

Use steam cleaners or pressure washers to clean the machine or use in the rain.

• 

Attempt machine maintenance or cleaning unless the power plug has been removed from the supply  

 outlet.

• 

Allow any inexperienced repairs. Call the experts

• 

Strain cable or try to unplug by pulling on cable.

• 

Leave the brush pad on the machine when not in use.

• 

Allow the machine to be used by inexperienced or un-authorised operators or without appropriate training.

• 

 Use the machine without the solution tanks properly positioned on the machine, as shown in the instructions.

• 

 Expect the machine to provide trouble-free, reliable operation unless maintained correctly.

• 

 Lift or pull the machine by any of the operating triggers - Use the main handle.

• 

 Remove the handle from the machine except for service and repair.

• 

 Use on surfaces having a gradient exceeding that marked on the machine.

ORIGINAL INSTRUCTIONS

READ MANUAL BEFORE USE

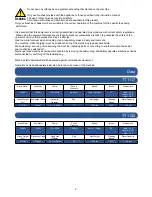
Information for Scrubber Dryer

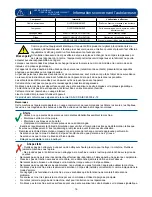
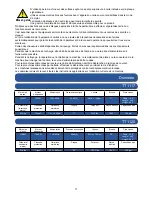
Component

Interval

Inspect for

Charging Lead

DAILY

Scuffing, cracks, splits, conductors showing

Brushes

DAILY

Bristle damage, wear, drive collar wear

Squeegee Blade

BEFORE EACH USE

Wear, cracks, splits

Filters

BEFORE EACH USE

Clogging and debris retention

Tanks 

AFTER EACH USE

Rinse dirty water tank after use

WARNING

CAUTION

DO

DON’T

Summary of Contents for TT 1117 / 100

Page 1: ...100 TT 1120 100 TT 1120 TT 1117 Original Instructions Warning Read instructions before using the machine Attention Lisez la notice avant d utiliser la machine www nacecare com Owner Instructions Mode...

Page 2: ...d eau propre Page 20 Control of Cleaning substances COSHH Page 9 Contr le des substances de nettoyage dangereuses pour la sant COSHH Page 20 Clean Water Tap On Off Page 9 Robinet marche arr t de l eau...

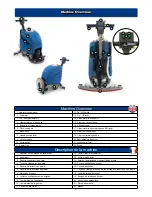
Page 3: ...8 Levier de levage du suceur 8 Levier de positionnement de poign e 19 Boutons de retenue du suceur 9 Commutateur de l aspiration 20 Suceur semi parabolique 10 Commutateur de la pompe 21 Filtre d eau p...

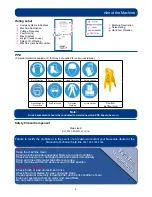
Page 4: ...n Eye Protection Protective Clothing Hi Vis Jacket Caution wet floor sign Note A risk assessment should be conducted to determine which PPE should be worn PPE Personal protective equipment that may be...

Page 5: ...r machine clean Keep your brushes in good condition Replace any worn or damaged parts immediately Regularly examine the power cord for damage such as cracking or ageing If damage is found replace the...

Page 6: ...ing servicing or maintaining the machine replacing parts or converting to another function the power source shall be switched off Mains operated machines shall be disconnected by removing the power pl...

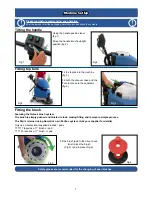
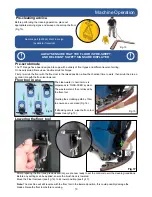
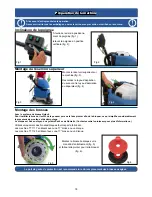
Page 7: ...twisted to lock making fitting and removal a simple process The Pad is retained using Numatic s own PadLoc system Ask your supplier for details Only use manufacturer supplied brushes pads TT 1117 requ...

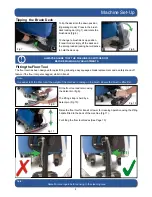
Page 8: ...f the machine is resting on the brush Ensure the brush is fitted first Fig 11 Fig 10 Fig 9 Fit the floor tool and retain using the detent pin fig 9 The lifting strap is held by a detent pin Fig 10 Not...

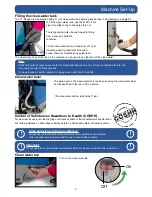
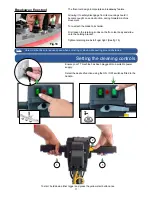
Page 9: ...to scrubber dryers Note Great care must be taken to ensure that contaminants leaves hair dirt etc are not allowed to enter the clean water during the filling process If using a bucket or similar ensur...

Page 10: ...soiling On heavily soiled floors use a double scrub technique First pre scrub the floor with the floor tool in the raised position allow the chemical time to work then scrub the area a second time wit...

Page 11: ...loor tool Fig 18 The floor tool design incorporates a breakaway feature Allowing it to safely disengage from its mounting should it become caught on an obstruction during forward machine movement To r...

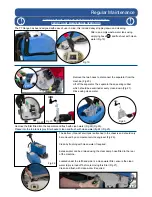
Page 12: ...e the filter fitted into the separator and flush with clean water Fig 22 Fig 23 Placed into the top tank is grey filter basket clean and flush with clean water fig 24 Fig 25 A Regular Maintenance The...

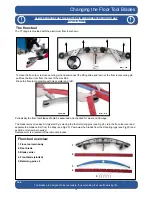
Page 13: ...ol assembly with clean water and refit Periodically the floor tool blades should be examined and checked for wear and damage The blade removal is easy Simply start by removing the four retaining pins...

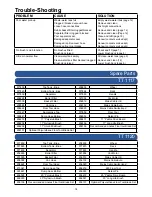
Page 14: ...839 Separator 577893 Handle 206265 Barrel Filter 321934 Vac Motor 207000 Basket Filter 236012 Mains Cable UK 208588 Vac Hose 236132 Mains Cable Euro 208624 Floor Tool Hose 236020 Mains Cable Switzerla...

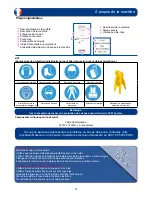
Page 15: ...ux V tements de protection Gilet haute visibilit Panneau de signalisation Attention sol mouill Remarque Il est n cessaire de mener une valuation des risques pour d cider de l EPI porter EPI quipement...

Page 16: ...e apr s utilisation NOTICE ORIGINALE LISEZ LE MODE D EMPLOI AVANT UTILISATION Mise en garde faire ne pas faire Remarques Cette machine est galement adapt e un usage commercial par exemple dans les h t...

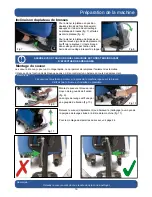
Page 17: ...u des disques appropri s la t che particuli re effectuer et garantissant le bon fonctionnement de la machine Il est essentiel que cet quipement soit mont correctement et utilis conform ment aux normes...

Page 18: ...blement le processus de montage et de d montage Le disque est fix au moyen du syst me PadLoc de Numatic Contactez votre fournisseur pour plus d informations Utilisez uniquement des brosses disques fou...

Page 19: ...tall e au pr alable Fig 11 Fig 10 Fig 9 Montez le suceur et bloquez le au moyen de la goupille de fixation fig 9 La sangle de levage est fix e par une goupille de fixation fig 10 Remarque Relevez le s...

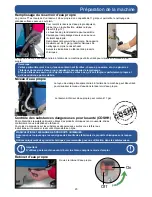
Page 20: ...rque Veillez particuli rement ce qu aucun contaminant feuilles cheveux poussi re etc ne p n tre l int rieur du r servoir d eau propre pendant le processus de remplissage Si vous utilisez un seau ou un...

Page 21: ...sales utilisez la technique de double lavage Pr lavez d abord le sol avec le suceur en position relev e laissez le temps au produit chimique d agir puis lavez la zone une seconde fois avec le suceur a...

Page 22: ...la poign e Fonction de d tachement du suceur Fig 18 Le suceur est dot d une fonction de d tachement Elle permet de le s parer en toute s curit de son support s il est bloqu par un obstacle pendant le...

Page 23: ...filtre du s parateur et rincez le l eau claire fig 22 et 23 Retirez le panier filtre gris du r servoir sup rieur nettoyez le et rincez le l eau claire fig 24 et 25 A Entretien r gulier Le r servoir i...

Page 24: ...t remettez le en place Les lamelles du suceur doivent tre examin es p riodiquement et l usure et l endommagement v rifi s La proc dure de d montage des lamelles est tr s simple Enlevez les 4 goupilles...

Page 25: ...arateur 577893 Poign e 206265 Filtre cartouche 321934 Moteur d aspiration 207000 Panier filtre 236012 C ble d alimentation Royaume Uni 208588 Tuyau d aspiration 236132 C ble d alimentation Europe 2086...

Page 26: ...26 TT 1117 TT 1120 120V 60Hz DRW 12545 A02 25 10 2012...

Page 27: ...27 Notes...

Page 28: ...28 TT 1117 TT 1120 244071 0213 A03 This machine has been packed with the following items Brush Floor Tool Hose Hook 38 mm 32 mm Adaptor Signed...

Reviews: