background image

Slovenščina

 - 39 -

Priročnik Za Uporabo Za Mobilno TV

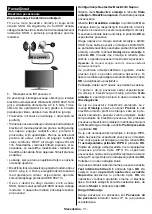
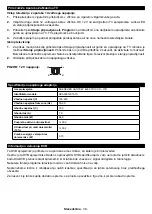
Vklop televizorja z uporabo 12-voltnega napajanja
1. 

Priklopite kabel s cigaretnim priključkom v vtičnico za cigaretni vžigalnik vašega avta.

2. 

Vključite drugo stran 12 -voltnega kabla v vtičnico DC 12 V na zadnji strani TV sprejemnika. Lučka LED 

za stanje pripravljenosti bo zasvetila.

3. 

Pritisnite tipko 

Stanje pripravljenosti,


P/-

 ali številčnico na daljinskem upravljalniku ali pritisnite 

gumb za upravljanje na TV. TV sprejemnik se bo vključil.

4. 

Za boljši sprejem po potrebi prilagodite položaj antene ali na novo namestite televizijske kanale.

Izklop televizorja
1. 

Za prikaz menija funkcije pritisnite tipko Stanje pripravljenosti ali gumb za upravljanje na TV. Izbrana je 

možnost 

Stanje pripravljenosti

. Pritisnite tipko in jo držite približno 2 sekundi, da aktivirate to možnost. 

Barva ikone možnosti se spremeni. Nato še enkrat pritisnite tipko. Televizor preklopi v stanje pripravljenosti.

2. 

Odklopite priključke kabla in napajalnega vtikača.


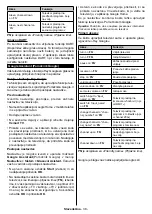
POZOR: 12 V napajanje: 

Specifikacije napajalnega adapterja

Ime proizvajalca

SHENZHEN HUNTKEY ELECTRIC CO., LTD

Identifikator modela

HKA09012070-7U

Vhodna napetost (V)

100-240

Vhodna napajalna frekvenca (Hz)

50-60

Izhodna napetost (V)

12,0

Izhodni tok (A)

7,0

Izhodna moč (W)

84,0

Povprečna aktivna učinkovitost

% 89,0 

Učinkovitost pri nizki obremenitvi 

(10 %)

% 90,2

Poraba energije v stanju brez 

obremenitve (W)

0,15

Informacija o delovanju DVB

Ta DVB sprejemnik je primeren za uporabo samo v državi, za katero je bil proizveden.
Čeprav je ta DVB sprejemnik skladen z najnovejšimi DVB specifikacijami, vam ne moramo jamčiti skladnost z 

bodočimi DVB prenosi zaradi sprememb, ki bi lahko bile vnesene v signal oddajnika in tehnologijo.
Nekatere funkcije digitalne televizije morda v vseh državah niso na voljo.
Neprenehoma  težimo  k  izboljševanju  naših  izdelkov,  specifikacije  se  lahko  spremenijo  brez  predhodnega 

obvestila.

Za nasvet, kje lahko kupite dodatno opremo, se prosimo povežite s trgovino, kjer ste nabavili opremo.

V+

V+

V-

V-

Summary of Contents for 32LA1200

Page 1: ......

Page 2: ...ienung 28 Verwendung der Programmliste 28 Einstellung der Kindersicherungseinstellungen 28 Elektronischer Programmführer 29 Teletext Dienste 29 Softwareaktualisierung 30 Fehlerbehebung Tipps 30 Typische Anzeigemodi für den PC Eingang 31 AV und HDMI Signalkompatibilität 31 Beim USB Modus unterstützte Dateiformate 32 Videodateiformate 32 Bilddateiformate 32 Audiodateiformate 32 Untertitel Dateiforma...

Page 3: ...igungen am Netzkabel Netzstecker können zu Bränden oder Stromschlägen führen Handhaben Sie das Netzkabel immer am Stecker trennen Sie das TV Gerät nicht durch Ziehen des Netzkabels vom Netz Berühren Sie niemals das Netzkabel den Stecker mit nassen Händen da dies einen Kurzschluss oder elektrischen Schlag verursachen kann Machen Sie niemals Knoten in das Netzkabel und binden Sie es nie mit anderen ...

Page 4: ... TV Geräts sicher tragen können Stellen Sie IMMER sicher dass das TV Gerät nicht über die Ränder des Möbelstücks hinausragt Klären Sie IMMER Ihre Kinder darüber auf dass es gefährlich ist auf hohe Möbelstücke zu klettern um das TV Gerät oder die Fernbedienung zu erreichen Verlegen Sie Kabel und Leitungen die an Ihr TV Gerät angeschlossen sind IMMER so dass sie nicht darüber gestolpert gezogen oder...

Page 5: ... Gerät nicht verwendet wird Dies wird auch den Energieverbrauch reduzieren Funktionen Fernbedienbares Farbfernsehgerät Vollintegriertes digitales terrestrisches Kabel Satelliten TV DVB T T2 C S S2 HDMI Eingänge um andere Geräte mit HDMI Anschlüssen zu verbinden USB Eingang OSD Menüsystem Rückseitige AV Eingänge für externe Geräte wie z B DVD Player PVR Videospiele usw Stereo Audiosystem Teletext K...

Page 6: ...Quelle empfängt geht das TV Gerät auf Standby Wenn Sie als nächstes das Fernsehgerät einschalten wird die folgende Meldung angezeigt Das TV Gerät hat sich automatisch in den Standby Modus geschaltet weil für längere Zeit kein Signal vorhanden war Sie können diese Funktion deaktivieren indem Sie die Option Kein Signal Timer im Menü Einstellungen System Geräteeinstellungen entsprechend einstellen Di...

Page 7: ...Sie die Taste drücken Das Fernsehgerät wechselt automatisch zur markierten Quelle Hinweis Die Hauptmenü OSD kann nicht über die Steuertasten aufgerufen werden Steuerung über die Fernbedienung Drücken Sie die Menu Taste auf der Fernbedienung um den Hauptmenübildschirm aufzurufen Verwenden Sie die Navigationstasten und die OK Taste zum Navigieren und Einstellen Drücken Sie die Return Back Taste bzw ...

Page 8: ...rbeiten markieren Sie diesen Timer wählen Sie die Registerkarte Ausgewählte Timer bearbeiten und drücken Sie OK Ändern Sie die Untermenüoptionen wie gewünscht und drücken Sie OK um Ihre Einstellungen zu speichern Um einen bereits eingestellten Timer abzubrechen markieren Sie diesen Timer wählen Sie die Registerkarte ausgewählten Timer löschen und drücken Sie OK Zur Bestätigung wird eine Meldung an...

Page 9: ...Anzeige auf der Fernbedienung möglicherweise nicht leuchtet wenn eine Taste gedrückt wird Eine Meldung auf dem Bildschirm wird angezeigt wenn die Batterien fast leer sind und müssen ersetzt werden Batterien dürfen niemals zu großer Hitze wie direkter Sonneneinstrahlung Feuer od dgl ausgesetzt werden Netzanschluss WICHTIG DasTV Gerät ist nur für den Betrieb mit einer 12 V Gleichstromversorgung ausg...

Page 10: ...wertung in die lokale Sammelstelle An einigen Sammelstellen können Sie Altgeräte kostenlos abgeben Hinweis Das unten abgebildete Pb Symbol für Akkus zeigt an dass dieser Akku Blei enthält Lizenzinformationen Die Begriffe HDMI und HDMI High Definition Multimedia Interface sowie das HDMI Logo sind Marken oder eingetragene Marken von HDMI Licensing Administrator Inc Hergestellt unter der Lizenz der D...

Page 11: ...H140 200 mW Länderbeschränkungen Dieses Gerät ist für Nutzung im Haushalt bzw Büro in allen EU Ländern und weiteren Ländern sofern diese die entsprechende EU Richtlinie anwenden ohne etwaige Einschränkungen mit Ausnahme der unten aufgelisteten gedacht Land Beschränkung Bulgarien Allgemeine Genehmigung für die Be nutzung im Freien und in öffentlichen Einrichtungen erforderlich Italien Wenn Sie das ...

Page 12: ...avigieren durch Menüs Inhalt usw und zeigt die Unterseiten im TXT Modus an wenn sie nach rechts oder links gedrückt wird 8 OK Bestätigt Benutzerauswahl hält die Seite im TXT Modus zeigt das Menü Kanäle an DTV Modus 9 Zurück Rücklauf Kehrt zum vorherigen Bildschirm zurück öffnet die Index Seite im TXT Modus Sucht schnell zwischen vorherigen und aktuellen Kanälen bzw Quellen 10 Netflix Startet die N...

Page 13: ...rwenden Bei Verwendung des Wandmontage Kits erhältlich bei verschiedenen Drittanbietern falls nicht mitgeliefert empfehlen wir Ihnen bevor Sie das TV Gerät an die Wand montieren alle Kabel an die Rückseite des TV Gerätes anzuschließen Sie dürfen nur dann das CI Modul einsetzen oder herausnehmen wenn das TV Gerät ABGESCHALTET ist Für die genaue Einstellung verweisen wir auf das Handbuch zum Modul J...

Page 14: ...ützten Funktionen des TV Gerätes am Bildschirm als Banner Information angezeigt oder die vorinstallierte Videodatei kann wiedergegeben werden Diese Option ist nur zur Verwendung in Geschäften gedacht Es wird empfohlen für die Verwendung zu Hause den Zuhause Modus auszuwählen Diese Option ist in Einstellungen System Sonstige verfügbar und Ihre Präferenz für diese Einstellung kann später geändert we...

Page 15: ... und drücken Sie OK um fortzufahren Warten Sie bis die Suche beendet ist Nun ist die Liste installiert Wenn Sie eine M7 Betreiberinstallation ausführen und dabei andere Parameter zur Satelliteninstallation als die Standardeinstellungen verwenden möchten wählen Sie für die Option Bevorzugter Suchlauf Manueller Sendersuchlauf und drücken Sie OK um fortzufahren Das Menü Antennen Typ wird eingeblendet...

Page 16: ... das TV Gerät anschließen WICHTIG Sichern Sie die Dateien Ihres Speichergerätes bevor Sie es mit dem Gerät verbinden Der Hersteller übernimmt keinerlei Haftung für beschädigte Dateien oder Datenverluste Unter Umständen sind bestimmte Arten von USB Geräten z B MP3 Player oder USB Festplattenlaufwerke Speichersticks mit diesem TV Gerät nicht kompatibel Das Fernsehgerät unterstützt FAT32 und NTFS For...

Page 17: ...Sie können die Timeshift Rücklauf Funktion benutzen nachdem Sie entweder zur normalen Wiedergabe oder schnellen Vorlauf Option zurückgekehrt sind Instantaufnahme Drücken Sie die Aufnahme Taste um die Aufnahme einer Sendung beim Ansehen sofort zu starten Drücken Sie Stopp Taste um die Aufnahme sofort abzubrechen Sie können im Aufnahme Modus die Sendung nicht wechseln Während der Aufzeichnung eines ...

Page 18: ...nschließen eines USB Speichergeräts an Ihr TV Gerät wird die Quellenleiste mit hervorgehobenem USBx angezeigt Drücken SieOK Das Medienbrowser Menü wird auf dem Bildschirm angezeigt Wählen Sie die Datei Ihrer Wahl und drücken Sie OK um sie anzuzeigen oder abzuspielen Sie können jederzeit über das Menü Quellen auf den Inhalt des angeschlossenen USB Geräts zugreifen Sie können auch die Source Taste a...

Page 19: ...altet das TV Gerät seine anderen Audioausgänge außer der Kopfhörerbuchse automatisch stumm und die Lautstärkeregler sind auf das angeschlosseneAudiogerät gerichtet UmARC zu aktivieren stellen Sie die Option Tonausgabe im Menü Einstellungen Ton auf HDMI ARC ein Hinweis ARC wird nur über den HDMI2 Eingang unterstützt Systemeigene Audiosteuerung Ermöglicht die Verwendung eines Audioverstärkers bzw Au...

Page 20: ...GA Modus nicht zentriert ist verwenden Sie diese Option um die Position des Bildes automatisch anzupassen Drücken Sie auf OK um die automatische Anpassung zu starten Horizontale Bildlage Mit dieser Option können Sie das Bild auf die rechte oder linke Seite des Bildschirms verschieben Vertikale Bildlage Diese Einstellung verschiebt das Bild vertikal auf dem Bildschirm nach Oben oder Unten Dot Uhr D...

Page 21: ...lligkeit manuell anzupassen Gamut Mapping Mit dieser Option können Sie den auf Ihrem Fernsehbildschirm angezeig ten Farbbereich einstellen Bei Einstellung auf Ein werden die Farben entsprechend dem Quellensignal eingestellt Bei Einstellung auf Aus wird standardmäßig die maximale Farbkapazität des Fernsehgeräts verwendet empfohlene Option Hinweis Diese Option ist möglicherweise abhängig vom TV Mode...

Page 22: ... Option als Aus eingestellt ist ändern sich die AVL Einstellungsoptionen Auto Nacht Normal und Aus sind verfügbar Im Auto Modus wechselt das Fernsehgerät gemäß den aktuellen Zeitinformationen automatisch in den Normal oder Nachtmodus Wenn keine Zeitinformationen verfügbar sind funktioniert diese Option immer als Normal Wenn das Fernsehgerät zum ersten Mal in den Nachtmodus wechselt nachdem Sie die...

Page 23: ...ktivität Drücken Sie WPS auf Ihrem WLAN Router Wenn Ihr Modem Router Gerät über WPS verfügt können Sie mit dieser Option eine direkte Verbindung zu ihm herstellen Markieren Sie diese Option und drücken Sie OK Gehen Sie zu Ihrem Modem Router und drücken Sie die dortige WPS Taste um die Verbindung herzustellen Diese Option ist verfügbar wenn der Netzwerktyp als Drahtloses Gerät eingestellt ist Inter...

Page 24: ...en Sendern Gefundene neue Sender werden angezeigt Dynamische Senderaktualisierung Wenn diese Option als aktiviert eingestellt ist werden die Änderungen für den Sender wie beispielsweise Frequenz Kanalname Untertitel Sprache usw bei laufendem TV Gerät automatisch angewandt Verfügbarkeit je nach Modell Installation des Home Transponders Mit Hilfe des Menüs können Sie den Haupt und Sicherungsparamete...

Page 25: ...erfügung Zum Aktivieren auf Ein setzen Die Vergrößerungsunterstützung wird durch langes Drücken der Zifferntaste 5 aktiviert oder deaktiviert Der erste obere linke Quadrant des Bildschirms wird gezoomt Nachdem die Vergrößerungsunterstützung aktiviert wurde wird der gezoomte Bereich durch langes Drücken der Zifferntasten 2 4 6 8 nach oben links rechts und unten verschoben Minikarte Die Minikarte is...

Page 26: ...ildschirminhalte gesammelt werden um Ihr Seherlebnis zu verbessern Mit dieser Option können Sie auf das Einstellungsmenü von Samba Interactive TV zugreifen die Nutzungsbedingungen von Samba TV die Datenschutzbestimmungen und Ihre Werbeeinstellungen usw überprüfen Für den Zugriff auf HTML basierte Einstellungen ist eine Internetverbindung erforderlich Sie können Interactive TV jederzeit über das Me...

Page 27: ...ualisierung Stellt sicher dass die Firmware des TV Geräts stets auf dem neusten Stand ist Drücken Sie OK um die Menüoptionen anzuzeigen Anwendungsversion Zeigt die aktuelle Software Version an Autom Abschaltung Einstellung der gewünschten Zeit wann das Gerät automatisch auf Standby geht wenn es nicht bedient wird Der Wert kann zwischen 1 und 8 Stunden in Schritten von jeweils 1 Stunde liegen Sie k...

Page 28: ...re an Anwendungspriorität Mit dieser Option können Sie Ihre Präferenz hinsichtlich der Priorität zwischen den Übertragungsanwendungen und den CICAM AppMMI Anwendungen festlegen Wenn eine CICAM in das Fernsehgerät eingelegt wird und ein Konflikt zwischen den Anwendungen auftritt wird der ausgewählten Anwendungsart die Priorität eingeräumt Hinweis Diese Funktion ist möglicherweise abhängig vom jewei...

Page 29: ... festlegen die angezeigt wird wenn die Programmliste geöffnet wird Die ausgewählten Filteroptionen werden oben im Menü Kanäle angezeigt Einstellung der Kindersicherungseinstellungen Die Optionen des Kindersicherungseinstellungen Menü dient dazu einzelnen Nutzern den Zugang zu bestimmtenProgrammen SendernundzurNutzungder Menüs zu verwehren Diese Einstellungen befinden sich im Menü Einstellungen Sys...

Page 30: ...gt Mit den Navigationstasten können Sie durch die Liste der Ereignisse blättern Drücken Sie die Zurück Zurückkehren Taste um die verfügbaren Optionen zu verwenden Markieren Sie die Registerkarte Filter und drücken Sie OK um die Filteroptionen zu sehen Um das Layout zu ändern markieren Sie Timeline Zeitplan und drücken Sie OK Sendungsoptionen Benutzen Sie die Navigationstasten um eine Sendung zu ma...

Page 31: ...sich nicht ein Vergewissern Sie sich dass das Netzkabel sicher in eine Steckdose eingesteckt ist Drücken Sie die Netztaste am TV Gerät Schlechte Bildqualität Prüfen Sie ob Sie das TV Gerät richtig eingeschaltet haben Niedriger Signalpegel kann Bildverzerrungen verursachen Bitte Überprüfen Sie die Antennenanschlüsse Überprüfen Sie ob Sie die richtige Frequenz eingegeben haben wenn diese durch manue...

Page 32: ...75Hz 7 1024x768 60Hz 8 1024x768 70Hz 9 1024x768 75Hz 10 1152x864 75Hz 11 1280x768 60Hz 12 1360x768 60Hz 13 1280x960 60Hz 14 1280x1024 60Hz 15 1280x1024 75Hz 16 1400x1050 60Hz 17 1440x900 60Hz 18 1440x900 75Hz 19 1920x1080 60Hz AV und HDMI Signalkompatibilität Quelle Unterstützte Signale Verfügbar RÜCKLAUF AV PAL O SECAM O NTSC4 43 O NTSC3 58 O YPbPr 480i 480p 60Hz O 576i 576p 50Hz O 720p 50Hz 60Hz...

Page 33: ...MPEG1 2 H 263 MPEG4 H 264 mkv MPEG 1 2 MPEG4 H 264 flv Sorenson Sp MPEG4 H 264 asf wmv MPEG4 WMV3 VC1 webm VP9 VP8 mp4 mov 3gpp 3gp ts trp tp mkv HEVC H 265 Bilddateiformate Erweiterung Technische Daten Auflösung Breite x Höhe jpg jpeg Grundlinie 8192 x 8192 Progressiv 3000 x 3000 bmp RGB 1 4 8 16 24 32 bit 8192 x 8192 RLE 4 8 bit png Graustufen 24 32 Bit pro Pixel Interlace Format Progressiv Audi...

Page 34: ...ub mkv ASS SSA TEXT dat mpg mpeg vob DVD Untertitel mp4 DVD Untertitel TEXT Unterstützte DVI Auflösungen Wenn Sie Zusatzgeräte über das DVI Adapterkabel DVI zu HDMI nicht im Lieferumfang enthalten an die Anschlüsse Ihres TV Gerätes anschließen können Sie die folgenden Auflösungsrichtwerte verwenden 56Hz 60Hz 66Hz 70Hz 72Hz 75Hz 640x400 x 640x480 x x x x 800x600 x x x x x 832x624 x 1024x768 x x x x...

Page 35: ...n zu starten Alle gefundenen Netzwerke werden aufgelistet Markieren Sie Ihr gewünschtes Netzwerk aus der Liste und drücken Sie OK Ein Netzwerk mit versteckter SSID kann von anderen Geräten nicht erkannt werden Wenn Sie eine Verbindung zu einem Netzwerk mit versteckter SSID herstellen möchten scrollen Sie in der Liste der erkannten drahtlosen Netzwerke nach unten markieren Sie die Option Neues Netz...

Page 36: ...Standby Modus im Menü Netzwerk Aufwachen Es ist notwendig dass sowohl das Gerät von dem die Netzwerknachricht an das TV Gerät gesendet wird als auch das TV Gerät an das gleiche Netzwerk angeschlossen sind Der Netzwerk Standby Modus wird nur auf Android Geräten unterstützt und kann ausschließlich über die YouTube bzw die Netflix App verwendet werden Um diese Funktion des TV Geräts zu verwenden soll...

Page 37: ...ültige Domain Stellen Sie sicher dass Sie bereits auf Ihrem PC mit einem autorisierten Benutzernamen Passwort angemeldet sind und weiterhin dass Ihre Domain im Medienserver Programm auf Ihrem PC aktiv ist bevor Sie mit dem Datenaustausch beginnen Eine ungültige Domain kann zu Problemen beim Browsen durch Dateien imAudio Video Sharing Modus führen Verwendung des Audio Video Sharing Netzwerkdienstes...

Page 38: ...hnellzugriff Schaltfläche und drücken Sie OK Taste Wählen Sie dann die Zum Schnellzugriff hinzufügen Option und drücken Sie OK Taste Füllen Sie die Felder für Name und Adresse aus markieren Sie OK und drücken Sie die OK Taste zum Hinzufügen Wenn Sie sich auf der Seite befinden die Sie der Kurzwahlliste hinzufügen möchten markieren Sie die Schaltfläche Vewd und drücken Sie die Taste OK Markieren Si...

Page 39: ...wird werden manche Schlüssel über die Anwendung gesteuert Beispielswiese kann die numerische Kanalauswahl möglicherweise in einer Teletext Anwendung nicht mehr laufen bei der die Nummer die Teletext Seiten anzeigen Für das HbbTV ist eine AV Streaming Fähigkeit der Plattform erforderlich Es gibt zahlreiche Anwendungen die VOD liefern Video On Demand auf Abruf und Catch Up TV Dienste Der Benutzer ka...

Page 40: ...weilige Informationsseite zu öffnen tippen Sie ein Programm an Auf der Informationsseite finden Sie detaillierte Informationen zu den von Ihnen gewählten Programmen Auf dieser Seite finden sich Tab wie z B Einzelheiten Cast Crew und Videos DETAILS Dieser Tab bietet eine Zusammenfassung und weitere Informationen über ausgewählte Programme CAST CREW Zeigt alle an diesem Programm Beteiligten an VIDEO...

Page 41: ...ng des Mikrofonbox für weitere Informationen Alexa Startbildschirm Sobald das Setup abgeschlossen ist wird die Alexa Startbildschirmfunktion integriert Diese Funktion ist ein Umgebungsbildschirm der angezeigt wird wenn keine Benutzeraktivität erkannt wird Auf dem Alexa Startbildschirm werden ein Hintergrundbild Uhrzeit und Datumsinformationen sowie Vorschläge für Sprachbefehle angezeigt Sie können...

Page 42: ...n Alexa turn off FN Schaltet den Fernseher aus Alexa play FN Startet die Medienwie dergabe Alexa pause FN Unterbricht die Medienwie dergabe Alexa resume FN Setzt die Medienwieder gabe fort Befehl Funktion Alexa stop FN Stoppt die Medienwie dergabe Alexa fast forward on FN Fördert Medien im schnel len Vorlaufmodus Alexa rewind on FN Spult Medien zurück Alexa set the volume of FN to 50 Setzt die Lau...

Page 43: ...uthentifizierungscode wird erstellt und auf dem Bildschirm angezeigt Geben Sie den Code ein den Sie auf dem TV Gerätin der Google Home Anwen dung sehen Sobald die Einrichtung abgeschlossen ist können Sie die Funktionen Ihres TV Geräts mit Google Assistent steuern Hinweis Stellen Sie sicher das die Geräte mit dem Internet verbunden sind Sie können nur ein TV Gerät mit Ihrem Konto verknüpfen Beispie...

Page 44: ...haltet in den Bereitschaftsmodus 2 Nehmen Sie die Kabelanschlüsse und den Netzstecker ab ACHTUNG 12 V Eingang Netzteilspezifikationen Herstellername SHENZHEN HUNTKEY ELECTRIC CO LTD Modellkennung HKA09012070 7U Eingangsspannung V 100 240 Eingangswechselstromfrequenz Hz 50 60 Ausgangsspannung V 12 0 Ausgangsstrom A 7 0 Ausgangsleistung W 84 0 Durchschnittliche aktive Effizienz 89 0 Effizienz bei ge...

Page 45: ...DMI High Definition Multimedia Interface DieserAnschluss liefert ein unkomprimiertes digitales Video und Audiosignal hoher Qualität Dabei werden Audio und Videosignale über einen einzigen Anschluss ausgegeben NTSC Der in den USA verwendete Standard für Zeilen TV Signale der auch in einigen anderen Ländern verwendet wird OSD Bildschirmanzeige On Screen Display Informationen wie Kanalnummer und Laut...

Page 46: ...al 16 Settings Menu Content 17 General TV Operation 24 Using the Channel List 24 Configuring Parental Settings 24 Electronic Programme Guide 24 Teletext Services 25 Software Upgrade 25 Troubleshooting Tips 25 PC Input Typical Display Modes 26 AV and HDMI Signal Compatibility 27 Supported File Formats for USB Mode 28 Video File Formats 28 Picture File Formats 28 Audio File Formats 28 Subtitle File ...

Page 47: ...t place objects filled with liquids such as vases cups etc on or over the TV e g on shelves above the unit Do not expose the TV to direct sunlight or do not place open flames such as lit candles on the top of or near the TV Do not place any heat sources such as electric heaters radiators etc near the TV set Do not place the TV on the floor and inclined surfaces To avoid danger of suffocation keep ...

Page 48: ...tion or through other apparatus with a connection to protective earthing and to a television distribution system using coaxial cable may in some circumstan ces create a fire hazard Connection to a television distribution system has therefore to be provided through a device providing electrical isolation below a certain frequency range galvanic isolator WALL MOUNTING WARNINGS Read the instructions ...

Page 49: ...riefly to switch your TV into standby mode picture state Note that once the Standby Mode Picture option is set as On the function of the Standby button on the remote will change After this you will need to press and hold the button to switch the TV into standby mode while the TV is in normal operating mode If there are more than 1 picture file available in the folder all picture files will be disp...

Page 50: ...2 seconds to activate this option The icon colour of the option changes when activated Then press the button once again to turn the TV off To turn on the TV Press the control button the TV will turn on To change volume Press the control button to display the function options menu and then press the button consecutively to move the focus to Volume or Volume option Press and hold the button for abou...

Page 51: ...mme guide menu using this option Refer to Electronic Programme Guide section for more information 3 2 Channels You can access the Channels menu using this option Refer to Using the Channel List section for more information 3 3 Timers You can set timers for future events using the options of this menu You can also review the previously created timers under this menu To add a new timer select the Ad...

Page 52: ...mote control may be impaired and the LED indicator on the remote may not illuminate when a button is pressed A message will be displayed on the screen when the batteries are low and must be replaced Batteries should not be exposed to excessive heat such as sunshine fire or the like Power Connection IMPORTANT The TV set is designed to operate on a 12 V DC supply For this an adaptor is used which gi...

Page 53: ...thorized Microsoft subsidiary Disposal Information European Union The symbol of the crossed out wheeled bin shown on the product or its packaging means that the device must not be disposed of with other household waste but requires separate collection You can dispose of the device free of charge at your local waste return and collection system The addresses can be obtained from your responsible ci...

Page 54: ...0 5250 MHz CH36 CH48 200 mW 5250 5350 MHz CH52 CH64 200 mW 5470 5725 MHz CH100 CH140 200 mW Country Restrictions This device is intended for home and office use in all EU countries and other countries following the rele vant EU directive without any limitation except for the countries mentioned below Country Restriction Bulgaria General authorization required for outdoor use and public service Ita...

Page 55: ...es frames backwards in media such as movies 14 Record Records programmes 15 Play Starts to play selected media 16 Pause Pauses the media being played starts timeshift recording 17 Stop Stops the media being played 18 Fast Forward Moves frames forward in media such as movies 19 Prime Video Launches the Amazon Prime Video application 20 YouTube Launches the YouTube application 21 Exit Closes and exi...

Page 56: ...io cable for audio connection When using the wall mounting kit available from a third party in the market if not supplied we recommend that you plug all your cables into the back of the TV before mounting on the wall Insert or remove the CI module only when the TV is SWITCHED OFF You should refer to the module instruction manual for details of the settings The Each USB input of your TV supports de...

Page 57: ...our selection and press OK to continue The picture mode selection screen will then be displayed In order for your TV to consume less energy and be more environmentally friendly select Natural and press OK to continue You can change your selection later using the Mode option in the Settings Picture menu Depending on the model of your TV and the country selection Privacy Settings menu may appear at ...

Page 58: ...ct this antenna type Press OK to continue Select an available satellite on the next screen and press OK to scan for services Single Satellite Cable If you have multiple receivers and a single satellite cable system select this antenna type Press OK to continue Configure settings by following instructions on the next screen Press OK to scan for services DiSEqC switch If you have multiple satellite ...

Page 59: ...ter however these files will not be available to be played on a computer You can play the recordings only via your TV Lip Sync delay may occur during the timeshifting Radio record is supported The TV can record programmes up to ten hours Recorded programmes are split into 4GB partitions If the writing speed of the connected USB disk is not sufficient the recording may fail and the timeshifting fea...

Page 60: ...g your USB drive will erase ALL the data on it and it s file system will be converted to FAT32 In most cases operation errors will be fixed after a format but you will lose ALL your data If USB disk writing speed too slow to record message is displayed on the screen while starting a recording try restarting the recording If you still get the same error it is possible that your USB disk does not me...

Page 61: ...n under the Settings System Device Settings menu accordingly The TV supports ARC Audio Return Channel This feature is an audio link meant to replace other cables between the TV and an audio system A V receiver or speaker system When ARC is active the TV will mute its other audio outputs except the headphone jack automatically and volume control buttons are directed to connected audio device To act...

Page 62: ...the top or bottom of the screen Dot Clock Dot Clock adjustments correct the interference that appear as vertical banding in dot intensive presentations like spreadsheets or paragraphs or text in smaller fonts Phase Depending on the input source computer etc you may see a hazy or noisy picture on the screen You can use phase to get a clearer picture by trial and error Advanced Settings Dynamic Cont...

Page 63: ...one socket will be set to maximum which could damage your hearing If HDMI ARC option is selected CEC feature will be enabled Note Depending on the selected option some items in Sound menu will appear as grayed out and will be unavailable AVL Automatic Volume Limiting Sets the sound to obtain fixed output level between programmes If the Dolby Audio menu item is set to an option other than Off the A...

Page 64: ... section for more information Press WPS on your wifi router If your modem router device has WPS you can directly connect to it using this option Highlight this option and press OK Go to your modem router device and press the WPS button on it to make the connection This option will be available if the Network Type is set as Wireless Device Internet Speed Test Start a speed test to check your connec...

Page 65: ...ation settings menu Standby Mode Search Your TV will search for new or missing channels while in standby Any new found broadcasts will be shown Dynamic Channel Update If this option is set as Enabled the changes on the broadcasts such as frequency channel name subtitle language etc will be applied automatically while watching Availability depends on model Setup Home Transponder Using this menu you...

Page 66: ...irst top left quadrant of the screen will be zoomed After the magnification support is enabled long press of the numeric buttons 2 4 6 8 will move the zoomed area to up left right and down Minimap Minimap is enabled and deactivated by default It will be activated when Magnification feature is enabled With this option you can prevent magnification feature from displaying the minimap Click Sound Thi...

Page 67: ...enable or disable the feature CEC Auto Power On This function allows the connected HDMI CEC compatible device to turn on the TV and switch to its input source automatically Press Left or Right button to enable or disable the feature No Signal Timer If your TV does not receive any input signal e g from an aerial or HDMI source for 3 minutes it will go into standby mode You can enable or disable thi...

Page 68: ...Mode Select this mode for store display purposes Whilst Store Mode is enabled some items in the TV menu may not be available For some models Enabled with video option may also be available If this option is set the TV will switch to store mode and the pre installed video file will be played back Audio Video Sharing This feature allows you to share files stored on your smartphone or tablet pc If yo...

Page 69: ... is set TV gets the maturity information from the broadcast and if this maturity level is disabled prohibits access to the broadcast Note If the country option in the First Time Installation is set as France Italy or Austria Maturity Lock s value will be set to 18 as default Child Lock If this option is set to On the TV can only be controlled by the remote control In this case the control buttons ...

Page 70: ...recording or timer on the current channel It is not possible to set timer or record timer for two or more individual events at the same time interval Teletext Services Press the Text button to enter Press again to activate mix mode which allows you to see the teletext page and the TV broadcast at the same time Press once more to exit If available sections in the teletext pages will become colour c...

Page 71: ... Position and V Position options Select the desired option and use Left and Right directional buttons on the remote to set Recording unavailable To record a programme you should first correctly connect a USB storage device to your TV while the TV is switched off You should then switch on the TV to enable recording feature If you cannot record check the storage device is correctly formatted and the...

Page 72: ... 480i 480p 60Hz O 576i 576p 50Hz O 720p 50Hz 60Hz O 1080i 50Hz 60Hz O 1080p 24Hz 25Hz 30Hz 50Hz 60Hz O X Not Available O Available In some cases a signal on the TV may not be displayed properly The problem may be an inconsistency with standards from the source equipment DVD Set top box etc If you do experience such a problem please contact your dealer and also the manufacturer of the source equipm...

Page 73: ...p MPEG1 2 H 263 MPEG4 H 264 mkv MPEG 1 2 MPEG4 H 264 flv Sorenson Sp MPEG4 H 264 asf wmv MPEG4 WMV3 VC1 webm VP9 VP8 mp4 mov 3gpp 3gp ts trp tp mkv HEVC H 265 Picture File Formats Extension Specification Resolution width x height jpg jpeg Baseline 8192 x 8192 Progressive 3000 x 3000 bmp RGB 1 4 8 16 24 32 bit 8192 x 8192 RLE 4 8 bit png Grayscale 24 32 bit per pixel Interlace format Progressive Au...

Page 74: ...on mkv VOBSub mkv ASS SSA TEXT dat mpg mpeg vob DVD Subtitle mp4 DVD Subtitle TEXT Supported DVI Resolutions When connecting devices to your TV s connectors by using DVI converter cable DVI to HDMI cable not supplied you can refer to the following resolution information 56Hz 60Hz 66Hz 70Hz 72Hz 75Hz 640x400 x 640x480 x x x x 800x600 x x x x x 832x624 x 1024x768 x x x x x 1152x864 x x x 1152x870 x ...

Page 75: ... detected wireless networks highlight the Add New Network option and press OK Enter the name of the network and select the security type using the related options to connect Note If the modem supports N mode you should set N mode settings If the selected network is password protected enter the correct key by using the virtual keyboard You can use this keyboard via the directional buttons and the O...

Page 76: ...des the ability to use your TV as wireless display device Using with mobile devices There are different standards which enable sharing of screens including graphical video and audio content between your mobile device and TV Then press the Source button on the remote and switch to Wireless Display source A screen appears stating that the TV is ready for connection Open the sharing application on yo...

Page 77: ... installed on your TV from the Home menu Press the Menu button on the remote Home menu will be displayed Highlight an app and press OK to launch In order to manage the apps installed on your TV you can use the More Apps option in the TV menu You can add an installed app to Home menu launch or remove it Highlight an app and press OK to see the available options You can add new apps from the applica...

Page 78: ...be noted that the red button switching capability is provided by the application and some application may behave differently other colour buttons such as green yellow blue may be defined for some other functions e g shurtcuts If you switch to another channel while an HbbTV application is active either in red button icon mode or full UI mode the following scenarios can occur The application can con...

Page 79: ...choose the channel list source to be used in the application The options are TV List and Custom List Additionally you can activate Remember my choice option to set the selected channel list source as a constant choice In this case if the selected source is available it will be used in the application Version No Displays the current version of the application Detail Page To open detail page tap on ...

Page 80: ... detected A background image time and date information and voice command suggestions will be displayed on the Alexa Home Screen You can use the Alexa Home Screen option in the Settings System Voice Assistant Alexa Built in menu to configure the settings of this feature You can set to one of the inactivity periods to enable or set to Off to disable Alexa Home Screen is displayed only when web brow ...

Page 81: ...e TV switches to the channel with the specified name Command Function Alexa channel up on FN The TV switches to the next higher channel if any available Alexa channel down on FN The TV switches to the next lower channel if any available Alexa next channel on FN The TV switches to the next channel on the channel list FN is the abbreviation for Friendly Name Amazon DART Once the setup is complete th...

Page 82: ...sume on FN Resumes media playback stop on FN Stops media playback volume up on FN Increases volume volume down on FN Decreases volume set mute volume on FN Mutes sound switch input to input_ name on FN The TV switches to the input source with the spec ified name e g HDMI 1 switch to input_name on FN change channel to chan nel_number on FN The TV switches to the channel with the specified number e ...

Page 83: ...V will switch into standby mode 2 Unplug cable connectors and power plugs ATTENTION 12 V Input AC Adaptor Specifications Manufacturer Name SHENZHEN HUNTKEY ELECTRIC CO LTD Model Identifier HKA09012070 7U Input Voltage V 100 240 Input AC Frequency Hz 50 60 Output Voltage V 12 0 Output Current A 7 0 Output Power W 84 0 Average Active Efficiency 89 0 Efficiency at Low Load 10 90 2 No load Power Consu...

Page 84: ...vitve 17 Splošno o upravljanju televizorja 25 Uporaba seznama kanalov 25 Nastavitve starševskega nadzora 25 Elektronski programski vodnik 25 Storitve teleteksta 26 Posodobitev Programske Opreme 26 Odpravljanje težav in nasveti 27 Tipični načini prikaza slike na PC vhodu 28 Združljivost signalov AV in HDMI 28 Formati datotek podprti v načinu USB 29 Formati video datotek 29 Formati slikovnih datotek...

Page 85: ...e potrebno zamenjati To lahko stori le usposobljena oseba TV sprejemnik naj ne bo izpostavljen kapljanju ali pršenju tekočin ter nanj ali nadenj ne postavljajte posod napolnjenih s tekočinami kot so na primer vaze skodelice itd npr na police nad televizorjem TV sprejemnika ne izpostavljajte neposredni sončni svetlobi in nanj ali v njegovo bližino ne postavljajte gorečih predmetov kot so na primer ...

Page 86: ...aprava ki je ozemljena preko vtičnice ali prek kake druge naprave ki je ozemljena in hkrati priključena na ponudnika prek koaksialnega kabla lahko v nekaterih primerih predstavlja požarno nevarnost Priključitev na televizijski distribucijski sistem je zato treba zago toviti z napravo ki zagotavlja električno izolacijo pod določenim frekvenčnim območjem galvanski izolator OPOZORILA ZA STENSKO MONTA...

Page 87: ...nosti v meniju Nastavitve Sistem Več na Vklop Ta možnost je privzeto nastavljena na Off Izklop V korenskem imeniku shranjevalne naprave USB ustvarite ločeno mapo z imenom standby_picture in prekopirajte datoteke ki jih želite uporabiti v to mapo nato pa priključite shranjevalno napravo USB na televizor Na kratko pritisnite gumb Stanje pripravljenosti na daljinskem upravljalniku da svoj televizor p...

Page 88: ... uporabite funkcijo ali odprete podmeni Če želite izbrati drugo možnost funkcije morate najprej deaktivirati nazadnje aktivirano možnost Za deaktiviranje pritisnite tipko in jo držite Ob deaktiviranju se spremeni barva ikone možnosti Če želite zapreti meni z možnostmi funkcij približno 5 sekund ne pritisnite tipke Meni z možnostmi funkcij izgine Izklop televizorja Pritisnite upravljalno tipko da s...

Page 89: ...ev To naredite tako da označite želeno možnost in pritisnete smerno tipko Navzdol na daljinskem upravljalniku Če vidite zapis Dodaj na domačo stran to pomeni da to možnost lahko dodate na domačo stran 2 Iskanje Ta možnost omogoča iskanje za kanale vodnik menije TV aplikacije splet YouTube in videoposnetke Pritisnite OK in z virtualno tipkovnico vnesite ključno besedo Nato označite OK in pritisnite...

Page 90: ...ne možnosti virov Vstavljanje baterij v daljinski upravljalnik Odstranite pokrovček na hrbtni strani da odprete pre dal za baterije Namestite dve AAA bateriji Prepričajte se da oznaki in ustrezata označbam pazite na pravilno polarnost Ne mešajte starih in novih baterij Baterijo nadomestite samo z enako oziroma z enako vredno Znova zaprite pokrovček Ko so baterije skoraj prazne se lahko delovanje d...

Page 91: ...P Ta izdelek je zaščiten z določenimi pravicami intelektualne lastnine podjetja Microsoft Uporaba ali distribucija takšne tehnologije zunaj tega izdelka je prepovedana brez licence podjetja Microsoft ali pooblaščene podružnice podjetja Microsoft Informacije glede ravnanja z odpadnimi napravami Evropska unija Simbol prečrtanega smetnjaka na kolesih ki je prikazan na izdelku ali njegovi embalaži pom...

Page 92: ...50 MHz CH36 CH48 200 mW 5250 5350 MHz CH52 CH64 200 mW 5470 5725 MHz CH100 CH140 200 mW Omejitve za posamezne države Ta naprava je namenjena za rabo v domačem okolju in v pisarnah v vseh državah ES in v drugih državah v katerih velja zadevna direktiva ES brez omejitev razen v državah omenjenih v nadaljevanju Država Omejitev Bolgarija Zahteva se splošno dovoljenje za uporabo na prostem in javne sto...

Page 93: ... desno ali levo tipko 8 OK Potrdi izbiro uporabnika zadrži stran v načinu TXT pregleda meni Kanali način DTV 9 Nazaj vrnitev Za vrnitev na prejšnji zaslon na prejšnji meni ali za odpiranje strani kazala v načinu TXT Hitra menjava med prejšnjim in trenutnim kanalom ali virom 10 Netflix Zažene aplikacijo Netflix 11 Moja tipka 1 12 Barvne tipke Za funkcije barvnih tipk si oglejte navodila na zaslonu ...

Page 94: ...hode povezati vtikačem avdio kabla PC YPbPr Pri uporabi seta za montažo na zid ki je voljo od tretjih na trgu če že ni priložen vam priporočamo da priključite vse kable na televizor pred montažo na zid Vstavite ali odstranite modul CI samo takrat ko je TV IZKLOPLJEN Za podrobne informacije o teh nastavitvah glejte navodila za uporabo modula Vsak vhod USB vašega TV sprejemnika podpira naprave moči ...

Page 95: ...meni Izberite želeni način in za nadaljevanje pritisnite OK Nato se prikaže zaslon za izbiro načina slike Če želite da vaš televizor porabi manj energije in je bolj okolju prijazen izberite Naravno in za nadaljevanje pritisnite OK Svojo izbiro lahko pozneje spremenite z možnostjo Način v meniju Nastavitve Slika Glede na model vašega televizorja in izbire države se zdaj lahko prikaže meni Nastavitv...

Page 96: ...tisnite OK da poiščete programe Kabel z eno satelitsko anteno Če imate več sprejemnikov in sistem kabel z eno satelitsko anteno izberite to vrsto antene Za nadaljevanje pritisnite OK Konfigurirajte nastavitve tako da sledite navodilom na zaslonu Za iskanje programov pritisnite tipko OK Stikalo DiSEqC Ak máte viacero satelitných parabol a DiSEqC spínač vyberte tento typ antény Nato nastavite različ...

Page 97: ... Posnetke lahko predvajate le na TV sprejemniku Med uporabo časovnega zamika bo morda prišlo do zamika sinhronizacije govora Podprto je tudi snemanje radijskih oddaj TV lahko snema programe do največ deset ur Posneti programi so razdeljeni na razdelke velikosti 4 GB Če hitrost zapisovanja na priključen disk USB ni zadostna lahko snemanje ne uspe in funkcija snemanja s časovnim zamikom morda ne bo ...

Page 98: ... lahko uporabite to možnost Ko je možnost Formatiranje diska označena pritisnite tipko OK Na zaslonu se bo prikazal meni ki bo zahteval vnos kode PIN Ko vnesete kodo PIN se bo prikazalo sporočilo za potrditev Za pričetek formatiranja pomnilniške enote USB izberite Da in pritisnite OK Za preklic izberite Ne in pritisnite OK Privzeta številka PIN je lahko nastavljena na 0000 ali 1234 Če ste med Prvo...

Page 99: ...vne funkcije Če želite prekiniti to delovanje in znova upravljati TV prek daljinskega upravljalnika na daljinskem upravljalniku pritisnite tipko 0 nič in jo držite 3 sekunde Funkcijo CEC lahko onemogočite tako da ustrezno nastavite povezano možnost v meniju Nastavitve Sistem Nastavitve naprave TV sprejemnik podpira funkcijo ARC Audio Return Channel povratni avdio kanal Ta funkcija je zvočna poveza...

Page 100: ...no vertikalno gor ali dol Frekvenca pik Nastavitev Frekvenca osveževanja lahko popravi napake ki se pojavijo kot navpični vertikalni trakovi v slikah z visoko ločljivostjo kot so preglednice besedilo ali odstavki z majhnimi črkami Faza Odvisno od vira vhoda računalnik ipd je lahko slika na zaslonu nejasna ali motna S pomočjo preskušanja lahko sliko izboljšate Napredne nastavitve Dinamični kontrast...

Page 101: ...televizorja priporočena možnost Opomba Ta možnost morda ni na voljo odvisno od modela in funkcij televizorja HDMI s polnim spektrom Ta funkcija bo vidna ob predvajanju z vira HDMI To funkcijo lahko uporabite da izboljšate prikaz črnine na sliki Ponastavitev Ponastavi nastavitve slike na tovarniške nastavitve Razen v načinu Igre Nekateri elementi v meniju Slika ne bodo na voljo ko boste v načinu VG...

Page 102: ...ka točka Dolby Audio nastavljena na karkoli drugega kot Izključeno se možnosti AVL spremenijo Na voljo bodo možnosti Samodejno Noč Normalno in Izključeno V načinu Samodejno bo televizor samodejno preklopil v način Normalno ali Noč glede na trenutne informacije o času Če informacije o času niso na voljo bo televizor vedno deloval v načinu Normalno Ko televizor ob nastavitvi te možnosti na Samodejno...

Page 103: ...zljivost Pritisnite WPS na svojem usmerjevalniku Wi Fi Če ima vaš modem usmerjevalnik WPS ga lahko preko te funkcionalnosti povežete neposredno Izberite to možnost in pritisnite OK Pojdite do vašega usmerjevalnika in za vzpostavitev povezave pritisnite tipko WPS Ta možnost je na voljo če je možnost Vrsta omrežja nastavljena na Brezžična naprava Test hitrosti interneta Zaženite preskus hitrosti in ...

Page 104: ...itvenih nastavitev Iskanje v načinu stanja pripravljenosti Vaš TV bo v času stanja pripravljenosti iskal nove ali manjkajoče kanale Če bodo najedene nove postaje se bodo prikazale Dinamična posodobitev kanalov Če je ta možnost nastavljena na omogočeno bodo spremembe kot so na primer frekvenca ime kanala jezik podnapisov itd izvedene samodejno med predvajanjem Razpoložljivost je odvisna od modela N...

Page 105: ...kom na numerični gumb 5 Prvi zgornji levi kvadrant zaslona se poveča Ko je podpora za povečavo omogočena z dolgim pritiskanjem numeričnih gumbov 2 4 6 8 premaknete povečano območje navzgor levo desno in navzdol Minipreslikava Minipreslikava je privzeto omogočena in deaktivirana Aktivira se ko je omogočena funkcija Povečava S to možnostjo lahko preprečite da bi funkcija povečava prikazala minipresl...

Page 106: ...možnost morda ni na voljo odvisno od izbrane države med postopkom prve namestitve modela televizorja in njegovih funkcij Nastavitve naprave CEC S to nastavitvijo lahko v celoti omogočite in onemogočite CEC funkcionalnost S tipkama Levo ali Desno lahko to funkcijo omogočite ali onemogočite Samodejni vklop CEC Ta funkcija omogoča da priključene združljive naprave HDMI CEC vklopite na TV in samodejno...

Page 107: ...st se uporablja za izbiro načinov podnapisov na zaslonu podnapisi DVB podnapisi Teletekst če so na voljo oboji Prednastavljeni so podnapisi DVB Ta možnost je na voljo samo če je za državo izbrana Norveška Ključ Biss Biss je sistem kodiranja satelitskega signala ki ga uporabljajo nekateri ponudniki Če morate pri sprejemanju vnesti ključ BISS lahko uporabite nastavitev ključa Biss Označite Biss Key ...

Page 108: ...omogoči ali onemogoči dostop do vseh menijev ali namestitvenih menijev televizorja Starostna zaščita Če je ta možnost omogočena TV sprejemnik prikaže oceno primerne starosti oddaje Če je ta starost onemogočena dostop do oddaje ali programa ne bo mogoč Opomba Če je bila pri Prvi namestitvi država nastavljena na Francijo Italijo ali Avstrijo bo Starostna zaščita privzeto nastavljena na 18 let Zaščit...

Page 109: ...Če želite preklicati že nastavljeno snemanje označite dogodek in pritisnite tipko OK ter izberite možnost Izbriši čas za snemanje Časovnik Časovnik za snemanje bo preklican POMEMBNO Na TV sprejemnik priključite disk USB ko je TV izključen Nato vklopite TV da omogočite funkcijo snemanja Opombe Medtem ko na trenutnem kanalu poteka aktivno snemanje ali je aktiven časovnik ne boste mogli preklopiti na...

Page 110: ...rabljene Zamenjajte baterije Baterije so morda vstavljene napačno Preberite si razdelek Vstavljanje baterij v daljinski upravljalnik Ni signala ali vhodnega vira Morda ni priključena nobena vhodna naprava Preverite kable AV in povezavo z vašo napravo Preverite ali je naprava vključena Slika ni centrirana pri viru VGA Če želite da televizor samodejno centrira sliko pojdite v meni Položaj PC v menij...

Page 111: ...15 1280x1024 75Hz 16 1400x1050 60Hz 17 1440x900 60Hz 18 1440x900 75Hz 19 1920x1080 60Hz Združljivost signalov AV in HDMI Vir Podprti signali Na voljo Zadnja AV PAL O SECAM O NTSC4 43 O NTSC3 58 O YPbPr 480i 480p 60Hz O 576i 576p 50Hz O 720p 50Hz 60Hz O 1080i 50Hz 60Hz O HDMI 480i 480p 60Hz O 576i 576p 50Hz O 720p 50Hz 60Hz O 1080i 50Hz 60Hz O 1080p 24Hz 25Hz 30Hz 50Hz 60Hz O X Ni na voljo O Na vol...

Page 112: ... 3gpp MPEG1 2 H 263 MPEG4 H 264 mkv MPEG 1 2 MPEG4 H 264 flv Sorenson Sp MPEG4 H 264 asf wmv MPEG4 WMV3 VC1 webm VP9 VP8 mp4 mov 3gpp 3gp ts trp tp mkv HEVC H 265 Formati slikovnih datotek Pripona Specifikacija Ločljivost širina x višina jpg jpeg Osnovno 8192 x 8192 Progresivno 3000 x 3000 bmp RGB 1 4 8 16 24 32 bit 8192 x 8192 RLE 4 8 bit png sivine 24 32 bitov na slikovno piko Format prepletanja...

Page 113: ...ikacija mkv VOBSub mkv ASS SSA TEXT dat mpg mpeg vob DVD podnapisi mp4 DVD Subtitle TEXT Podprte DVI ločljivosti Ko boste na priključke TV sprejemnika priključevali naprave s pomočjo kabla z DVI pretvornikom ni priložen glejte naslednje informacije o ločljivosti 56Hz 60Hz 66Hz 70Hz 72Hz 75Hz 640x400 x 640x480 x x x x 800x600 x x x x x 832x624 x 1024x768 x x x x x 1152x864 x x x 1152x870 x 1280x768...

Page 114: ...ostavitev povezave Druge naprave ne morejo zaznati omrežja s skritim SSID Če se želite povezati v omrežje s skritim SSID se pomaknite navzdol po seznamu zaznanih brezžičnih omrežij označite možnost Dodaj novo omrežje in pritisnite OK Vnesite ime omrežja in izberite vrsto zaščite z uporabo povezanih možnosti za povezavo Opomba Če modem podpira način N morate nastaviti nastavitve načina N Če je izbr...

Page 115: ...rovanja Delovanje nekaterih na tržišču dostopnih naprav se lahko razlikuje zaradi zgradbe programske opreme Da bi lahko uporabljali Omrežni način pripravljenosti fz boljšo zmogljivostjo preverite ali ima vaša naprava najnovejšo različico vgrajene programske opreme Če želite da vaš televizor v načinu pripravljenosti porabi še manj energije lahko to funkcijo onemogočite tako da možnost Omrežni način...

Page 116: ...robne informacije o konfiguraciji glejte poglavje Brezžična povezljivost 3 Omogočitev skupne rabe avdio in video vsebin Pojdite v meni Nastavitve Sistem Več in omogočite možnost Skupno rabo zvočnih in video vsebin 4 Predvajanje skupnih datotek na medijskem brskalniku S smernimi tipkami označite možnost Skupna raba zvočnih in video vsebin v meniju Viri in pritisnite OK Prikazale se bodo razpoložlji...

Page 117: ...a Vsa spletna mesta morda ne bodo podprta Glede na spletno mesto lahko pride do težav z vsebinami Pod določenimi pogoji morda video vsebin ne bo mogoče predvajati Sistem HBBTV HbbTV ali Hibridni širokopasovni TV sprejem je nov industrijski standard ki neopazno združuje televizijske storitve dobavljene preko oddajnikov in storitve dobavljene preko širokopasovne povezave Uporabnikom omogoča dostop d...

Page 118: ...ite na sličico kanala in pridržite Prikazan bo seznam kanalov vi pa lahko izberete kateri kanal želite zamenjati TV Vsebino lahko gledate preko zavihka televizorja V tem načinu lahko navigirate po seznamu kanalov sprejetem iz televizorja in kliknete na sličice za ogled strani s podrobnostmi POSNETKI Na tem zavihku lahko pregledate aktivne posnetke in opomnike če so na voljo Za brisanje enostavno p...

Page 119: ...kaza s televizorja Zahteve 1 Pametni televizor 2 Omrežna povezava 3 Mobilna naprava na podlagi platforme Android ali iOS Android OS 5 1 ali novejši IOS 12 ali novejša različica 4 Aplikacija Smart Center lahko jo najdete v spletnih trgovinah za aplikacije za platformi Android in iOS 5 Usmerjevalnik modem 6 Pomnilniška naprava USB s formatom FAT32 potrebna za funkcijo snemanja na USB če je na voljo ...

Page 120: ...a obiščite internetni naslov URL ki je prikazan na zaslonu Usmerjeni boste na stran kjer se lahko najprej vpišete v račun Amazon če še niste vpisani Nato boste usmerjeni na stran kjer lahko vnesete kodo za preverjanje pristnosti ki je prikazana na televizorju in povežete televizor z računom Amazon Če je bil postopek povezovanja uspešen boste naprošeni da določite ime vašega televizorja ime novano ...

Page 121: ... Nastavitve Sistem Glasovni Asistent Čarovnik vas bo vodil skozi postopek nastavitve Na prvem zaslonu označite Start Zaženi in za nadaljevanje pritisnite OK Na naslednjem zaslonu boste morali določiti ime za televizor ki se imenuje prijazno ime FN Izberite ime ki vas spominja na vaš televizor na primer TV v dnevni sobi TV v kuhinji TV v jedilnici ipd Ime na j bo enostavno za izgovorjavo Ko končate...

Page 122: ...o Televizor preklopi v stanje pripravljenosti 2 Odklopite priključke kabla in napajalnega vtikača POZOR 12 V napajanje Specifikacije napajalnega adapterja Ime proizvajalca SHENZHEN HUNTKEY ELECTRIC CO LTD Identifikator modela HKA09012070 7U Vhodna napetost V 100 240 Vhodna napajalna frekvenca Hz 50 60 Izhodna napetost V 12 0 Izhodni tok A 7 0 Izhodna moč W 84 0 Povprečna aktivna učinkovitost 89 0 ...

Page 123: ...ruestørrelser Længde X Tråd Y Русский РАЗМЕРЫНАСТЕННОГОКРЕПЛЕНИЯVESA Размерысистемыотверстий Размерывинтов Длина Х Резьба Y беларуская ПАМЕРЫНАСЦЕННАГАМАЦАВАННЯVESA Памерысістэмыадтулін Памерывінтоў Даўжыня X Разьба Y македонски МЕРКИЗАМОНТИРАЊЕНАЅИДЗА ВЕСА Шеманаголемининадупката мм Големинанашрафот Должина Х Навој Y українськa РОЗМІРИНАСТІННОГОКРІПЛЕННЯVESA Відстаньміжкріпильнимиотворами мм Розм...

Page 124: ...s Direktivom 2014 53 EU Cjeloviti tekst EU izjave o sukladnosti dostupan je na sljedećoj internetskoj adresi www nabo at HU Baytronic Handels GmbH igazolja hogy a TFT IDTV típusú rádióberendezés megfelel a 2014 53 EU irányelvnek Az EU megfelelőségi nyilatkozat teljes szövege elérhető a következő internetes címen www nabo at IT Il fabbricante Baytronic Handels GmbH dichiara che il tipo di apparecch...

Page 125: ...auer von 2 JAHREN SERVICE HOTLINE Österreich 0720 20 40 96 Email nabo kundendienst email Wir wünschen Ihnen viel Spaß mit Ihrem neuen LED TV Unsere Garantiebedingungen sowie unsere Kontaktdaten für Reparatur und Service finden Sie bitte unter https www nabo at service hilfe support Wir möchten Sie darauf hinweisen dass im Rahmen Ihrer Service Anfragen erforderliche personenbezogene Daten verarbeit...

Page 126: ......

Reviews: