4
Changing the nose pad
Hold the viewer with the front pointing away from you.
Place both of your thumbs on top of nose pad and
support the bottom of the viewer with your fingers (see
figure 5.). Using your thumbs, press the nose pad
straight down firmly to disengage it from the viewer.
(figure 5) (figure 6)
To reinstall a nose pad, support the viewer with one
hand (see
figure 6.). Using the index finger of your other
hand, align the nose pad with the slot in the viewer.
Press the nose pad up into the slot until it snaps into
place.
Earbuds and earbud pads
Cover the earbuds with the protective earbud pads.
Three different size earbud pads (small, medium and
large) are provided (see
figure 7.). Choose a pad size
that fits comfortably in your ear. Be sure to adjust the
volume to a safe level before inserting the earbuds into
your ears (see
figure 8.). The viewer ships with medium-
sized earbuds attached.
(figure 7) (figure 8)
Picture control
Due to the nature of this universal product, picture
settings may need to change to suit your specific portable
media player. Use the brightness and picture controls
featured on the pendant to adjust myvu’s picture to suit
your viewing pleasure. Further instructions on adjusting
the picture and brightness are listed below.
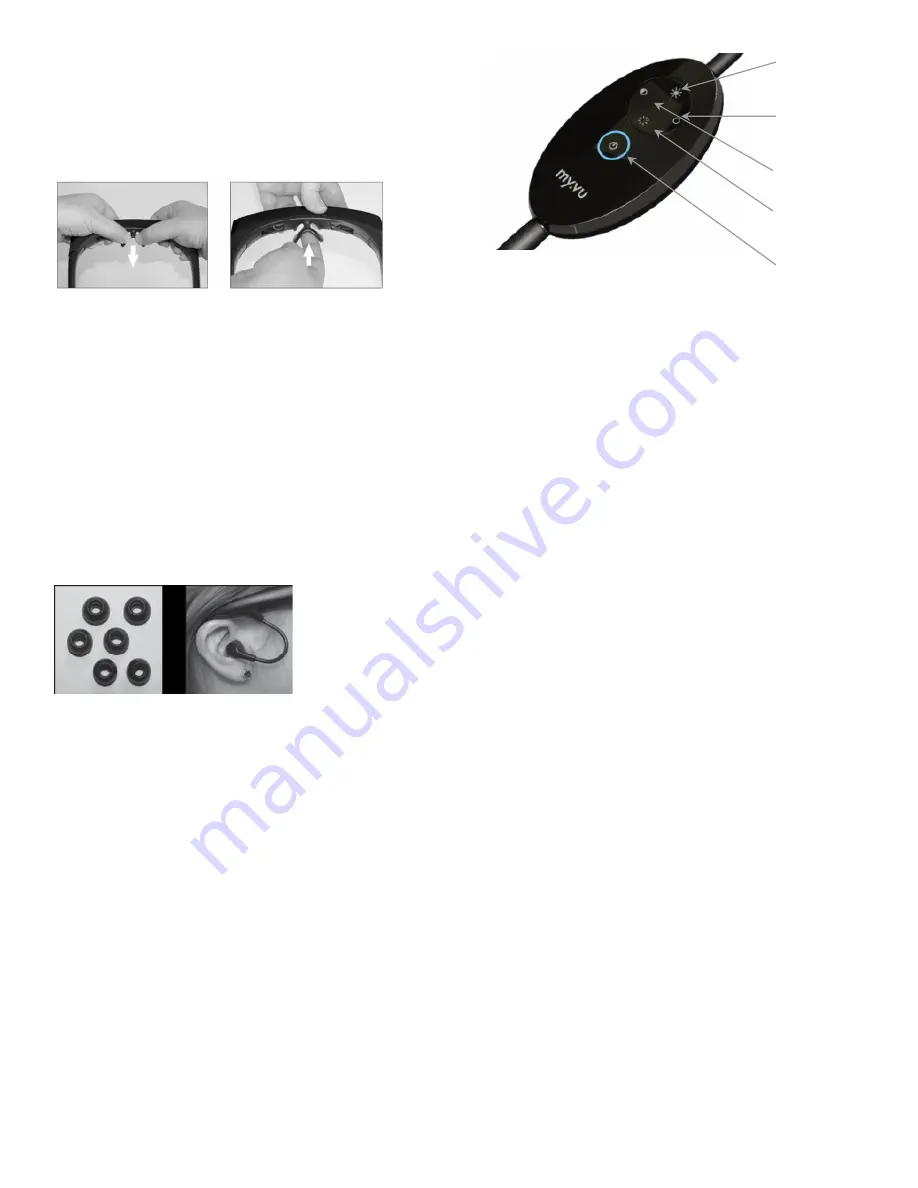
using the pendant controls
You can power myvu “On” by using the power button on
the pendant. The pendant also allows you to control
image contrast and brightness by holding down the
appropriate button on the pendant. You can return the
brightness and contrast settings to the factory default
settings at any time by pressing the power and
brightness down buttons simultaneously while the viewer
is on. Figure 9 shows the button functions and layout on
the pendant.
(figure 9)
about charging the battery
In order to get the longest possible video experience,
fully charge your myvu and your portable media player
before each use. You can still watch video or listen to
music while the battery is being charged from a USB
wall adapter. The LED on the pendant indicates the
charging state of your myvu:
Solid Blue: On and detected video signal
Blinking Blue: On but no signal detected (check video
sources and A/V cable connections)
Blinking Orange: Low charge/Less than approximately 3
minutes of battery life remaining OR Charging
Blinking Purple: Low battery and no signal detected
Solid Purple: Battery fully charged
Charging time
The battery is designed to charge from many different
power sources. When using a high capacity charging
adaptor, such as a USB wall adaptor, full charge can be
achieved in approximately two hours. When charging off
of a computer, slow charge mode is in effect, which will
take approximately three hours to achieve full charge.
watching video
myvu set-up 1:
Watching video with the viewer and your iPod or
Zune portable media player
Plug the black end of the iPod/Zune connector cable to
the pendant. Connect the other end of the cable to the
headphone jack of your portable media player. Turn
the viewer “On” by pressing the button in the middle of
the viewer’s pendant. Choose your favorite video and
enjoy.
NOTE: The enclosed 3.5mm cable will only function
with 5
th
generation video iPod models. To use myvu
Universal with the new iPod touch, iPod nano or iPod
classic models, you will need to purchase the
Connection Cable for iPod at www.myvu.com.
Increase
Brightness*
Increase
Contrast
Decrease
Contrast
Decrease
Brightness
Power*
*Reset factory
settings by
depressing
these buttons
simultaneously
Summary of Contents for MA-0483
Page 1: ......


