background image

Select the water type: by going to the target settings by pressing the scroll key
(MOVE) and enter the list of types of water by pressing ENTER and the list of 
water types will appear on the screen that can be searched:
Fresh water, salt water, mineral water, all kinds of water
And select the water to be searched by pressing the MOVE button. If the water 
type is pressed, the ENTER key is pressed,

The first operation

Start search

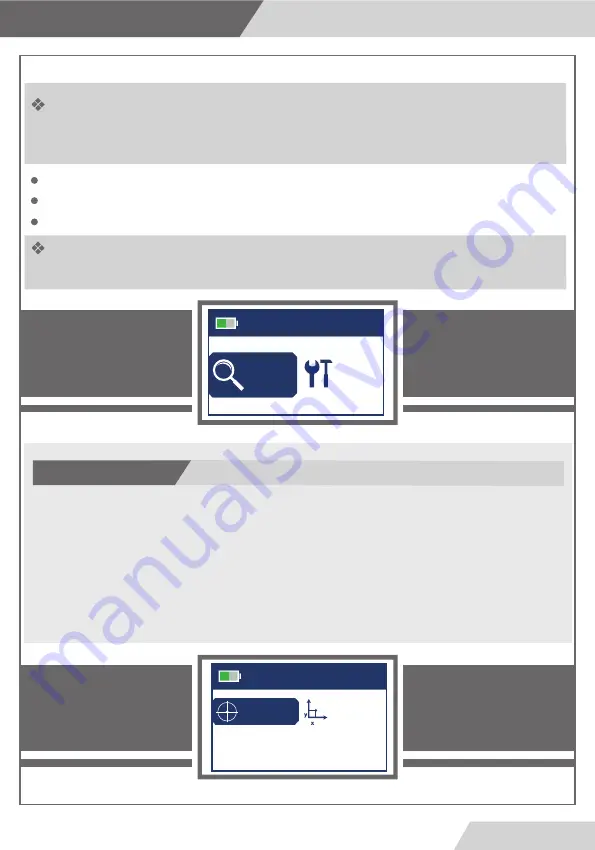
After you have finished setting the main device settings and return to the 
main menu, we select a search from the menu to show us the search 
settings list:

Note :
The user must set up all search options before pressing Start Search.

Search criteria (specify values for distance and depth)

Type of target (

through this option we specify the type of water to be searched 

for)

Start your search

12

Page

Sitting

Settings

Recherche

Main menu

Target

Parameters

Start Search

Search

Summary of Contents for WF 202 PRO +

Page 1: ...WF 202 PRO The WF 202 PRO is the latest device to detect the different types of water in the ground Metal and Water Finder WWW MWF USA COM USER MANUAL...

Page 2: ...echnical speci cation Safety information Device parts Main control unit Settings Start work Page 1 Page 2 Page 3 Page 5 Page 6 Page 10 Page 17 Page 17 Charge setting Page 24 Notes Page Page 33 34 Line...

Page 3: ...e would void the warranty For devices that work on replaceable batteries use good quality batteries to work longer hours The user must practice before starting the detecting operations and discoveries...

Page 4: ...eceive the electrostatic fields of target 1 From 9 KHz to 11 KHz for LRL system Operating Frequency 3 Battery Endurance 15 Working hours Charger 5 1 V DC 3 Amps Display 3 2 TFT LCD Display 16 bit colo...

Page 5: ...Bluetooth NO YES Wireless communications Audio notifications YES Vibration notifications NO Operating Temperature From 5 F to 140 F From 15 C to 60 C NO Smart Auto guiding System Technical Storing Te...

Page 6: ...s 3 amp 15 watts The charger This unit is connected to the main unit of the device and then connected to the soil to be responsible for transmitting and transmitting the frequency waves coming out of...

Page 7: ...hat are attached to the device Wireless antenna The unit is based on remote detection and search technology to locate and monitor targets from long distances directs the user and leads him directly to...

Page 8: ...Front elevation 1 2 Power ON OF 3 Back button 4 Enter button Move button 3 2 1 4 7 Page The main unite...

Page 9: ...8 Back elevation Plug the charger 5 Socket connecting the soil support unit 6 Wireless antenna jack 7 5 6 7 8 Page The main unite...

Page 10: ...ort unit to the machine with its input and then connect it to the ground as shown in the diagram 2 Connect the wireless antennas to the designated area as shown on the graphic 1 2 1 Connection method...

Page 11: ...after the definition of the name of the device will appear in the list of languages the user must choose the language control device by going to the language to be selected by pressing the MOVE key Af...

Page 12: ...100 Audio Options To set the sound alarm values select the option and press the Enter button to change the volume from 1 to 5 or you can hide the sound completely Language Options To change the system...

Page 13: ...ater type is pressed the ENTER key is pressed The first operation Start search After you have finished setting the main device settings and return to the main menu we select a search from the menu to...

Page 14: ...eral Water Water type Target Fresh Water Water type Target Salty Water Water type Target All types Water type Target Types of water Mineral water fresh water Saltwater All types of water 13 Page Sitti...

Page 15: ...of the settings menu which is the search criteria Then set the distance and depth parameters by using the Move button to move between the distance and depth values The search and depth distance is the...

Page 16: ...n or to change the type of water distance or depth you can press the ESC key to restart the device and start the settings again Important Not When you have finished selecting the search options go to...

Page 17: ...Line tracking system Line Tracker Remote Sensing 16 Page Start work Line Tracker system...

Page 18: ...ne tracking system by pressing the Move button and selecting Track the line from the menu and then pressing Enter 17 Page Start work Line Tracker system Line tracker Hand held Search method Target Dis...

Page 19: ...ty with the main unit Red Disconnected Green Connected Power Switch Slide down to switch ON Make sure the Tracker is off before storage Speaker in the back of the Tracker 1 2 3 4 Battery Compartment T...

Page 20: ...out waves spread through the earth which stimulate the formed fields around the target identify it and forming a power lines 3 The line Tracker device receives the power lines that connected to the t...

Page 21: ...of the device waves with the water to be searched To start the search and check for water we can use the visual tracking system through the receiver and reception antennas Note Soil Water location If...

Page 22: ...ving antennas above a point the point of direction of the power line connecting between the device and the location of water B In the case of rotors around the transmitter unit 360 degrees and we did...

Page 23: ...ation of the soil support unit transmitter responsible for transmitting waves and then carry antennas in the form of a horizontal and horizontal with the ground A 25 cm antenna with the right antenna...

Page 24: ...l turn back Walk and track the power line through the intersection of the antennas over the power line The antennas will intersect towards the power line leading to the water location The antennas wil...

Page 25: ...Handheld LRL Long Range Locator 24 Page Start work Handheld LRL system...

Page 26: ...researcher system by pressing the Move button and selecting the mobile unit from the list and then press the Enter 25 Page Start work Handheld LRL system Line tracker Hand held Search method Target D...

Page 27: ...1 2 3 1 2 3 Hand held LRL Unit Transceiver Antenna Handling Grip 26 Page Start work Handheld LRL system...

Page 28: ...tenna to the jack in front of the Handheld LRL Unit Connect the grip to the socket in the bottom of the Unit Put 4xAA Batteries in the battery compartment and pay attention to the polarity Note For th...

Page 29: ...1 2 3 4 5 6 7 2 3 Antenna Jack Power Button Target Selection Button 5 6 7 Status indicator Target LEDs Laser Pointer Out 4 Laser Button 1 28 Page Start work Handheld LRL system...

Page 30: ...ser must carry the device by grip horizontally slightly sloped towards ground as shown in the figure below Then stimulate the device s waves and output fields by moving the device right and left slowl...

Page 31: ...once more and go toward the water then get 30 m sideway from the first reading point and stimulate the device s waves and steady the device and wait for the result if the water is legit the device wil...

Page 32: ...ound the normal track towards the point Rotate with device slowly and start walking towards the target slowly until you reach the point where the device rotates right and left then you have located th...

Page 33: ...er the information And we move away from the water location 20 meters and carry the device and wait for reading the water location if there is a reading of the water location here we know that the dep...

Page 34: ...y is full and the charging is done so disconnect the charger when the notification is heard An indicator will show the charging progress in the upper corner while the device is working To ensure the p...

Page 35: ...34 Page Notes...

Page 36: ...l and Water Finder www mwf metaldetectors com info mwf metaldetectors com 90 212 222 0946 90 212 222 0947 www mwf usa com info mwf usa com 1 708 364 9602 United States of America illinois Turkey istan...

Reviews: