background image

4

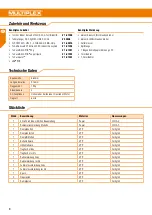
Zubehör und Werkzeug

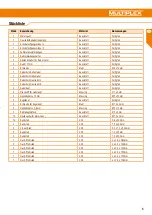
Stückliste

Technische Daten

Benötigtes Zubehör

Benötigtes Werkzeug

Spannweite

860mm 

Länge über alles

918mm 

Fluggewicht

195g 

Steuerkanäle

4

RC-Funktionen

Höhenruder, Seitenruder, Querruder, Motor

Flugzeit

6 min

•  1x Hitec Indoor Servo Set 2x HS-40 & 1x HS-65HB

#  1-01009                   

•  1x Empfänger RX-5 light M-LINK 2,4 GHz

# 55808

•  1x ROXXY EVO LiPo 2 - 450B 30C mit BID-Chip

# 1-00016

•  1x Antriebssatz V2 Extra 330 SC Indoor / FunnyCub

# 1-01026

•  1x Zacki2-ELAPOR

® 

20g

# 1-01291

•  1x Zacki2-ELAPOR

®

 super liquid

# 1-01292

•  1x Zackivator

® 

# 1-01032

•  UHU

®

POR

•  kleiner Kreuzschlitzschraubendreher
•  kleiner Schlitzschraubendreher
•  Cuttermesser
•  Spitzzange
•  1 Bogen Schleifpapier Körnung 320
•  1mm Bohrer
•  1,5mm Bohrer

Stück

Bezeichnung

Material

Abmessungen

1

Slick X360 Indoor Edition Bauanleitung

Papier

DIN A-4

1

Reklamationsmeldung Modelle

Papier

DIN A-5

1

Rumpfoberteil

EPP

Fertigteil

1

Rumpfunterteil

EPP

Fertigteil 

1

Rumpfmittelteil

EPP

Fertigteil 

1

Seitenleitwerk

EPP

Fertigteil 

1

Höhenleitwerk

EPP

Fertigteil

1

Tragfläche links

EPP

Fertigteil

1

Tragfläche rechts

EPP

Fertigteil

1

Radverkleidung links

EPP

Fertigteil

1

Radverkleidung rechts

EPP

Fertigteil

1

Fahrwerksverkleidung links

EPP

Fertigteil

1

Fahrwerksverkleidung rechts

EPP

Fertigteil

1

Sporn

EPP

Fertigteil

2

Flügelpylon

EPP

Fertigteil

2

Rumpfpylon

EPP

Fertigteil

DE

Summary of Contents for 1-01631

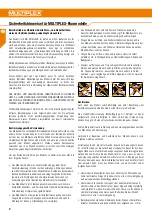
Page 1: ...Sicherheitshinweise 2 3 Zubehör und Werkzeug Stückliste 4 5 Bauanleitung 6 7 Abbildungen 20 23 Conseils de sécurité 14 15 Accessoires et outils nomenclature 16 17 Notice de montage 18 19 Illustrations 20 23 Safety information 8 9 Accessories and tools list of parts 10 11 Assembly instructions 12 13 Illustrations 20 23 DE EN ...

Page 2: ...n nachdem ein kompletter Funktions und Reichweitentest gemäß der Anleitung der Fernsteuerung erfolgreich ausgeführt wurde Das Modell darf nur bei guten Sichtverhältnissen geflogen werden Fliegen Sie nicht bei schwierigen Lichtverhältnissen und nicht in Richtung der Sonne um Blendungen zu vermeiden Das Modell darf nicht unter Einfluss von Alkohol und anderen Rauschmitteln betrieben werden Gleiches ...

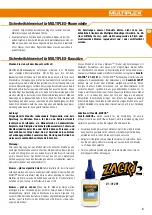
Page 3: ...Verwendung der EC Color Farben keinen Primer zur Vorbehandlung Optisch bringen Mattlacke das beste Ergebnis Die Lackschichten dürfen keinesfalls zu dick oder ungleichmäßig aufgetragen werden sonst verzieht sich das Modell und wird krumm schwer oder sogar unbrauchbar Dieses Modell ist nicht aus Styropor Daher sind Verklebungen mit Weißleim Polyurethan oder Epoxy nicht möglich Diese Kleber haften nu...

Page 4: ...itzschraubendreher kleiner Schlitzschraubendreher Cuttermesser Spitzzange 1 Bogen Schleifpapier Körnung 320 1mm Bohrer 1 5mm Bohrer Stück Bezeichnung Material Abmessungen 1 Slick X360 Indoor Edition Bauanleitung Papier DIN A 4 1 Reklamationsmeldung Modelle Papier DIN A 5 1 Rumpfoberteil EPP Fertigteil 1 Rumpfunterteil EPP Fertigteil 1 Rumpfmittelteil EPP Fertigteil 1 Seitenleitwerk EPP Fertigteil ...

Page 5: ...toff Fertigteil 1 Ruderhorn Querruder R Kunststoff Fertigteil 5 Gabelkopf Kunststoff Fertigteil 5 Druckstift für Gabelkopf Messing Ø 1 x 5mm 2 Gewindehülse 1 5mm Messing M2 x 20mm 5 Kugelkopf Kunststoff Fertigteil 5 Schraube für Kugelkopf Stahl M1 5 x 4mm 2 Gewindehülse 0 8mm Messing M2 x 14mm 2 Rohradapterstück Kunststoff Ø 2 x 5mm 10 Gestängehalter klein Ösen Kunststoff M1 5 x 4mm 14 Rundstab CF...

Page 6: ...rn in das Seitenruder Abb 2 Kleben Sie die Tragflächenhälften sowie das Höhenleitwerk an das Rumpf Mittelstück Abb 3 Kleben Sie die Kohlefaserstäbe zur Verstärkung in die Rumpf Unterseite und die untere Rumpfhälfte Kleben Sie außerdem die EPP Kohlestabhalterungen auf die Tragflächenunterseite und die 3D Druck Fahrwerksverstärkungen auf die untere Rumpfhälfte Anschließend kleben Sie das Höhenruders...

Page 7: ...es mit etwas UHU POR zu bestreichen und den Kleber 10min antrocknen zu lassen Der Schwerpunkt des Modells ist bei 210mm gemessen von der Vorderkante des Motorspants Die Ruderausschläge sind individuell einzustellen es empfiehlt sich jedoch ca 80 EXPO auf Querruder und 60 EXPO auf Seiten und Höhenruder zu mischen Sicherheit Sicherheit ist das oberste Gebot beim Fliegen mit Flugmodellen Eine Haftpfl...

Page 8: ...lare The model may not be operated under the influence of alcohol or other intoxicants The same applies for medicines that impair percep tion and responsiveness Only fly the model in wind and weather conditions in which you can safely control it Even with light wind take into account that turbu lence may build up on objects and have an effect on the model Never fly in places where this would pose ...

Page 9: ...exist If you want to paint your model you do not need any primer for pretreatment when using the EC colors Matt paints result in the best look Under no circumstances may the paint coats be too thick or applied unevenly otherwise the model will go out of shape and will be crooked heavy or even unusable This model is not made of Styrofoam Therefore adhesions using white glue polyurethane or epoxy ar...

Page 10: ...d pliers 1 sheet of 320 grit sandpaper 1mm drill bit 1 5mm drill bit Qty Name Material Dimensions 1 Slick 360 Indoor Edition assembly instructions Paper DIN A 4 1 Complaints form for models Paper DIN A 5 1 Upper fuselage section EPP Finished component 1 Lower fuselage section EPP Finished component 1 Center fuselage section EPP Finished component 1 Vertical tail EPP Finished component 1 Tailplane ...

Page 11: ...astic Finished component 1 Rudder horn aileron R Plastic Finished component 5 Fork head Plastic Finished component 5 Clevis pin for fork head Brass Ø 1 x 5mm 2 Threaded coupler 1 5mm Brass M2 x 20mm 5 Ball head Plastic Finished component 5 Screw for ball head Steel M1 5 x 4mm 2 Threaded coupler 0 8mm Brass M2 x 14mm 2 Tube adapter Plastic Ø 2 x 5mm 10 Small rod holder eyelets Plastic M1 5 x 4mm 14...

Page 12: ... rudder horn into the rudder Fig 2 Glue the wing halves and the tailplane to the center fuselage section Fig 3 To ensure reinforcement glue the carbon fiber rods into the underside of the fuselage and into the lower fuselage section Further glue the EPP carbon rod holders to the underside of the wing and the 3D printed undercarriage reinforcements to the lower fuselage section Then glue the elevat...

Page 13: ...ed and allow it to air dry for about ten minutes The model s center of gravity is 210mm measured from the leading edge of the bulkhead The rudder deflections can be set to the pilot s individual preference but we recommend about 80 EXPO on ailerons and 60 EXPO on rudders and elevators Safety Safety is the top priority when flying any model aircraft Third party liability insurance is mandatory If y...

Page 14: ...modèle uniquement si la visibilité est bonne Ne le pilotez pas si les conditions de lumière sont difficiles et vers le soleil cela afin d éviter tout éblouissement Ne pilotez pas ce modèle si vous êtes sous l emprise de l alcool et d autres stupéfiants Ne le pilotez pas non plus si vous prenez des médicaments limitant votre capacité de perception et vos réflexes Ne pilotez votre modèle que dans de...

Page 15: ... veillez donc à ne pas exagérer Une pièce tordue C est possible dans certaines conditions Si vous voulez peindre votre modèle vous n avez pas besoin d apprêter le support si vous utilisez des peintures EC Color Esthétiquement les peintures mates donnent les meilleurs résultats En aucun cas les couches de peinture devront être trop épaisses ou irrégulières À défaut le modèle se dilatera se cintrera...

Page 16: ...Zackivator Réf 1 01032 UHU POR Petit tournevis cruciforme Petit tournevis plat Cutter Pince à bec 1 feuille de papier de verre grain 320 Foret 1mm Foret 1 5mm Qté Désignation Matière Dimensions 1 Notice de montage Slick 360 Indoor Edition Papier DIN A 4 1 Modèles d avis de réclamation Papier DIN A 5 1 Partie supérieure du fuselage EPP Complet 1 Partie inférieure du fuselage EPP Complet 1 Partie ce...

Page 17: ...mplet 1 Guignol aileron D Plastique Complet 5 Chape Plastique Complet 5 Tige pour chape Laiton Ø 1 x 5mm 2 Douille filetée 1 5mm Laiton M2 x 20mm 5 Rotule Plastique Complet 5 Vis pour rotule Acier M1 5 x 4mm 2 Douille filetée 0 8mm Laiton M2 x 14mm 2 Adaptateur tube Plastique Ø 2 x 5mm 10 Support de tringle petit œillets Plastique M1 5 x 4mm 14 Tige ronde PRFC 0 8 x 500mm 4 Tige ronde PRFC 1 2 x 3...

Page 18: ...pennage et sur la dérive Ensuite collez le guignol de dérive sur la dérive Fig 2 Collez les ailes et l empennage à la partie centrale du fuselage Fig 3 Collez les tiges de renfort en fibre de carbone sur le bas du fuselage et sur la moitié inférieure du fuselage Collez aussi les supports de tiges en carbone en EPP sur le dessous des ailes et les renforts 3D du train sur la moitié inférieure du fus...

Page 19: ... mesurés à partir de l arête avant du support moteur Les débattements sont à régler individuellement Il est néanmoins recommandé de mettre 80 EXPO sur les ailerons et de mixer dérive et profondeur avec 60 EXPO Sécurité La sécurité est la première des priorités lorsque vous pilotez un modèle La souscription d une assurance responsabilité civile est obligatoire Si vous êtes membre d un club ou d une...

Page 20: ... 8mm round 1 2mm round 2x 1 5 x 25mm 2x 3 x O 5 x 14Omm 2x 2 5 x 1 5 x 233mm 14x O 8 x 5OOmm 1 14 4x 1 2 x 3OOmm 2x 1 5 x 2OOmm 1x 3 x O 5 x 28Omm 1x O 8 x 69Omm 1x 3 x O 5 x 12Omm 2x O 8 x 444mm 1x 3 x O 5 x 72Omm 1x 3 x O 5 x 7O4mm 2x 3 x O 5 x 1OOmm Abbildungen Illustrations Illustrazioni ...

Page 21: ...21 Abb Fig 4 Abbildungen Illustrations Illustrazioni Abb Fig 7 Abb Fig 5 Abb Fig 6 ...

Page 22: ...22 Abbildungen Illustrations Illustrazioni Abb Fig 9 Abb Fig 8 ...

Page 23: ...23 Abbildungen Illustrations Illustrazioni Abb Fig 10 Abb Fig 11 ...

Page 24: ...BK Slick X360 Indoor Edition Irrtum und Änderungen vorbehalten 2019 10 FP MULTIPLEX Modellsport GmbH Co KG Westliche Gewerbestrasse 1 D 75015 Bretten Gölshausen www multiplex rc de ...

Reviews: