Network Settings
The method for setting the IP address of the VF-9000 frame
is determined using the 4-position DIP switch on the rear
of the chassis. The four possible settings for IP address
configuration are outlined below:
• Preset IP address configuration — the network controller
card in the frame can be forced to use one of two specific
predefined IP address settings. This can be used to establish
initial communications, configure the frame for future
deployment on another network, or to override a custom
user configuration.
• User-defined IP address configuration — the network
controller card in the frame can be configured to use a user-
defined static IP address from the device’s embedded Web
page. Re-configuration can only be done once network
communications have been established.
• Automatic configuration using DHCP — the network
controller card in the frame is configured to automatically
obtain network settings from a Dynamic Host Configuration
Protocol (DHCP) server. This method would be recommended
for advanced users only as there is no way to display the
DHCP assigned address on the frame itself.
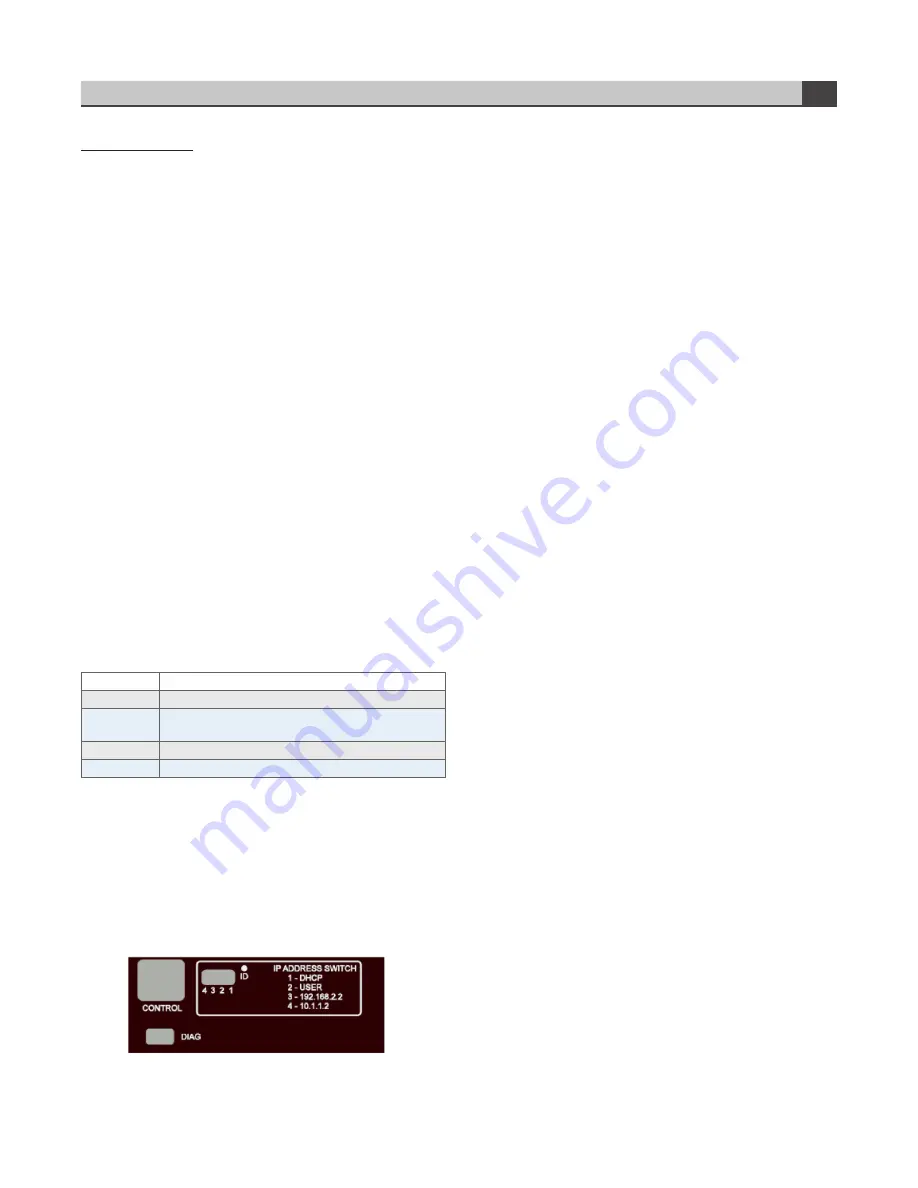
The physical DIP switching settings are shown below. Only
one switch is allowed to be in the ON position (UP).
Note — The IP Addresses of the VF-9000 frame and your
computer must be on the same Subnet. For example, if
the VF-9000 frame has an IP Address of 192.168.2.2, then
your computer should be configured for an IP address of
192.168.2.X where X is a number other than 2.
To use one of the fixed preset IP addresses:
1. Set the DIP Switch to specify the desired preset IP address
as outlined in the IP address DIP switch table.
2. Ensure the network settings of your computer are
compatible with those chosen for the VF-9000 frame. Both
your computer and the VF-9000 must be on the same subnet.
Contact your IT Department if you need help determining or
configuring the network settings of your computer.
3. To prevent any possible IP address conflicts, initially
isolate the VF-9000 frame and your computer from the rest
of your network.
• If you are using a hub or switch, unplug all devices
except the VF-9000 frame and your computer
Or
• Connect the VF-9000 frame directly to your computer
with an Ethernet cable.
4. Launch a web browser on your computer.
5. Power up the VF-9000 frame.
6. In the address bar of the web browser, enter the preset
IP address selected on the DIP switch.
7. Wait approximately 30 seconds while the frame
establishes network communications.
8. Verify that the VF-9000 Dashboard Web page displays in
the web browser.
9. Should the Web page fail to display after a minute or two:
• Click the refresh/reload button in your browser.
• Verify the Ethernet cables are properly connected.
• Check the link/activity LEDs found on the Ethernet
RJ-45 connectors.
• Verify that you have properly performed each step of
this procedure.
• Contact MultiDyne Technical Support if you cannot
establish a connection.
To use a Custom User IP Address via Web page Dashboard:
Once network communications have been established
with a VF-9000 frame, a custom static IP address can be
configured through the Frame Ethernet Settings box in the
Web page Dashboard.
To configure the User IP address using the Web page
Dashboard:
1. Establish Ethernet communications with the VF-9000
frame using one of the preset IP addresses, DHCP, or
previously configured User IP address and load the device’s
Dashboard Web page in a web browser by entering the IP
address in the browser’s address bar.
2. In the Frame Ethernet Settings Box, enter the desired User
IP address in the User IP boxes.
Instruction Manual, VF-9000 Series
FEATURES & OPERATION
3
DIP SWITCH # DESCRIPTION
1
DHCP. Network settings assigned by a DHCP server
2
User IP Address. IP Address is set by the user through
the embedded Web page.
3
Fixed IP Address #1 - 192.168.2.2
4
Fixed IP Address #2 - 10.1.1.2
DIP SWITCH SETTINGS
IP address DIP switch


