3
7
4
6
5
1
2
3
OVERVIEW
OPERATION
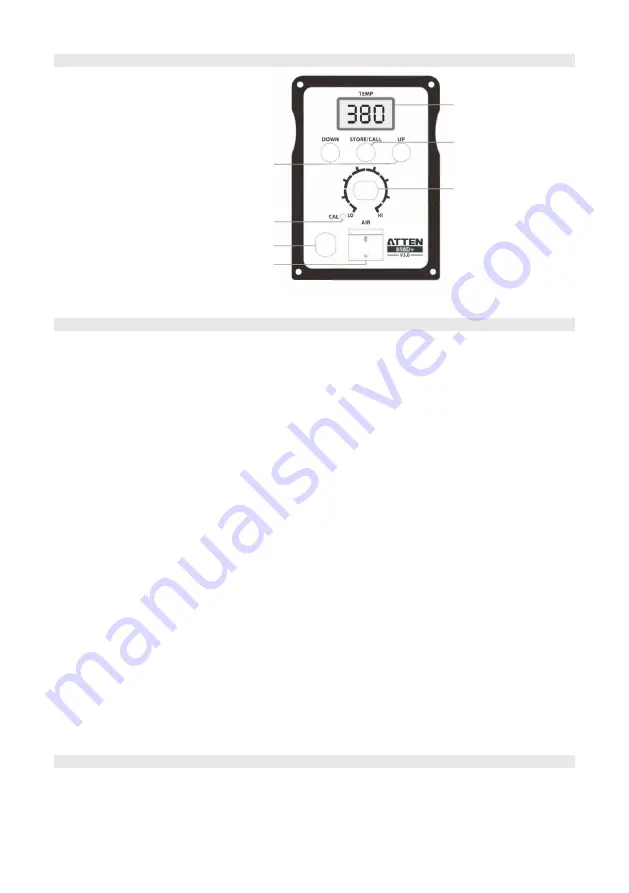
Fig 1. Front Panel Layout
1. Temperature display screen
2. Temperature store and
recall button
3. Air volume rotary control
4. Calibration adjuster
5. Mains power switch
6. Tool interface
7. Temperature regulation
button
•
Put the hot air handle onto the bracket.
•
Connect the mains plug into the power socket and switch the power-on.
•
To switch between Fahrenheit and Centigrade operation, press and hold the SET
button while turning on the mains power.
•
To increase or decrease the temperature press the UP or DOWN button. To adjust
in greater increment press and hold the relevant button.
•
The LCD will update after a few seconds to display the current temperature.
•
To adjust the air volume use the rotary control. The LCD displays A25 to A99.
•
Max volume is 120l/min.
Store/recall settings
•
To store a setting of temperature and air volume to memory, press and hold the
STORE/CALL button for about two seconds.
•
To recall a setting briefly press STORE/CALL again.
Sleep Function
•
When the hot air tool is placed in the support holder, heating is turned off and
cooler air is produced until the temperature of the nozzle is reduced to 100
o
C then
SLP is displayed on the LCD.
•
Remove the tool from the holder and the station will resume normal working state
and return to the set temperature.
•
When you have finished using the rework station, place the tool in the holder and
allow the station to automatically lower the temperature to 100
o
C or press the
down button to less than 100
o
C and wait for the temperature to drop to this setting
before you switch off the mains power.
•
After replacing the heating element it may be necessary to recalibrate the tool.
•
Using a meter to accurately measure the nozzle temperature, any deviation to
that displayed on the LCD can be corrected by using a small non-conductive
screwdriver to turn the adjuster through the hole (4) in the front panel (see Fig 1.)
CALIBRATION


