14
OPERATION
E. BRAKE PEDAL
The brake pedal is located on the left side of the riding mower,
along the running board. The brake pedal can be used for
stopping the riding mower or setting the parking brake.
NOTE:
The brake pedal must be fully depressed to start the riding
mower. Refer to Safety Interlock System for more information.
F. PARK BRAKE LEVER
The Park Brake Lever is located on the right side of the
steering column and is used to engage the parking brake.
Refer to Engaging the Parking Brake section of this manual
for detailed instructions regarding setting the parking brake.
Refer to Releasing the Parking Brake section of this manual for
instructions regarding releasing the parking brake.
G. DECK LIFT LEVER
Located on your riding mower’s right fender, the
deck lift lever is used to change the height of the
cutting deck (5 positions). To use the deck lift lever,
move the lever to the left, then place in the notch
best suited for your application. The lowest position
is “1” and the highest position is “5”.
Position “1” is approximately a 1 inch cutting
height, Position “5” is approximately a 4 inch
cutting height and the change in height is
approximately 3/4 inch between each position.
H. HEADLIGHT
The headlights will turn ON whenever the key is ON and the
headlight button is pressed. To turn the headlights OFF, press the
headlight button again.
I. CHARGING PORT
The charging port is located on the rear of the riding mower. To
access the charging port, lift up on the charging port cover.
J. USB CHARGING PORTS (IF EQUIPPED)
If equipped, a pair of USB power sources are
located on the left console. The two USB
ports are both rated 2.1 A. The ports can be
used to charge your phone or power up other
USB devices.
WARNING
Do not have any devices plugged into your USB charging
ports when starting the riding mower. Doing so may
cause damage to your device.
K. CUP HOLDER
The cup holder is located to the left of the operator’s seat.
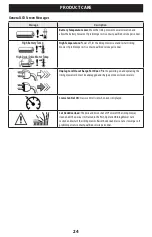
Cruise Control Button
Located on the VCM, pressing the cruise control button
while the riding mower is in motion allows the riding
mower to remain at a constant ground speed without
applying pressure to the forward drive pedal. The LCD Screen
displays “CRUISE ON” when the cruise control is activated. The
cruise control can be disengaged by pressing either the cruise
control button, the brake pedal or the forward drive pedal.
NOTE:
Cruise control will not engage at the riding mower’s
fastest ground speed. If the operator should attempt to do so, the
riding mower will automatically decelerate to the fastest optimal
mowing ground speed.
NOTE:
Cruise control will not engage in reverse.
LCD Screen and Battery Level Indicator
Located on the VCM, the LCD screen and battery level indicator
are used to provide instructions, warnings and information
about your riding mower systems and the battery level of your
riding mower.
B. KEY SWITCH
The key switch is located at the bottom of the VCM and powers
the VCM when the key is fully inserted. The riding mower cannot
be started unless the key is fully inserted and the START/STOP
button is depressed. Removing the key turns the riding mower
off (Figure 13).
Figure 13
C. FORWARD DRIVE PEDAL
The forward drive pedal is located on the right side of the
steering column, along the running board. Press the forward
drive pedal forward to allow the riding mower to travel forward.
Ground speed is also controlled with the forward drive pedal.
The further forward the pedal is depressed, the faster the riding
mower will travel. The pedal will return to its original/neutral
position when it is not pressed.
D. REVERSE DRIVE PEDAL
The reverse drive pedal is located on the right side of the riding
mower along the running board. Ground speed is also controlled
with the reverse drive pedal. The further rearward the pedal is
pressed, the faster the riding mower will travel. The pedal will
return to its original/neutral position when it is released.
Summary of Contents for 33 27JD Series
Page 78: ...NOTES NOTAS NOTES ...
Page 79: ...NOTES NOTAS NOTES ...


