Overview
1-8
7
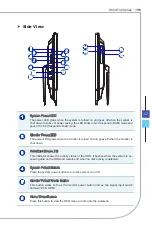
Up/ Volume Up Button
In Menu mode, this button indicates the cursor movement or OSD manual selection in
incremental values. Out of Menu mode, it works as Volume Up button.
8
Down/ Volume Down Button
In Menu mode, this button indicates the cursor movement or OSD manual selection in
decremental values. Out of Menu mode, it works as Volume Down button.
9
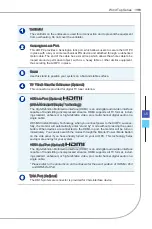
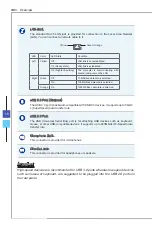
USB 3.0 Port (Optional)
The USB 3.0 port is backward-compatible with USB 2.0 devices. It supports up to 5Gbit/
s (SuperSpeed) data transfer rate.
10
USB 3.0 Port (with MSI Super Charger Technology) (Optional)
The USB 3.0 port is backward-compatible with USB 2.0 devices. It supports up to 5Gbit/
s (SuperSpeed) data transfer rate.
With MSI Super Charger Technology, not only does it function as normal USB 3.0 port,
but it also enables users to charge USB devices even when the system is turned off. Us-
ers will no longer need to power on the system just to charge USB devices. Better yet, it
can reduce the charge time up to 40%, making life more efficient than ever.
11
B-CAS Card Reader Slot (Optional for Japanese ISDB-T/S only)
This slot is provided for B-CAS (Broadcast Satellite Conditional Access System) card.
12
Card Reader Drive
The built-in card reader may support various types of memory cards.
13
Power Jack
The AC/DC adapter converts AC power to DC power for this jack. Power supplied
through this jack supplies power to the PC. To prevent damage to the PC, always use
the supplied power adapter.
14
Optical Disk Drive
A DVD Super-Multi drive is integrated for your home entertainment (Blu-ray is option-
al).
15
Eject Hole
Insert a thin, straight object (such as a paper clip) into the eject hole to open the optical
disk drive manually if the eject button does not work.
16
Eject Button
Press the eject button to open the optical disk drive.
17
ODD LED
If the ODD LED is on, it means the system is reading data from, or writing to, a CD or
DVD.
Summary of Contents for Wind Top AE2712 Series
Page 24: ......
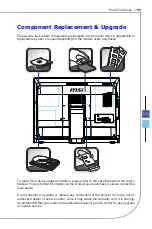
Page 29: ...2 5 Wind Top Series Powering on the System Press the power button to power on the system ...
Page 30: ......
Page 56: ......
Page 88: ......
Page 89: ...Appendix A Troubleshooting ...


