background image


Getting Started 

3-2 

™

 Begin to Use the Notebook


For a new user of this notebook, we would like to suggest you follow the illustrations below to 

begin to use the notebook. 


Summary of Contents for GT70

Page 1: ...Preface 1 Notebook User s Manual...

Page 2: ...1 6 Optical Device Drive Notice 1 8 Trademarks 1 8 Reversion History 1 8 Chapter 2 Introductions Manual Map 2 2 Unpacking 2 2 Product Overview 2 3 Top Open View 2 3 Front Side View 2 7 Right Side Vie...

Page 3: ...Comfort Tips 3 9 Knowing the Keyboard 3 11 Knowing the Touchpad 3 15 About Hard Disk Drive 3 17 Using the Optical Storage Device 3 37 Connecting the External Devices 3 19 Peripheral Devices 3 19 Commu...

Page 4: ...terference by one or more of the following measures Reorient or relocate the receiving antenna Increase the separation between the equipment and receiver Connect the equipment into an outlet on a circ...

Page 5: ...ifornia For further information please visit http www dtsc ca gov hazardouswaste perchlorate Safety Guideline for Using Lithium Battery Danger of explosion if battery is incorrectly replaced Replace o...

Page 6: ...mage the equipment This unit should be operated under maximum ambient temperature of 40O C 120O F Make sure the power voltage is within safety range and has been adjusted properly to the value of 100...

Page 7: ...nt checked by a service personnel The power cord or plug is damaged Liquid has penetrated into the equipment The equipment has been exposed to moisture The equipment has not worked well or you can not...

Page 8: ...model please contact your nearest AUTHORIZED service station To prevent direct exposure to the laser beam do not try to disassemble the enclosure Trademarks All trademarks are the properties of their...

Page 9: ...2 Introductions...

Page 10: ...these accessories is damaged or missing please contact the vendor where you purchased this notebook Also this chapter provides the specification of this notebook and introduces the function buttons qu...

Page 11: ...rance of this notebook before using it Please be aware that the notebook shown in this section may vary from the actual one that users purchased Top open View The figure of top open view and descripti...

Page 12: ...the S Bar application ODD Eject Touch this sensor to eject the disc tray of the optical device drive Please Note The ODD Eject sensor is functional under pure DOS system However in an Operating System...

Page 13: ...power button to awake the notebook from the sleep state Power Power Saving function LED Glowing white when the notebook power is turned on Glowing amber when NVIDIA Optimus function is activated LED g...

Page 14: ...power saving modes provided by ECO Engine or to turn this function off recurrently Webcam Press and hold the Fn button and then press the F6 button to turn the Webcam function on Press again to turn i...

Page 15: ...if the battery fails and it is recommended to replace a new battery Consult the local dealer for purchasing an equivalent type of battery recommended by the manufacturer Battery LED goes out when it...

Page 16: ...ireless LAN WiFi function is enabled LED indicator goes out when this function is disabled Note Functions listed here may be optional supported depending on the model users purchased Warning For fligh...

Page 17: ...ct USB interface peripheral devices such as the mouse keyboard modem portable hard disk module printer and more 2 Optical Drive Device This notebook is equipped with an optical drive device The actual...

Page 18: ...cards depending on the model users purchase Contact the local dealer for further and correct information and be noted that the supported memory cards may vary without notice 3 Audio Port Connectors M...

Page 19: ...A connector for speakers Connect the Surround speakers here 4 USB 3 0 Ports USB 3 0 the SuperSpeed USB delivers the higher interface speeds for connecting various devices such as storage devices hard...

Page 20: ...to connect an external Serial ATA hard disk device Users can now utilize shielded cable outside the notebook to take advantage of the benefits the SATA interface brings to storage 4 Power Connector T...

Page 21: ...y Pack This notebook will be powered by the battery pack when the AC DC adapter is disconnected 4 Battery Release Button It is a bounce back device as a preparation for releasing the battery pack Slid...

Page 22: ...iver Ivy Bridge Supported Processor Intel Quad Dual Core processor L3 Cache UP to 8MB Based on CPU Core Chips North Bridge Intel Chief River Ivy Bridge South Bridge Intel Panther Point HM77 Memory Tec...

Page 23: ...e Communication Port LAN 10 100 1000Mb Ethernet Wireless LAN Optionally supported Bluetooth Optionally supported Display LCD Type 17 3 LED panel Brightness Controlled by K B hot keys Video Graphics 1...

Page 24: ...devices will be auto detected when connected Audio Internal Speaker 2 speakers 1 sub woofer Sound Volume Adjust by K B hot key SW Software BIOS USB Flash Boot Yes USB floppy boot up DOS only BIOS Fast...

Page 25: ...3 Getting Started...
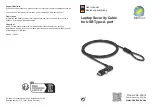
Page 26: ...Getting Started 3 2 Begin to Use the Notebook For a new user of this notebook we would like to suggest you follow the illustrations below to begin to use the notebook...

Page 27: ...y Li ion battery pack The rechargeable Li ion battery pack is an internal power source of the notebook Be aware of that this battery pack may be damaged if users try to disassemble the battery pack on...

Page 28: ...lign and place the battery to the battery tray with correct orientation 2 Press down the battery pack to fasten the battery pack in the battery tray 3 Press the lock unlock button to the Lock position...

Page 29: ...button to the unlocked position 3 Locate the battery release button on the bottom side 4 Push and hold the release button to the battery releasing direction as shown on the bottom side 5 Dig the edge...

Page 30: ...uspend timer s time period Turn off the system if you won t be using it for a period of time Disable unnecessary settings or remove idle peripherals Connect an AC DC adapter to the system whenever pos...

Page 31: ...or set your PC to standby hibernate mode after a period of user inactivity Follow the instructions below to adjust the power management settings in Windows OS Power Options in Windows OS allow you to...

Page 32: ...r saving function to manage the computer s energy consumption 2 Turn off the monitor after a period of user inactivity 3 Utilize the Fn and F12 sleep mode keys to turn into power saving mode 4 Tune th...

Page 33: ...instructions to assure your own safety and make yourself comfortable during the operations Safety and Comfort Tips The notebook is a portable platform that allows you to work anywhere However choosin...

Page 34: ...flat and naturally on the floor so that your knees and elbows have the proper position about 90 degree when operating 5 Put your hands on the desk naturally to support your wrists 6 Adjust the angle...

Page 35: ...Keyboard This notebook provides a full functioned keyboard This keyboard can be divided into four categories Typewriter keys Cursor keys Numeric keys and Function keys 1 Typewriter keys 2 Numeric key...

Page 36: ...to toggle the Scroll Lock on and off This function is defined by individual programs and is usually used under DOS Numeric Keys Find the numeric keys among the keyboard and activate the Num Lock funct...

Page 37: ...ional Press and hold the Fn button and then press the F4 button to launch the User Defined application Or press and hold the Fn button and then press the F4 button to launch the Windows Search functio...

Page 38: ...uetooth Optional Press and hold the Fn button and then press the F9 button to turn the Bluetooth function on Press again to turn it off This function button will not be available when the Bluetooth fu...

Page 39: ...ice to meet your personal needs For example if you are a left handed user you may want to swap the functions of the two buttons In addition you can change the size shape moving speed and other advance...

Page 40: ...to execute a double click Drag and Drop You can move files or objects in your notebook by using drag and drop To do so place the cursor on the desired item and slightly tap twice on the touchpad and...

Page 41: ...drive when the notebook is turned on The replacement of hard disk drive should be done by an authorized retailer or service representative Using the Optical Storage Device Your notebook is equipped wi...

Page 42: ...alled the EJECT button will not be functional In such a case users can right click the ODD in My Computer and select Eject to eject the ODD tray 3 Gently pull the tray out until fully extended 4 Place...

Page 43: ...ook allow you to connect peripheral devices and communication devices All functions and devices listed here are for reference only Peripheral Devices The functions listed here are supported optionally...

Page 44: ...Getting Started 3 20 Communication Devices The functions listed here are supported optionally depending on the model users purchased Contact the local dealer for detailed information...

Page 45: ...oduct users purchased may be upgradable or replaceable by user s request depending on the models users purchased This notebook is equipped with a high capacity Li ion battery pack and the battery pack...

Page 46: ...nding on the specification limitation To learn more about upgrade limitation please refer to the specification in the User s Manual provided For any further information about the product users purchas...

Page 47: ...notebook powered off at least for 30 minutes while charging the battery 5 If the problem remains please contact with your local dealers or local MSI service center for further support The system can n...

Page 48: ...n your system The region code is listed on the disc s packaging 2 If you see video but cannot hear audio check all of the following Make sure your DVD player s mute setting is off Check the master vol...

Reviews: