12
3. Now you can enter a macro. To do that, Click the ‘Start Record’ button in the right-
hand window. Enter the key Combination which you need for a special action in
the game. The option ‘Record delays between key commands’ is located under the
record button. This option allows you to determine how long a certain key should be
pressed for. As a result it’s possible to create a macro that instructs a figure in the
game to only perform a specific action after a pre-determined period.
4. Click ‘Stop Record’ once you’re done entering your key combination via the keyboard.
You can now either record an additional macro in the macro set you’ve created or
create new macro set. Click ‘OK’ when you’re done. The macro can now be assigned
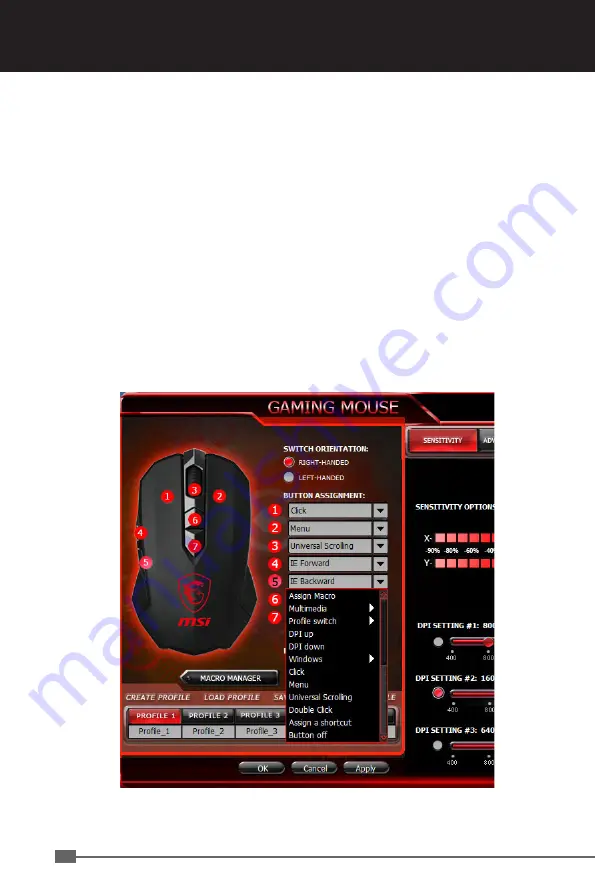
to any one of the six programmable buttons. You can assign the macro to a button
by clicking onto the arrow next to the box of the button you want the macro to be
assigned to. In the following dropdown menu choose ’Assign Macro’. All available
macro sets are now displayed. Select the one containing your macro of choice and
then click on the respective macro.
Note: if you’ve edited a macro that is already assigned to a particular button. You’ll
need to assign the macro to the desired mouse button again.
Summary of Contents for GAMING MOUSE 2017
Page 1: ...MSI GAMING MOUSE 2017 User s Guide...
Page 6: ...6...
Page 20: ...20...
Page 21: ...MSI GAMING MOUSE 2017...
Page 22: ...2 1 6 CPI 2 7 CPI 3 8 4 9 5...
Page 24: ...4 4 Windows 3 5 6 OK...
Page 25: ...MSI GAMING MOUSE 2017 5...
Page 26: ...6 7...
Page 27: ...MSI GAMING MOUSE 2017 7 GAMING MOUSE...
Page 28: ...8 Windows Windows Windows...
Page 29: ...MSI GAMING MOUSE 2017 9 exe file...
Page 30: ...10 DPI DPI DPI DPI 1 2...
Page 31: ...MSI GAMING MOUSE 2017 11 3 4 OK...
Page 32: ...12 1 2 3 5...
Page 33: ...MSI GAMING MOUSE 2017 13 4 Down UP 5 6...
Page 36: ...16 dpi 800dpi 1000Hz 1600 LED SPEED 2 255MS...
Page 37: ...MSI GAMING MOUSE 2017 17 1 11 APPLY Windows 1 11...
Page 39: ...MSI GAMING MOUSE 2017 19...
Page 40: ...20...


