Studiobot TX90 Quick Start Guide
21
4.
Power up the Flair computer system and all of its components. You
can do this while the robot is powering up (step 3).
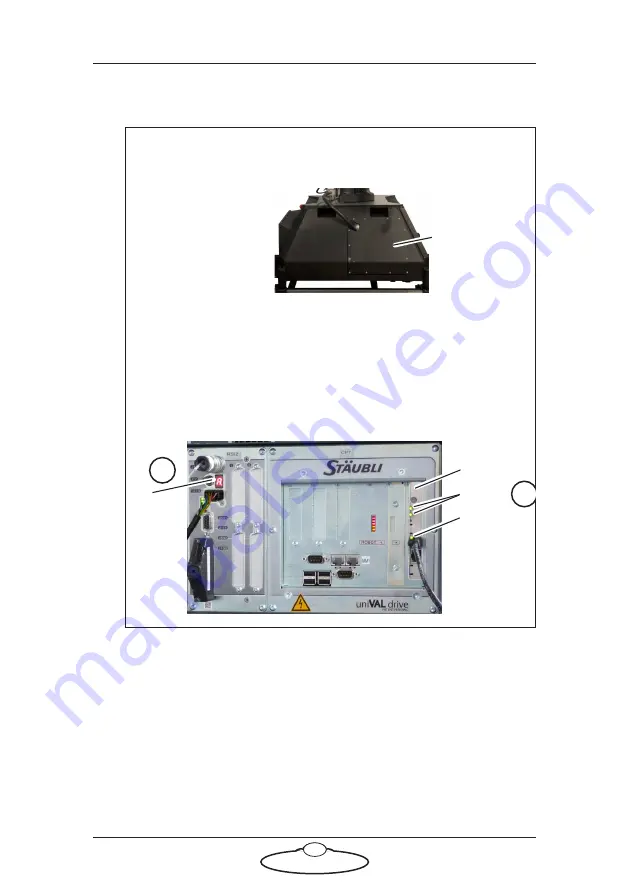
Do not start the
Flair application yet
.
5.
After the robot has finished powering up (step 3), the cifX board in
the Flair PC display two steady lights and one blinking light (see
previous diagram).
If the cifX board lights do not show as above after about three
minutes, then close Flair and restart INtime as follows:
Hint
The Stäubli CS8 is
housed inside the
Studiobot TX90
Base, which you will
not need to access
under normal
circumstances.
However, in case of
a fault, you can
access CS8 by unscrewing the bolts on the plate covering the
CS8 in Studiobot TX90 Base.
When the power-up sequence has completed, the Stäubli CS8
shows an “
A
” on its display.
Studiobot
TX90 Base
plate
covering
CS8
“
A
”
Steady
Blinking
cifX board
Summary of Contents for MRMC-2000-00-JB-0053
Page 19: ...Studiobot TX90 Quick Start Guide 15 Notes...
Page 35: ...Studiobot TX90 Quick Start Guide 31 9 Type AT to get a menu of commands...
Page 38: ...Studiobot TX90 Quick Start Guide 34 2 AT Debug 2 command gives you the following information...
Page 53: ...Studiobot TX90 Quick Start Guide 49 Notes...
Page 57: ...Studiobot TX90 Quick Start Guide 53 4 The Cabinet Temperature is shown on the pendant screen...
Page 58: ...Studiobot TX90 Quick Start Guide 54 Notes...
Page 62: ...Studiobot TX90 Quick Start Guide 58 Notes...


