1.
Page 30
mrcool.com
Refrigerant Piping Connection
IMPORTANT:
2
.
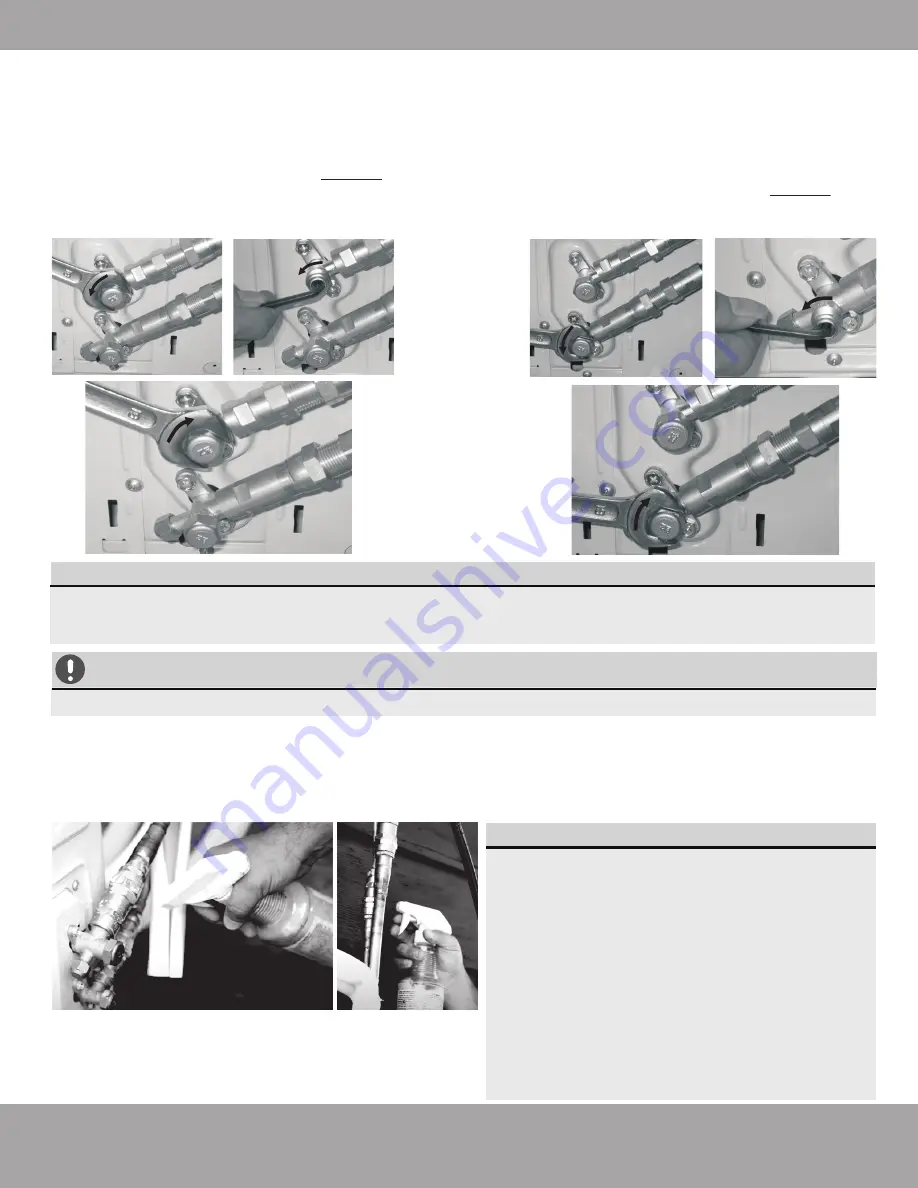
Using the images below as a guide, remove the cover
on the top valve, using a 19 mm open-ended wrench
or a crescent (adjustable-type) wrench. Then, insert a
5 mm Allen key and open the valve by turning it
counter-clockwise as far as it will go.
DO NOT
force it.
The valve is now open. Screw the cover back onto the
top valve and tighten it well to ensure that it is
properly sealed.
Using the images below as a guide, repeat the same
process for the bottom valve. Remove the cover on
the bottom valve, using a 19 mm open-ended wrench
or a crescent (adjustable-type) wrench. Then, insert a
5 mm Allen key and open the valve by turning it
counter-clockwise as far as it will go.
DO NOT
force it.
Screw the cover back onto the bottom valve and
tighten it well to ensure that it is properly sealed.
You will be asked to check for leaks at the
piping connections multiple times
throughout the following steps of the
installation, because the pressures within
the lines will change once the unit is turned
on and this could reveal leaks not present
during the initial check. These are imperative
to make sure your connections are not
allowing refrigerant to escape the system.
When checking for leaks, if any bubbles form,
it indicates the system has a leak and the
screw connector needs to be retightened. For
more information about checking for leaks,
please refer to the Electrical and Gas Leak
Checks section of the manual.
If the valves are not fully opened, it could cause the system to malfunction and suffer damage.
CAUTION
The conical ring on the valve and the seat within the caps have an important function of sealing
the valve. Ensure that you do not damage the cone and you keep the cap free of dust and dirt
while performing these steps.
IMPORTANT:
Step 5: Opening the refrigerant valves of the outdoor unit
After completing steps 1 and 2, you will now need to check all of the piping connections (at indoor unit and
outdoor unit) for leaks. You can do this by using leak detection spray or applying a soapy water solution (liquid
detergent/water mixture) to the connection via a spray bottle or brush. If any bubbles begin to form, that
indicates there is a leak, and the connection needs to be retightened. Tighten the connection and recheck it
for leaks. Refer to
Electrical and Gas Leaks Checks
section of this manual for more information.
3.


