E10
E11
Getting Started
Unpack your Coffeemaker
Unpack your coffeemaker and remove all plastic bags,
cartons and any tape on the brewer.
WARNING:
KEEP PLASTIC BAGS AWAY FROM CHILDREN.
Setting the Clock
Plug in brewer into an outlet. Press the
HR
and
MIN
buttons
to set the clock. 5 seconds of inactivity will set the clock at
the time selected.
Advanced Water Filtration System
The improved 2-step advanced water filtration system
reduces impurities like chlorine and calcium to make coffee
taste better.
1. Soak the Advanced Water Filtration Cartridge in cold
water for 5 minutes.
2. Rinse the soaked cartridge for about
1 minute.
3. Open bottom hatch where the
cartridge goes and insert a new
Advanced Water Filtration Cartridge.
FPO IMG
Filter pouch in the
Water Filtration
stick
4. Close the hatch and place system in designated slot in
water reservoir. More information can be found in the
“Clean Before First Use” section.
5. After 30 days or 30 uses (whichever comes first), replace
the Advanced Water Filtration Cartridge.
Clean Before First Use
1. Wash the Parts -
Wash the Carafe, Carafe Lid, Brew Basket,
Pod Holder, and Water Reservoir in a mixture of mild
detergent and water. Rinse each thoroughly.
2. Set up Water Reservoir –
Insert the
Advanced Water Filtration Holder into
the center of the Water Reservoir. Fill
the Water Reservoir with cold, fresh
water to the MAX fill line and put the
Water Reservoir in place on the back
of the unit. (Figure 1)
3. Place Mug and Pod Holder –
Place a large mug on the Drip
Tray. Set the Carafe to the side. Place the Pod Holder inside
the Brew Basket. (Figure 2) Slide the Brew Basket into place.
4. Cleansing Brew –
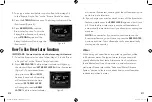
Press the
SIZE
button until “12 oz” is
displayed. Press
BREW NOW
to begin the Cleansing Brew
Cycle. (Figure 3) The light on the BREW NOW button will
FPO IMG
Water Reservoir
Figure 1
BVMC-SS12XTH_21ESM1.indd 10-11
BVMC-SS12XTH_21ESM1.indd 10-11
2021/8/11 上午9:55
2021/8/11 上午9:55


