

2
Issue 01.2021
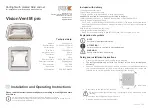
Installation
Please clean the frames carefully before mounting the
sealant.
Follow the instructions of the sealant manufacturer.
Separate the inner and outer frames and fit the outer frame
to the outside of the roof aperture onto a bed of sealant.
The operating handles facing the front and rear of the
vehicle!
Place over the screw holes on the inside of the frame, the 8
fixing brackets; four in each corner, four in the centre of each
side. Secure with screws, stop as soon as the brackets start to
distort.
Max. Torque 0.5 Nm.
Remove the small tabs on the corner bracket before installing
the inner frame.
To fit the inner frame, gently pull out the pointed ends of the
cover profiles to release them and reveal the fixing points.
Version 1: Timber support under the roof lining
Offer up the inner frame into the outer frame.
Use the four small
holes to fix the inner frame with standard screws into the timber
support.
Version 2: Inner lining made of plywood / polyester layer
Offer up the inner frame into the outer frame and mark drill
holes (large screw hole).
Pre-drill the screw holes and screw the inner frame tight with
the supplied plastic screws.
Refit the inner frame covers by locating the securing lugs
and keeping the covers parallel against the roof whilst sliding
them carefully onto the frame, ‘clicking’ back into position,
without distorting.
Operation
To open the rooflight, press both locking buttons and push the handles upwards.
The rooflight can be opened fully by the handles or in four different directions, so that the
dome can be angled against driving weather conditions.
To close the rooflight, press the locking buttons again and pull the handles down. The roof
hood is locked.
Keep the pleated blinds open while driving to avoid driving noise and damage
from the airstream.
To avoid heat accumulation do not close blind completely during the day. Open
both pleats when not using the vehicle.
Cleaning
For easier cleaning of the dome it can be removed from the frame
by releasing the four screws holding the handle arms.
Never remove the screws holding the dome and the
handles together. These are secured by a torque
screwdriver and should only be handled by an approved
dealer.
Use only clear water and a soft sponge.
Solvents may attack the plastic and make it brittle.
Clean the gaps by immersing the hood in a container filled with
water. Let the dirt soak a little.
Use the two handles to pull the hood through the water so that the
dirt can be washed out.
Make sure that only the original screws are used when
replacing the dome and they enter the thread in the plastic
correctly. Do not over-tighten.
Clean the pleated blinds with a soft brush, dry cloth or feather duster.
We strongly advise against wet cleaning, as this can damage the insect screen and
blackout pleated blind.
Extras (optional)
Designation
Article No
.
Adapter frame for Fiat Ducato
4040ARW
Warranty
The legal warranty applies.
Var.1
Var. 2
mpk-kierspe.de/Downloads


