background image

Setting Recorde Functions

58

59

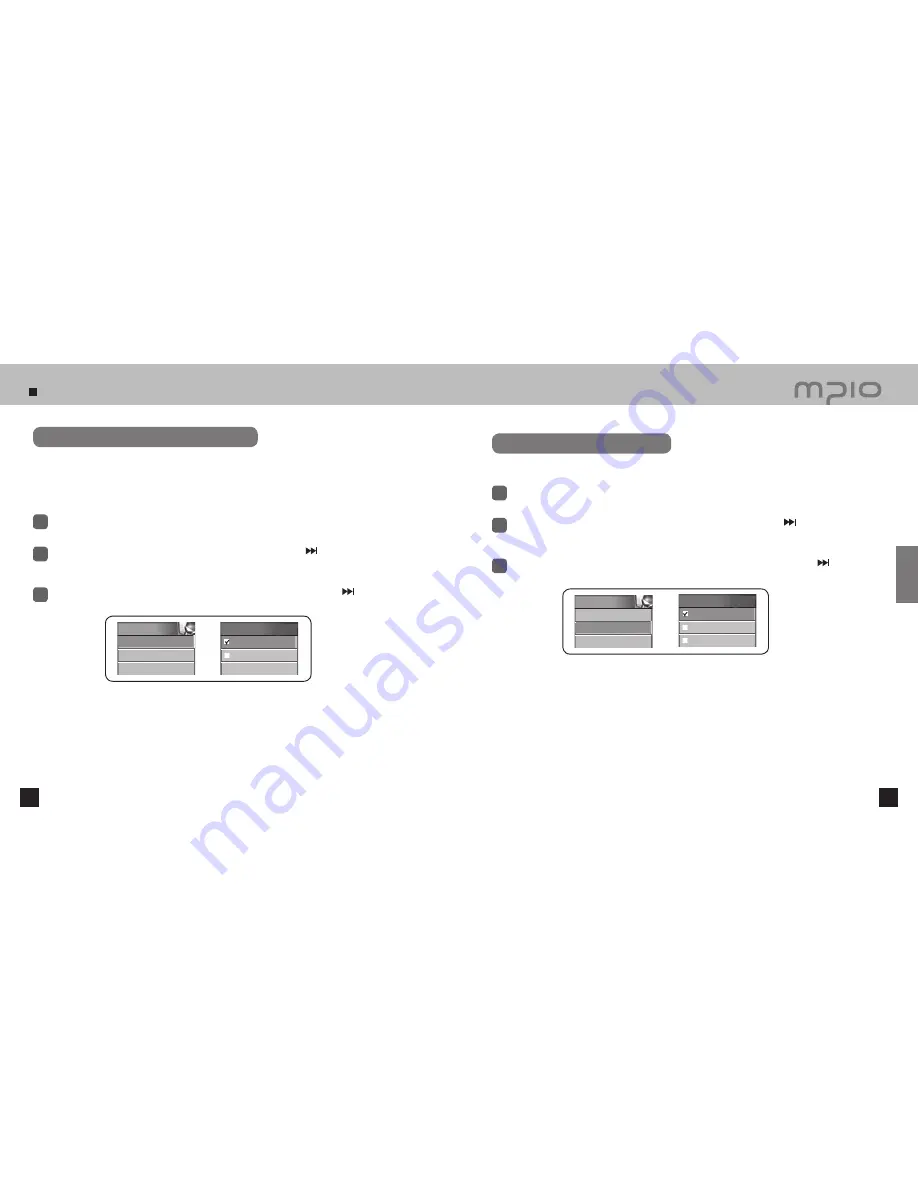
Setting Voice Activity Detector (VAD) 

Select 

RECORD

 in the menu. 

1

Push the lever in 

+ / -

 directions to select 

VAD

 and then, push the lever in   direction or press it 

to enter. 

2

3

Push the lever in 

+ / -

 directions to Select voice detection and then, push the lever in   direction 

or press it to save the setting. After saving, the device will return to its previous menu.

VAD ( Voice Activity Detector )

VAD is a function that begins recording when the device detects a voice signal, and stops recording when the 

signal is absent. The VAD level is adjustable so the recording begins when the recording signal from the internal 

microphone reaches the user’s designated level.

On

: When VAD is turned ON, the device will keep recording when the input signal maintains at     

        the set level.

Off

: When VAD is turned OFF, the device will keep recording once it begins regardless of the  

        input signal.

Auto Sync settings

Select 

RECORD

 in the menu.

1

Push the lever in 

+ / -

 directions to select 

Autosync

 and then, push the lever in   direction or 

press it to enter.

2

3

Push the lever in 

+ / -

 directions to select the Auto Sync mode and then, push the lever in   

direction or press it to save the setting. After saving, the device will return to its previous menu.

Auto Sync allows the user to separate the songs automatically when encoding from Line-in input.

Off

: When encoding using LINE-IN input, the device will store the songs from LINE-IN input as one file.   

       (Ex: LINE001.WMA)

SYNC 1

: When encoding using LINE-IN input, the device will store one song.

SYNC all

: When encoding using LINE-IN input, the device will store all songs into separate files.  

                 (Ex: LINE001.WMA, LINE002.WMA, LINE003.WMA, etc)   

RECORD    

4. VAD


5. Autosync   
6. ALC


VAD

On   

Off       

Autosync      

Off   

Sync 1  
Sync all 

RECORD    
4. VAD   


5. Autosync


6. ALC


Usage

Summary of Contents for FG200

Page 1: ...FG200 User s Manual...

Page 2: ...r part as well as compressing the documents in an electronic format without authorization of MPIO Co Ltd is restricted by the law Trademarks Microsoft Windows Windows Explorer and Windows logo are reg...

Page 3: ...d a PC When storing important data please make a back up copy The data may be damaged due to malfunction or other elements such as outer impact or lack of battery Please note that in case of data loss...

Page 4: ...56 Recording Level Control Setting 57 Setting Voice Activity Detector VAD 58 Auto Sync settings 59 Setting Automatic Level Control ALC 60 Setting Tuner Reservation Voice Reservation 61 Setting Video...

Page 5: ...ng MP3 WMA OGG Q10 format les as well as WMA DRM protected WMA les purchased in online shops FM Radio Support Beyond a simple radio function FG200 supports Auto Preset Functions for storing your favor...

Page 6: ...ing Using the lever Pressing Lever Press the lever down or press and hold it Pushing Up Push the lever or push and hold it up Push Down Push the lever or push and hold it down Pushing to Left Push the...

Page 7: ...ged to Do not charge the battery past the speci ed time Do not charge the battery past the speci ed time It may cause a re When the playback time reduces dramatically the internal rechargeable battery...

Page 8: ...sion cables is not guaranteed Installing the software Note In Windows 98 98SE the program must be installed to use FG200 as a removable disk Please install the USB drivers before use In Windows ME 200...

Page 9: ...s needed to install But the following items must be installed Windows 98 Device Driver Must be installed for Windows 98 98SE users MPIO Utility 4 Click the Install button to install the selected utili...

Page 10: ...der Windows 98 98SE doesn t connect with FG200 automatically install the USB Driver manually by referring to Installing USB Driver manually Page 19 20 Windows 98 ME Control Panel Systems Device Manage...

Page 11: ...k Icon When double clicked the connection icon on the LCD screen will change 2 The user can store delete data and create a folder in the same way as a hard drive Copy paste Drag Drop commands can be u...

Page 12: ...evice from the PC safely If these instructions are not followed it may result in data damage or product malfunction To use the movie playback function appropriately use the included PMP Transcoder to...

Page 13: ...n CD and run it 1 Use the Browse button to select the target installation directory and then click the Next button 3 Click the Next button 2 When the installation is complete click the Finish button T...

Page 14: ...lay back the selected le 2 Move the seek bar to the intended starting position 3 Press the button to set the end position The mark will appear at the end position like the start position marker 6 Pres...

Page 15: ...ose Delete All List to cancel all les 2 Click the button to skip the current le and convert the next le on the list 4 Click the button to convert all les The le currently being converted will be highl...

Page 16: ...20x480 wide screen format Choosing this option will show the movie in the original screen ratio Select the Path tab Designated the directory for the converted les to be saved in 3 Using theTranscoder...

Page 17: ...hanged by setting Refer to page 70 and 79 To adjust the volume Push the lever toward direction during playback or pause to adjust the volume Note The volume can be adjusted from 00 to 30 To adjust the...

Page 18: ...ton again to resume the recording 2 Press the REC button to stop recording 3 Note The les will be stored in order of VORC001 VORC002 etc And it will be stored in the RECORD folder as a WMA le When sto...

Page 19: ...Be sure to set the auxiliary device s volume in an appropriate level before encoding Too high or low volume may result in poor audio quality The Navigation Mode allows you to nd the le or switch modes...

Page 20: ...Movie folder it can be added to MY LIST Enter My List in Navigation Mode and play the selected les 3 Select music les voice recording les or encoded les in My List Go to the Photo folder in the Navig...

Page 21: ...iles with extensions changed to MP3 may not played by FG200 When playing VBR files pushing the lever in direction within the first 4 seconds may not play the previous track Press and hold the FUNC but...

Page 22: ...in in SCAN mode For more detailed information about the FM Menu refer to pages 51 54 Records the selected FM Radio broadcast Press the REC button while listening to FM Radio to switch to FM Recording...

Page 23: ...the lever in directions to move the highlight Entering Menu Push the lever in direction or press the lever to enter the menu Changing settings Push the lever in directions to change the setting Savin...

Page 24: ...ing values in each frequency range instead of the pre de ned EQ setting values Select AUDIO in the menu 1 Push the lever in directions to select User EQ and then push the lever in direction or press i...

Page 25: ...sting bass and treble will provide more dynamic music playback Select AUDIO in the menu 1 Push the lever in directions to select Dynamic Bass Treble and then push the lever in direction or press it en...

Page 26: ...l Repeats all playable songs Random All Plays all playable les in random order Folder Plays the les stored in the selected folder once Repeat Folder Repeats the les stored in the folder Random Folder...

Page 27: ...nge the sound modes MONO and STEREO Setting Auto Channel Save Follow the directions in FM Radio Mode only Auto Preset menu is only accessible in RADIO Mode Select FM Radio in the menu 1 Push the lever...

Page 28: ...e lever in directions to select Recording Option and then push the lever in direction or press it to enter 2 3 Push the lever in directions to select the recording mode and then push the lever in dire...

Page 29: ...in direction and move to the EXIT to cancel the recording quality setting Increasing sample rate and bit rate will increase qual ity but be sure to check for sufficient memory space because the file...

Page 30: ...t level Off When VAD is turned OFF the device will keep recording once it begins regardless of the input signal Auto Sync settings Select RECORD in the menu 1 Push the lever in directions to select Au...

Page 31: ...the menu 1 Push the lever in directions to select Tuner Reservation or Voice Reservation Push the lever in direction or press it to Enter Reservation screen will appear on the LCD screen 2 Tuner Reser...

Page 32: ...Display in the menu 1 Push the lever in directions to select Visualization and then push the lever in direction or press it to enter 2 3 Push the lever in directions to select the visualization to us...

Page 33: ...ttings also support ID3 tags Refer to page 65 for ID3 tags Setting Track Information Indicator Select Display in the menu 1 Push the lever in directions to select File Info and then push the lever in...

Page 34: ...urrent song Setting Scroll Speed Select Display in the menu 1 Push the lever in directions to select Scroll Speed and then push the lever in direction or press it to enter 2 3 Push the lever in direct...

Page 35: ...lecting ON will maintain the backlight ON and then the screen saver will be disabled Setting Brightness Select Display in the menu 1 Push the lever in directions to select Brightness Push the lever in...

Page 36: ...stored photo images Slide Image Shows a slideshow of the stored photo images Setting Lyrics Select Display in the menu 1 Push the lever in directions to select Lyrics and then push the lever in direc...

Page 37: ...be set to play music automatically once the power is turned ON Setting Resume Select System in the menu 1 Push the lever in directions to select Resume and then push the lever in direction or press i...

Page 38: ...sic Setting Playback Speed Select System in the menu 1 Push the lever in directions to select Speed and then push the lever in direction or press it to enter 2 3 Push the lever in directions to select...

Page 39: ...ess the lever a con rmation window will appear Select YES to erase the folder If there are les remaining in the folder the folder will not be erased Be sure to erase the les within the folder before d...

Page 40: ...etting Pressing the lever shortly will also save the setting After saving the device will return to its previous menu Note Canceling Sleep Timer Push the lever in direction and move to the EXIT to can...

Page 41: ...e LCD screen Setting System 80 81 Setting Alarm Select System in the menu 1 Push the lever in directions to select Alarm and then push the lever in direction or press it to enter Alarm Setting Screen...

Page 42: ...gs and initializes all menu settings to default settings 3 Move the lever to the directions and select Yes to initialize all settings of the menu How to play Select Game in the menu 1 Push the lever i...

Page 43: ...CORD Recording Option Quality Record Gain VAD Autosync ALC Tuner Reservation Voice Reservation Photo Movie Display Visualization Language File Info Playing Time Scroll Speed Lighting Time Brightness S...

Page 44: ...complete click the OK button The captured screens of MPIO Utility may vary for the user s PC environment MPIO Utility cannot be run under MAC OS For information regarding MPIO Utility installation ref...

Page 45: ...lick the Start button 1 Caution When formatted the menu settings will be changed to default settings The files in FG200 WILL BE LOST after formatting When FG200 has been formatted using the Windows FO...

Page 46: ...you can download from the MPIO website is compressed as a Zip file Upgrade_FG200 dwu file will be created when you uncompress the zip file When the firmware upgrade is complete FG200 will be turned OF...

Page 47: ...wn or malfunction can be caused if external shock is applied or the battery is not sufficient during the firmware upgrade I cannot turn on the player If the battery is completely discharged at the pla...

Page 48: ...e product s memory capacity due to the logical file system 2 Gigabyte is planned to be available by 2nd half of 2005 The actual release date may vary The battery life may differ from specifications de...

Reviews: