background image

160

Chapter

5

Downloading Software Through The Ethernet Using FTP

Downloading Software Through The Ethernet Using FTP

IMPORTANT

To load software through the ethernet, you need the IP Address of the 
printer and the flash memory must contain basic printer code. If the 
flash memory was replaced, or if a download was interrupted (e.g., by a 
power outage), you must load software through the parallel port. (See 
“Downloading Software If Flash Contains Only Boot Or Corrupt Code” 
on page 163.)

1.

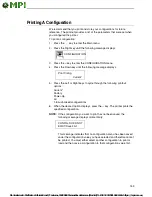
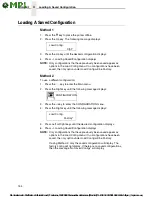
Make a configuration printout of all saved configurations. See page 153.

2.

Set the printer power switch to O (Off).

3.

Connect the ethernet cable to the printer interface.

4.

On the printer control panel, press and hold down the 

 and 

 keys. 

Without releasing the keys, power the printer on. When you see


“DECOMPRESSING PROGRAM” on the on the LCD, release the keys.

5.

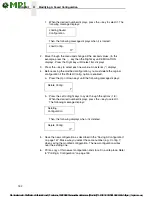
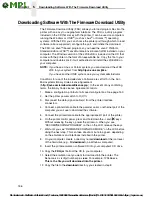
Wait until you see “WAITING FOR DOWNLOAD” on the LCD before 
proceeding. This can take about a minute to appear, depending on the 
emulations and interfaces installed in the printer.

6.

Using Windows Explorer, create a directory named 

download

 at the root 

level of your C: hard drive (

C:\download

).

7.

Insert the printer emulation software CD into your computer’s CD drive.

8.

Select the emulation set you want to download into the printer. The 
filename is a six digit number plus 

.exe

. For example: 123456.exe


This file contains the file you will download into the printer.

9.

Copy the file to the 

download

 directory you created in step 6.

10. Start a command prompt session in Windows. (The Start Menu icon is 

usually labeled 

MS-DOS Prompt 

or 

Command Prompt

.)

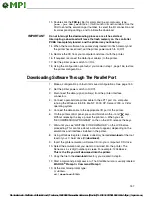
11. At the command prompt type:

C:

<Enter>


cd \download

<Enter>

12. Extract the download file by typing the filename of the .exe file. 


Example: For 123456.exe, the extracted file will be the same name as the 
.exe file but with a .prg extension. 123456.prg is the file you will download 
into the printer.

13. Start the FTP (file transfer protocol) program by typing:

ftp 

xxx.xxx.xxx.xxx

<Enter>


where 

xxx.xxx.xxx.xxx

 is the IP Address of the printer.

14. Log in to the printer by typing:

root

<Enter>

You are given a password prompt.

NOTE:

The default is no password. If the FTP program requires a password, 
contact the system administrator.

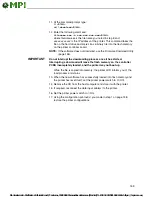
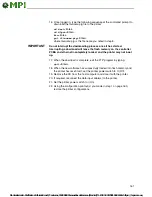
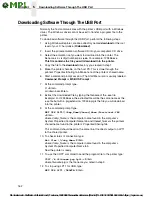
15. At the password prompt, press <Enter>.

Mantenimiento Periféricos Informáticos C/Canteras, 15 28860 Paracuellos de Jarama (Madrid) Tel: 00 34 917481604  Web: https://mpi.com.es/

Summary of Contents for InfoPrint 6700-M40 Series

Page 1: ...InfoPrint 6700 M40 Series Thermal Printer G550 0997 03 User s Manual Mantenimiento Perif ricos Inform ticos C Canteras 15 28860 Paracuellos de Jarama Madrid Tel 00 34 917481604 Web https mpi com es...

Page 2: ...Mantenimiento Perif ricos Inform ticos C Canteras 15 28860 Paracuellos de Jarama Madrid Tel 00 34 917481604 Web https mpi com es...

Page 3: ...InfoPrint 6700 M40 Series Thermal Printer G550 0997 03 User s Manual Mantenimiento Perif ricos Inform ticos C Canteras 15 28860 Paracuellos de Jarama Madrid Tel 00 34 917481604 Web https mpi com es...

Page 4: ...civilian agencies and Defense Federal Acquisition Regulation Supplement 227 7202 in the case of military agencies use duplication and disclosure by agencies of the U S Government shall solely be in ac...

Page 5: ...irements 22 Setting Up The Printer 23 Loading Ribbon 24 Loading Roll Media 27 Loading Fanfold Media 32 Operating Modes 36 Controls And Indicators 37 Power Switch 37 Powering On The Printer 37 Control...

Page 6: ...nu 63 Selecting A Menu Option 65 Changing Printer Settings 66 Hidden Menus 67 Menu Overview 68 Main Menu 69 MEDIA SETUP Menu 71 MEDIA SETUP Submenus 72 SENSOR SETUP Menu 87 SENSOR SETUP Submenus 88 EM...

Page 7: ...river 165 PGL Emulation Online 165 Download Mode 166 PTR_SETUP 168 Labeling Applications 168 Select And Print Downloaded TrueType Fonts 169 169 6 Routine Care And Troubleshooting 171 Cleaning 171 Exte...

Page 8: ...Snapshot Image to a Second Printer 240 Updating The Printer Configuration To The QCMC 242 Loading New Firmware On The Printer 243 Install The EMC 244 Using The Standard Peel Without Liner Rewinder 24...

Page 9: ...essories 264 Genuine InfoPrint Solutions Company Thermal Transfer Ribbons 265 Ribbons 450M 266 Printheads 266 Accessories 266 C ASCII Control Codes 267 D Glossary 269 Notices 275 Product recycling and...

Page 10: ...Table of Contents Mantenimiento Perif ricos Inform ticos C Canteras 15 28860 Paracuellos de Jarama Madrid Tel 00 34 917481604 Web https mpi com es...

Page 11: ...The four digit machine type is 5403 Please enter this number when prompted NOTE Technical support is also available from the InfoPrint Solutions Company Printing Systems Division home page at http www...

Page 12: ...ion environments without requiring modification to host data stream Fanfold media handling High Resolution Printhead 203 dpi or 305 dpi for sharp graphics and text Media sensing Horizontal positioning...

Page 13: ...PGL or ZGL to print characters for virtually every language used in the world today including simplified and traditional Chinese Japanese and Korean see Andal Fonts on page 235 Quick Change Memory Ca...

Page 14: ...the dispensed liner in front of the printer For more information about printer options see Appendix B on page 221 Thermal Printer Technology Quiet and fast with excellent print quality your multifunc...

Page 15: ...y label applications The wide selection of media sizes and face stocks have been tested with InfoPrint Solutions Company ribbons for print quality and usage NOTE The term media used in this manual ref...

Page 16: ...out printer operation This symbol indicates the presence of a hazard that could cause death or serious injury This symbol indicates the presence of a hazard that could cause moderate or minor injury T...

Page 17: ...mer s Reference Manual Provides information for the printer to function in the legacy TEC application environment without requiring modification to host data stream IGL Programmer s Reference Manual P...

Page 18: ...ity which allows you to organize all of the printers in your office remotely in a single database download software and printer settings from a host computer with a single mouse click RFID Label Refer...

Page 19: ...event electrostatic discharge damage while setting up the printer The discharge of accumulated electrostatic energy can damage or destroy the printhead or electronic components used in this device Fig...

Page 20: ...hen inserted in a correctly wired power outlet the ground conductor will ensure that the printer chassis is at ground earth potential Do not use adapter plugs or remove the grounding prong from the ca...

Page 21: ...rinter supports simultaneous connection of the parallel serial and USB interfaces using the Auto Switching feature Auto Switching is described on page 55 d Ethernet Connection Insert a suitable ethern...

Page 22: ...es that the printer chassis is at ground earth electrical potential IMPORTANT Never use adapter plugs without grounding prong Never remove the grounding prong from the power cable plug If using an ext...

Page 23: ...man body or other surfaces can damage or destroy the printhead or electronic components used in this device ATTENTION Do not close the pivoting deck without label stock installed between the printhead...

Page 24: ...ribbon take up spindle NOTE The first ribbon take up core comes with the printer Thereafter move the empty core from the ribbon supply spindle to the take up spindle after the ribbon is used up 3 Sli...

Page 25: ...he ribbon take up and supply spindles NOTE Make sure to thread the ribbon behind the ribbon take up spindle NOTE The alternate ribbon path is for inside ink ribbon Printhead Ribbon Guide Roller 2 Ribb...

Page 26: ...core on the ribbon take up spindle with tape 7 Manually rotate the take up spindle counterclockwise until the ribbon leader has passed the printhead 8 Rotate the deck lock lever fully clockwise to clo...

Page 27: ...ge the media See Cleaning The Printhead Platen Roller And Media Sensors on page 172 1 Slide the media hanger guide outward to the end of the media hanger as shown 2 Remove and dispose of any empty med...

Page 28: ...er s side wall NOTE For information regarding smart labels refer to the RFID Labeling Reference Manual 5 Slide the media hanger guide against the media roll to prevent horizontal travel but make sure...

Page 29: ...er threading instructions NOTE The alternate media path is for inside wound label media ATTENTION If the blue media width guide locking knob is too loose or is removed the media width guide will fall...

Page 30: ...ition of the media sensor assembly see Positioning The Media Sensors on page 47 10 Align the left inside edge of the media with the inside media edge guide Media Sensor Assembly Inside Media Edge Guid...

Page 31: ...ia type installed Direct or Transfer The Print Mode submenu is located in the MEDIA SETUP menu See MEDIA SETUP Menu on page 71 for details 13 Verify the Gap Mark Sensor selection matches the type of m...

Page 32: ...or bottom panel opening 4 Place the media over the media hanger flush against the back of the printer 5 Slide the media hanger guide against the outer edge of the fanfold media to prevent horizontal t...

Page 33: ...or is removed the media width guide will fall off the printer 8 Turn the media width guide locking knob counterclockwise just enough to slide the media width guide and no more 9 Position the metal gui...

Page 34: ...ent Along the Inside Media Edge Guide 11 Align the left inside edge of the media with the inside media edge guide Inside Media Edge Guide Media left edge Mantenimiento Perif ricos Inform ticos C Cante...

Page 35: ...sage to display 13 Verify that Print Mode submenu is set for the media type installed direct or transfer The Print Mode submenu is located in the MEDIA SETUP menu See Main Menu on page 69 for more inf...

Page 36: ...key toggles the printer between the online and offline modes The ONLINE status indicator is lit green in online mode Offline In offline mode you can perform operator functions such as loading media o...

Page 37: ...the LCD momentarily displays the DPI resolution 203 or 305 DPI of the installed printhead The default power on state is online Once the printer has successfully initialized the ONLINE status indicator...

Page 38: ...ine Mode Offline Mode sets the printer to Online Mode Fault Mode causes the printer to recheck the faults if the faults have been cleared the printer toggles to the Offline mode Menu Mode sets the pri...

Page 39: ...move down into the submenus of that menu If the highlighted menu is a display only menu then pressing the Enter key performs no function If the highlighted menu has selectable parameters pressing the...

Page 40: ...ement the segment or character value If at the bottom of the segment or character value range pressing the Down key will go to the top of that value range This key is inactive in all other states This...

Page 41: ...typematic and if held down will start to accelerate Combination Keys Menu Unlock Combo Key A combination key whose default setting is the Enter and Down keys pressed simultaneously In Menu mode this k...

Page 42: ...Peel Off option is not installed the error message OPTION NOT INSTALLED displays Requires the Standard Peel with or without Liner Rewinder options to be installed Cut When the optional media cutter is...

Page 43: ...printhead pressure switch has two positions high and normal Follow this procedure to adjust the media thickness 1 Rotate the printhead balance adjustment dial until A appears in the indicator window s...

Page 44: ...d the Indicator Window Media width adjustment allows you to vary printhead pressure along the platen from one end to the other If the printhead pressure is out of balance the printed image will be dar...

Page 45: ...balance adjustment dial until the correct value appears in the indicator window see Detail B above Table 3 Printhead Balance Adjustment Ranges Printhead Balance Dial Setting A 1 to 2 2 to 4 4 to 5 Pap...

Page 46: ...for consistent image printing across the label If the printhead is misaligned labels will print with uneven ink distribution i e splotches and fading ink When you align the printhead you are moving t...

Page 47: ...ly that detects the top of form position on media with label length indicators gaps notches holes or black marks These sensors also detect when a Paper Out condition exists See page 215 for media and...

Page 48: ...ensor submenu under SENSOR SETUP menu For Mark sensing the ribbon must be loaded see Loading Ribbon on page 24 3 Perform an Auto Calibrate See Running Auto Calibrate on page 50 Sensing Media with No L...

Page 49: ...SETUP 5 Press the Down key until Gap Mark Sensor Disable the currently enabled option displays 6 Press Left or Right keys until the option that matches the type of label length indicators on the insta...

Page 50: ...to place the printer in Menu mode 2 Press Down Enter keys together until THE KEY IS UNLOCKED displays 3 Press the Right key until SENSOR SETUP displays 4 Press to enter the SENSOR SETUP menu 5 Press...

Page 51: ...Threshold values illustrates if and when each label length indicator is detected and shows the difference between the label length indicators and the label The profile printout see Figure 22 on page...

Page 52: ...the Profile printout represent the last values determined from a successful Auto or Manual Calibrate or the factory default values if no Auto or Manual Calibrate was performed Figure 22 This Illustra...

Page 53: ...the Cal in Peel Mode option under the SENSOR SETUP menu Cal in Peel Mode displays only if Admin User is enabled under the PRINTER SETUP menu 1 Press to place the printer in Menu mode 2 Press the Down...

Page 54: ...between a label and its label length indicators 13 Press the Pause key until OFFLINE displays 14 Press the Feed key several times Each time you presss the media advances one label length and stops NOT...

Page 55: ...printer the ability to handle multiple data streams sequentially With Auto Switching the printer can service hosts attached to the serial parallel USB or Ethernet as if they were the only interface co...

Page 56: ...DGE Return 10 28 CHASSIS GROUND 17 DATA LINE 2 Return 3 21 ONLINE Return 13 28 GROUND 30 DATA LINE 3 Return 4 22 FAULT Return 32 29 Spares 14 DATA LINE 4 Return 5 23 PAPER EMPTY Return 12 28 No Connec...

Page 57: ...xt data transfer Online A high true level from the printer to indicate the printer is ready for data transfer and the Pause key on the control panel has been activated When the printer is in online mo...

Page 58: ...the eight bits are sent over eight data lines Some devices cannot send data over their eight data lines To bypass this the IEEE 1284 permits data to be sent as half a byte over four status lines Half...

Page 59: ...Data 6 8 Host Printer Data 7 9 Host Printer Data 8 MSB 10 Printer nAck PtrClk PtrClk 11 Printer Busy PtrBusy PtrBusy 12 Printer PError AckDataReq AckDataReq 13 Printer Select Xflag Xflag 14 Host nAuto...

Page 60: ...wledge Data Request nAcknowledge Reverse Driven by the printer Indicates the printer is in a fault condition Data bits 3 and 7 in Nibble Mode Xflag Driven by the printer A high true level indicating t...

Page 61: ...rates of 600 1200 2400 4800 9600 19200 38400 57600 and 115200 are available The length of the data cable from the host computer to the printer must not exceed 50 feet 15 meters for RS 232 Received Dat...

Page 62: ...e printer The ON condition is required for the printer to receive data Data Terminal Ready DTR Control signal from the printer Subject to configuration Mantenimiento Perif ricos Inform ticos C Cantera...

Page 63: ...uration menus using the appropriate navigation keys as shown in Figure 16 See Controls And Indicators on page 37 for more details on the function of the operator panel keys You can select different op...

Page 64: ...he ENTER key to allow you to make configuration changes 3 MEDIA SETUP Enters the printer menus 4 MEDIA SETUP Print Intensity 3 Enters the MEDIA SETUP Menu 5 DOWN Key UNTIL Print Mode Transfer Print Mo...

Page 65: ...unlocked you select the value or option that displays An asterisk displays after the value you selected and the configuration is changed immediately IMPORTANT This change takes effect for all subsequ...

Page 66: ...ptions 5 Press the key to select a value An asterisk displays next to the selected value or option 6 If there are more submenu values or options you want to change use the Up Down Left and Right keys...

Page 67: ...ill now appear 8 If there are more submenu values or options you want to change use the Up Down Left and Right keys to access the value and the key to select it At any time you may press the key to re...

Page 68: ...er emulations and various printer operating parameters CONFIGURATION Name store and retrieve up to eight custom printer configurations Setup and status reporting for RFID encoder if installed DIAGNOST...

Page 69: ...nce Table file is loaded 3 This menu appears only if an EMC Expanded Memory Cartridge is installed 4 This menu appears when Slew Speed Ctrl is set to Manual in the MEDIA SETUP menu 5 This menu appears...

Page 70: ...erface ETHERNET PORT ETHERNET SETTING 3 WLAN SETTING 4 Parallel Port 5 CENTRONICS 6 IEEE 1284 7 USB Port Serial Port Printer Mgmt INTERFACE page 120 NOTES Italicized items are available only when you...

Page 71: ...nable TOF Adjust 0 40 inches 0 00 to 0 40 inches 4 Notes Factory Default Italicized items are available when Admin User is set to Enable in the PRINTER SETUP menu 1 You can change the unit value from...

Page 72: ...equires special heat sensitive media Media Handling This option specifies how the printer will handle the media labels or tag stock Tear Off Strip factory default Printer prints on the media and sends...

Page 73: ...s Standard but the cross perforation following the last printed label is aligned at the tear bar No blank label is needed to remove the last printed label No blank label should exist between print job...

Page 74: ...This does not include the liner material or gap Tag Stock with notches or holes measurable length from the trailing edge of one notch or hole to the leading edge of the next notch or hole Tag Stock w...

Page 75: ...n the setting of the Units submenu under the MEDIA SETUP menu The allowable range in inches is 0 1 to 4 1 inches The allowable range in millimeters is 2 5 to 104 mm Ver Image Shift This option specifi...

Page 76: ...dscape Landscape refers to horizontal orientation where the width of a page is greater than its height The top edge of the image is the left edge of the media The following illustration is an example...

Page 77: ...its height The top edge of the image is the right edge of the media the left edge of the image is the trailing edge of the media The factory default is Portrait The following illustration is an exampl...

Page 78: ...els that exceed the physical page width of the printer will be clipped or wrapped depending upon the setting of the Autowrap menu option The options are Disable the factory default and Enable Examples...

Page 79: ...ll be horizontally adjacent Once these labels have been completed the printer will print the remaining 2 labels along with a blank 2 label Solution 2 The user sets Auto Label Width to 2 configures the...

Page 80: ...that these values are not optimum Printer Operation The maximum Num Auto Labels 20 4 5 The selected value of 3 is legal After the file is sent the printer will begin by printing the first 4 width lab...

Page 81: ...Print Direction This option determines the basic print image orientation NOTE Print Direction will not change the orientation of any print test patterns in the DIAGNOSTIC menu Print Direction has two...

Page 82: ...wait after a label is removed from the peel bar before starting to print the next label The range is 0 1 to 60 0 seconds and the factory default is 0 1 second Table 9 Results of Using the Head First...

Page 83: ...media sensor looks for the gap notch hole or black mark only after the media has advanced the distance specified by the Label Length value in the MEDIA SETUP menu or by the Host Forms Length value sen...

Page 84: ...NOTE When Fault Reprint is set to Enable and a RIBBON OUT condition occurs some labels may not reprint This depends on the label length print speed selected and the additional time it takes to detect...

Page 85: ...rk Sensor Gap the printer will subtract the Gap Length value in the SENSOR SETUP menu from the Sensed Distance value obtained when the Auto or Manual Calibrate was performed If you set the label lengt...

Page 86: ...losed and advances media until the next gap notch or mark is detected by the Media Sensor s When print data is sent printing begins only after the next TOF is detected resulting in one or more blank l...

Page 87: ...ory Default Italicized items are available only when you enable Admin User in the PRINTER SETUP menu 1 The value depends on the sensor settings and calibration results 2 If Gap Mark Sensor in the SENS...

Page 88: ...rate This feature is used to set the sensitivity and reliability of the Media Sensor in detecting gaps notches holes or black marks on the installed media as well as a paper out condition Press the ke...

Page 89: ...printer as a gap or black mark When Auto or Manual Paper Calibrate is performed the value displayed is equal to the gap mark threshold value set by this procedure If running the procedure does not pro...

Page 90: ...on menu Run Manual Cal is completed successfully when the displayed Sensed Distance correctly matches that of the installed media When Gap is selected the Sensed Distance should match the length from...

Page 91: ...there is data in the buffer and when Error Recover in MEDIA SETUP menu is enabled see page 71 If the printer is in Peel mode the calibration will not be done unless Cal in Peel Mode is set to enable...

Page 92: ...Off message will briefly display Additionally if Pwr Up Auto Cal or Head Auto Cal is enabled the printer will not perform calibration at power up or when the printhead is closed Enable Run Auto Cal c...

Page 93: ...he actual label length Example A 0 2 inch calibrated Sensed Distance with a 3 0 inch long label installed NOTE Setting the Label Length value less than half the actual length of the label in use will...

Page 94: ...L Config Refer to the IEGL Programmer s Reference Manual You can select emulation default parameters directly from the control panel or by control codes as explained in the appropriate Programmer s Re...

Page 95: ...shading features for a customized appearance to forms reports and labels Rotated Alphanumerics permit new concepts in form design Normal expanded and compressed character strings can be rotated 90 deg...

Page 96: ...PRINTER SETUP menu 1 This menu appears only if PGL is selected in the Select submenu 2 xxx is set to the active emulation PGL ZGL TGL IGL STGL DGL or MGL 3 xxx is set to the active emulation ZGL TGL...

Page 97: ...Skip Cmd Prefix Enable Disable Ignore Text Disable Enable Ext Execute Copy Disable Enable AI 00 Spaces Disable Enable Select SO Char 14 0 to 255 Do FF at TOF Enable Disable Expanded Font Scalable Bloc...

Page 98: ...le Enable Storage Select DISK EMC DISK PCB FLASH Notes Factory Default Italicized items are available only when Admin User is set to Enable in the PRINTER SETUP menu User Def Ratio Enable Disable I 2...

Page 99: ...Greek ELOT 928 Greek Greek 3 ABY Greek ABG Greek ELOT 927 Greek Greek 851 Greek 437 Greek 8859 7 Win CP 1253 Greek 813 EURO Greek 869 EURO Hebrew Old Hebrew New Hebrew DEC Latin 1 Hebrew Win CP 1255...

Page 100: ...Fault Allows you to halt the printer if a PGL error occurs If you select this option the PGL error prints on the paper the message IGP PGL Error displays on the front panel and the printer goes offli...

Page 101: ...an extra line feed after each carriage return The next print position will be print position 1 of the next line Define LF Code This parameter forces the printer to insert an automatic Carriage Return...

Page 102: ...enu settings are changed Var Length The physical label length is the longest print element defined in CREATE mode including both static and dynamic elements plus the setting of Var Form Adjust with CR...

Page 103: ...ratios PI Slew Range You can specify how many lines the paper will feed 16 factory default A paper slew of 0 15 will move 1 16 lines 15 A paper slew of 1 15 will move 1 15 lines A paper slew of 0 wil...

Page 104: ...quent forms and each form is printed on a separate page AI 00 Spaces This option is designated for EAN UCC 128 barcodes whose application identifier AI is 00 Disable factory default The printable data...

Page 105: ...print characters in different sizes with specified parameters and to select which font face to use Scalable factory default Uses scalable fonts Block Uses block fonts Alt Block 1 Uses alternative bloc...

Page 106: ...mber of digits a leading zero is inserted in front of the data However this special IGP X00 customization gives you the option of adding a space character at the end of the bar code instead Leading Ze...

Page 107: ...inter dpi to expand or shrink the vertical position of graphic elements and the height of the vertical line The factory default is 0 dots The adjustment range is from 20 dots to 20 dots with respect t...

Page 108: ...he Preparser command Enable Sends the Preparser command Storage Select Allows the user to map the parameter DISK to either EMC Expanded Memory Cartridge or PC Flash PC Board Flash Disk EMC the factory...

Page 109: ...d 2 This menu appears if the RFID option is not installed and a CST Character Sequence Table file was loaded Power Saver Time 15 minutes 30 minutes 45 minutes 60 minutes 240 minutes 1 minute 5 minutes...

Page 110: ...tes 50 to 2000 KBytes Max Cached Char 01 KBytes 01 to 20 KBytes Standard Chars 340 0 to 512 Extra Bold Char OCR A Chars 384 0 to 512 OCR B Chars 304 0 to 512 504 0 to 512 Bold Chars 448 0 to 512 Disab...

Page 111: ...the control panel Sending a print job to the printer also turns off power saver mode The options are 1 5 10 15 30 45 60 and 240 minutes The factory default is 15 minutes Pwr Save Control Pwr Save Con...

Page 112: ...hex values are 01 FF The factory default value is hex 21 which corresponds to the character Cancel Key Enable factory default When enabled the key may be used in offline mode to clear all data in the...

Page 113: ...pond with the T3000 line of thermal printers T1006 Forces the output to correspond with the T1006 line of thermal printers Del Char frm Fls This option deletes downloaded character s from flash memory...

Page 114: ...ger usable Contact your administrator for further assistance Flash Avail The amount of flash available for the user to save or download files into the main flash EMC FFS Overwrite Files Enable factory...

Page 115: ...INTER SETUP main menu and select Set Lock Key 2 Press The display reads Select a new lock key 3 Press the combination of keys that you want to be the new lock key Make sure you press all keys selected...

Page 116: ...es an uncommon memory configuration Max Cached Char The Maximum Cached Characters option specifies the size of the largest character that can be stored in the font cache To calculate the memory requir...

Page 117: ...is 504 NOTE For most applications the default settings for font memory are acceptable Therefore do not change the defaults unless your application requires an uncommon memory configuration OCR A Char...

Page 118: ...set the date and time The date is expressed in hh mm YYYYMMMDD hh hour 24 hour format mm minute MMM month DD day YYYY year Feed Key Online Selects the Feed key action when the printer is online Feed f...

Page 119: ...roll lengths vary Ribbon Life Full to 3 4 full Ribbon Life less than 3 4 to 1 2 full Ribbon Life less than 1 2 to 1 4 full Ribbon Life less than 1 4 to 1 8 full Current Config The last line of the di...

Page 120: ...r 3 minutes 2 10 minutes Ethernet Speed 2 Auto Select 10 Half Duplex 10 Full Duplex 100 Half Duplex 100 Full Duplex Job Control Standard Enhanced Off Offline Process Disable Enable WLAN SETTING 3 IP A...

Page 121: ...ffer Size in K 16 1 16 IEEE 1284 3 Prime Signal Disable Enable TOF Action Reset Do Nothing Buffer Size in K 16 1 16 Offline Process Disable Enable Timeout 4 10 sec 1 60 sec Report Status 4 Disable Ena...

Page 122: ...ber 1 3 3001 1023 65535 PNE Port Timeout 1 3 100 Seconds 1 255 Status Port Number 1 3002 1023 65535 Mgmt Port Number 1 3007 1023 65535 INTERFACES cont d from page 120 Notes Factory Default Italicized...

Page 123: ...been received for the selected timeout period Session Close Allows Autoswitching only when the Network Socket is closed If the Ethernet Adapter is not installed the Network Socket is always reported...

Page 124: ...aults for the SEG1 through SEG4 are 000 000 000 and 000 After specifying a Subnet Mask you are prompted to Press to Save Exit Press to Exit Press to Edit NOTE When changing the Gateway Address the pri...

Page 125: ...y if a 10 100Base T ethernet is installed The Ethernet Speed menu has five different speed modes to allow compatibility with different systems and networks Auto Select factory default Tells the 10 100...

Page 126: ...resets the ethernet when the printer is placed online When the printer resets the ethernet the LCD displays DO NOT POWER OFF The printer will then reboot to re establish communication with the ethern...

Page 127: ...is placed online When the printer resets the ethernet the LCD displays DO NOT POWER OFF The printer will then reboot to re establish communication with the ethernet BootP You can enable or disable th...

Page 128: ...printers which can handle higher transfer rate speeds Long For older printers which cannot handle higher transfer rate speeds Antenna The type of antenna used Primary factory default Select when you...

Page 129: ...x Width is set to 128 Bits the key values can be entered in the following 13 sub menus BYTE 1 BYTE 13 The key values must configure to match the corresponding key in the Access Point s key configurati...

Page 130: ...es Auto Trickle This feature is used to prevent a host computer from timing out because the parallel interface is busy for too long Disable factory default The Auto Trickle feature is not used Enable...

Page 131: ...the host asserts the Prime Signal Enable The parallel port will perform a warm start reboot if the host asserts the Prime Signal Offline Process Disable factory default When set to disable the printe...

Page 132: ...o match the response polarity of your host computer Standard factory default Does not invert the response signal Inverted Inverts the response signal sent to the host computer Busy on Strobe Enable fa...

Page 133: ...ed for the serial port buffer The range is 1 16 Kbytes in 1 Kbyte increments The factory default is 16 Timeout This item allows you to set the time that the printer when it has not received data from...

Page 134: ...K means acknowledge the device acknowledges it has accepted a transmission NAK means negative acknowledge the device did not receive the transmission Series1 1 Char The printer controls the flow of co...

Page 135: ...printer from a different host Trickle Time prevents the second host from timing out while it is waiting for its data to be printed In order to support this feature the port has to be able to accept d...

Page 136: ...serts the DTR signal when the printer is offline or the internal serial buffer is full On Line Asserts the DTR signal when the printer is online False Never asserts the DTR signal Request to Send This...

Page 137: ...he host This option also allows you to turn on and off this feature The Poll Character is removed from the data stream If the Data Protocol is set to ETX ACK ACK NAK or Series1 One Char Enquiry is aut...

Page 138: ...ine or the buffer is full 1 Set when the printer is offline 2 Clear during a paper out or RibbonMinder fault 3 Always set 4 Set during a Head Open fault 5 Set during a buffer overflow fault 6 Set duri...

Page 139: ...unicate through the Debug Serial Port Host If the PNE Port is set to Serial then the PNE will communicate through the Host Serial Port This cannot be selected if Host Interface is set to Auto Switchin...

Page 140: ...the initilization string does not work the modem must be configured manually the setting must be stored in configuration 0 and the printer Modem NVM menu must be set to enable Modem Status Enable fac...

Page 141: ...Config Factory 1 to 8 Print Config Current Factory Power Up All 1 to 8 Power Up Config Factory 1 to 8 Protect Configs Disable Enable Name Config 1 1 Name Config 2 1 Name Config 3 1 Name Config 4 1 Nam...

Page 142: ...Print Config This option is used to print a listing of various stored printer configurations We recommend you store printouts of your configurations in a safe place for quick referral The options are...

Page 143: ...ion on the printer s front panel To exit this menu without saving press the key The configuration name will revert to the last saved value The factory default is the configuration number Reset Cfg Nam...

Page 144: ...Resolution XXX DPI 3 Head Voltage XX XX X XX volts 3 Factory Default Italicized items are available only when Admin User is set to Enable in the PRINTER SETUP menu 1 This menu appears only if the Eth...

Page 145: ...identify ribbon wrinkle problems Combo Test Prints a combined left test and right test Ethernet Test This item appears only if the ethernet adapter is installed Prints the ethernet statistics stored o...

Page 146: ...of DRAM installed in megabytes Ptr On Time Displays the cumulative time in hours the printer has been powered on This value is set to zero at the factory after burn in testing Printer Usage Displays t...

Page 147: ...onfig option is enabled the new configuration will not be saved until the existing configuration is deleted Follow these steps to save a new configuration 1 Press the key to enter the menu configurati...

Page 148: ...rt of the Printer Settings such as the Network Addresses will not trigger the Auto Save Configuration function The Auto Save Configuration function works with the active configuration The active confi...

Page 149: ...Changes Detected prompt Save Permanently default option This option will cause the printer to save the configuration to the active configuration and make the active configuration the Power Up default...

Page 150: ...in User submenu 6 Press the Right key until the following displays 7 Press the key to select Enable An asterisk appears after Enable Setting Admin User to Enable allows the user to see hidden submenus...

Page 151: ...modify Config 1 shown below Suppose you want to keep all the settings but you want to select the parallel Centronics interface instead of the IEEE 1284 interface 1 Load the configuration to be changed...

Page 152: ...following message displays b Press the Left or Right keys to cycle through the options 1 8 When the desired number displays press the key to select it The following message displays Then the following...

Page 153: ...ctory Power Up All 1 8 customized configurations 6 When the desired option displays press the key The printer prints the specified configuration NOTE If the configuration you want to print has not bee...

Page 154: ...wing message displays 3 Press the key to enter the CONFIGURATION menu 4 Press the Right key until the following message displays 5 Press Left or Right keys until the desired configuration displays 6 P...

Page 155: ...printer all other optional fonts except those on the EMC customer supplied logos setup files feature files and TIFF files will be erased You will then need to reload those files Before starting a down...

Page 156: ...In the event of any conflicting terms the Binary Code License Agreement controls 1 Make a configuration printout of all saved configurations See page 153 2 Set the printer power switch to O Off 3 Dis...

Page 157: ...s 4 Connect a parallel data printer cable to the LPT1 port of a computer running the Windows 95 98 Me NT 2000 XP Server 2003 or Vista operating system 5 Connect the data cable to the appropriate I O p...

Page 158: ...he printer and the flash memory must contain basic printer code If the flash memory was replaced or if a download was interrupted e g by a power outage you must load software through the parallel port...

Page 159: ...d will leave the flash memory on the controller PCBA incompletely loaded and the printer may not boot up While the file is copied into memory the printer LCD informs you of the load process and status...

Page 160: ...e root level of your C hard drive C download 7 Insert the printer emulation software CD into your computer s CD drive 8 Select the emulation set you want to download into the printer The filename is a...

Page 161: ...may not boot up 17 When the download is complete exit the FTP program by typing quit Enter 18 When the new software has successfully loaded into flash memory and the printer has reset itself set the...

Page 162: ...DOS Prompt 7 At the command prompt type C Enter cd download Enter 8 Extract the downloaded file by typing the filename of the exe file Example For 123456 exe the extracted file will be the same name a...

Page 163: ...sert the printer emulation software CD into your computer s CD drive 9 Select the emulation set you want to download into the printer The filename is a six digit number plus exe For example 123456 exe...

Page 164: ...t and print TrueType fonts see page 169 use TrueType fonts to print DBCS using UTF 8 see page 170 Downloading TrueType Fonts You can download TrueType fonts to your printer by using any of the followi...

Page 165: ...PGL Emulation Online A TrueType font can be loaded by creating a file that appends a PGL command to the font and then sending that file to the printer Use the PGL FONTLOAD command FONTLOAD FontName Fo...

Page 166: ...nts Via The Parallel or Serial Port on page 166 and Download TrueType Fonts Via The Ethernet Using FTP on page 168 Download TrueType Fonts Via The Parallel or Serial Port 1 Set the printer power switc...

Page 167: ...the following commands mode COM1 9600 N 8 1 P Enter copy b filename dwn COM1 Enter where filename dwn is a file you noted in step 9 The 9600 baud rate is the only selection some systems can use The ba...

Page 168: ...tware Through The Ethernet Using FTP on page 160 Follow the instructions for flash download operation Once the fonts are loaded they will be visible in a configuration listing or in a View File List m...

Page 169: ...ected character set You can also select a new character set using the ISET command Example CREATE FORM FONT NAME ARIAL TTF ALPHA 10 10 2 2 01234 STOP END EXECUTE FORM 1 To Print All Characters You can...

Page 170: ...on page 141 For information on EMC see Expanded Memory Cartridge EMC on page 221 When all conditions are met you can access the DBCS TrueType font by using the FONT NAME command with the UTF 8 command...

Page 171: ...leaning solution ATTENTION Do not use abrasive cleaning agents or solvents Interior Cleaning Clean the interior of the printer by removing any dirt and lint with a soft bristled non metallic brush Use...

Page 172: ...lity and cause voids in your label image Clean the platen roller at the same time as the printhead Use a small amount of isopropyl alcohol on a lint free cloth to clean the platen roller With the pivo...

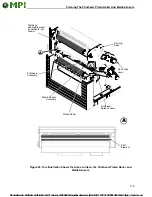
Page 173: ...en Roller and Media Sensors Pivoting Deck Printhead HeatingElements underneath not shown Deck Lock Lever Media Sensor Assembly Platen Roller A A Print Element Printhead Assembly Printhead Release Leve...

Page 174: ...th a dry cloth to prevent dust attraction 5 Loosen the thumbscrew on the right side of the front panel and swing it open 6 Use a vacuum or can of compressed air with a nozzle around the area of the cu...

Page 175: ...s addressed here you may find some of these tips helpful Contact a qualified service technician for problems that persist or are not covered in this section Improving Processing Time Before looking at...

Page 176: ...nter is in the busy state which indicates that the printer input buffer is full and can no longer receive data Software Handshaking XON and XOFF are software signals that control serial data flow betw...

Page 177: ...to ensure that foreign material does not accumulate on the printhead and interfere with heat transfer If smears voids or white lines appear in the printed form the printhead should be cleaned with a c...

Page 178: ...the light brown area heating elements of the printhead Do not touch the light brown area when you handle the printhead assembly Always unplug the printer power cord from the printer or power outlet be...

Page 179: ...ler cable assembly from the printhead assembly Figure 31 This Illustration Shows How to Connect the New Printhead to the Pivoting Deck 10 Position the new printhead below the pivoting deck and connect...

Page 180: ...the AC power cord into the printer and the power source 6 Set the printer power switch to On 7 Press to place the printer in Menu mode 8 Press the Down Enter keys at the same time until ENTER SWITCH U...

Page 181: ...he direct thermal side facing up 5 Check that the transfer ribbon is correctly routed Route transfer ribbon with ink side down as it passes under the printhead 6 Check that the printhead assembly is p...

Page 182: ...1 Check that the printer AC power cord is correctly attached to the printer and to the AC power outlet 2 Have a qualified electrician test the AC wall outlet for the correct power range Locate the pri...

Page 183: ...f against the media 2 The ribbon may be designed for another model printer 3 The ribbon may not be compatible with the media When narrow media is installed the media moves but no image prints Verify t...

Page 184: ...ggering off of a dark preprinted image on the label multiple gaps within the physical label 2 In the MEDIA SETUP menu set Clip Page to Disable 3 Run a Media Profile see page 51 4 If the Media Profile...

Page 185: ...xpose a clean area Handle labels by the edges 7 Check that the media has not been mishandled before or during installation in the printer Soiled media or media with fingerprints will prevent proper ri...

Page 186: ...Media Profile printout to see if the label length indicators are being sensed 6 Run Manual Calibrate See Running Manual Calibrate on page 53 Print is too small or too large Ensure the proper printhea...

Page 187: ...ndicator and resume printing If the fault message reappears power off the printer and wait 15 seconds before powering on the printer again If the error condition persists contact your authorized servi...

Page 188: ...POWER FAIL Yes 24 VDC an internal power failure Power off the printer for 15 seconds then power back on If the problem persists contact your authorized customer service representative B11 ERROR RAM T...

Page 189: ...oot Yes The QCMC has finished copying to the printer 1 Power off the printer 2 Install the cartridge 3 Power on the printer CUTTER FAULT Jam or Cut Fail Yes 1 Cutter assembly is not in the closed posi...

Page 190: ...your authorized service representative DOWNLOADER ERROR FLASH WRITE 2 Repeat Download No A Flash Write to Main Flash failed to complete Try downloading again or contact your authorized service repres...

Page 191: ...n was attempted in the application program 1 Cycle Power Run the print job again If the message appears load the latest emulation software 2 Cycle power Run the print job again If the message appears...

Page 192: ...the message appears load the latest emulation software 2 Cycle power Run the print job again If the message appears record the display message and send it to your next higher support facility E03B DS...

Page 193: ...appears load the latest emulation software 2 Cycle power Run the print job again If the message appears record the display message and send it to your next higher support facility E03E DSI CXIWX See U...

Page 194: ...the message appears load the latest emulation software 2 Cycle power Run the print job again If the message appears record the display message and send it to your next higher support facility E03H DS...

Page 195: ...ppears load the latest emulation software 2 Cycle power Run the print job again If the message appears record the display message and send it to your next higher support facility E04C ISI PROTEC See U...

Page 196: ...essage appears record the display message and send it to your next higher support facility E08 FLOATINGPNT See User Manual Yes An illegal or unsupported instruction was attempted in the application pr...

Page 197: ...RROR FLASH DID NOT PROGRAM Yes No The printer encountered an error trying to program flash memory Power off the printer for 15 seconds then power back on If the problem persists contact your authorize...

Page 198: ...ash memory Power off the printer for 15 seconds then power back on If the problem persists contact your authorized customer service representative ERROR SHORT AT ADDRESS XXXX Yes No Hardware failure i...

Page 199: ...Files menu option 2 Select the menu option Optimize Reboot 3 Check the Flash Avail menu option to determine if there is enough flash to store the file FILE SYS FULL File Too Big Yes No Insufficient fl...

Page 200: ...ors on page 47 3 Clean the sensor assembly and paper path 4 Run Auto Cal to improve the sensor s ability to detect the media in use 5 Run the Media Profile printout in the SENSOR SETUP menu 6 Run Manu...

Page 201: ...utomatically when a lower printhead temperature is achieved 2 Let the printer cool down Full speed will be restored when printing is resumed 3 Lower Print Intensity and Print Speed to reduce frequency...

Page 202: ...Reinstall labels close the deck press the Pause key and continue printing 4 Select the correct Media Handling mode in the MEDIA SETUP menu LABEL READY Remove Label Yes A label was detected at the fron...

Page 203: ...ut the sensor is not detecting it Gap Mark Thresh value may be set too high and or Paper Out Thresh may be set too low 1 Install media If a break occurred reinstall the media Press the Pause key to cl...

Page 204: ...RAM for storage of saved configurations Large emulations reduce the amount of space available for saving configurations which means that sometimes fewer than eight configurations can be saved If this...

Page 205: ...printer used to configure the QCMC has different hardware options than the printer to be configured Change the hardware configuration of the new printer to match the original printer PRINTER UNDER RE...

Page 206: ...uency has not been set Set RFID country through RFID menus If problem persists contact your authorized customer service representative RFID Comm Err Check Cable Yes RFID error communication cannot be...

Page 207: ...ly spool is getting low 2 If there is a large amount of ribbon still on the supply spool then the Ribbon Low message is being displayed falsely 1 Replace ribbon 2 Disable Ribbon Low in the MEDIA SETUP...

Page 208: ...r serial interface parameter to match those of the host SERIAL FRAMING ERROR Yes Serial framing error over a serial interface Match the serial interface settings of the printer to those of the host co...

Page 209: ...the printer software The PCMCIA radio card that you installed may be incompatible with the dual ethernet interface in the printer Verify the approved brand and model number of the radio card with your...

Page 210: ...B21STATUS PRINTER RESET N A The printer is automatically reseting after a download No action is required CLEARING PROGRAM FROM FLASH N A Emulation software successfully loaded into printer RAM and th...

Page 211: ...el is dimmed and only 5Vdc logic circuits are active No action required Send a print job or pressing any control panel key turns off power saver mode PRINTER RESETTING Please Wait N A Printer finished...

Page 212: ...ion will be in affect if the Set Lock Key option in the Printer Setup menu was used THE KEY IS UNLOCKED Yes A momentary status message that appears when the Enter key is unlocked permitting configurat...

Page 213: ...Max Slew Speed ips 10 10 Max Print Width in 4 1 104 1 mm 4 1 104 1 mm Flash Memory MB Standard 8 8 Flash Memory MB Maximum with Expanded Memory Cartridge EMC option 40 40 DRAM MB Standard Max fixed 3...

Page 214: ...Gap the assembly detects die cut labels on liner media and notches and holes in tag stock When set to Mark it senses a black mark on the underside of tag or label stock When set to Disable it senses...

Page 215: ...ode 0 25 in 6 mm to 99 in 2515 mm Peel Off Mode 1 in 25 4 mm to 39 in 991 mm Cut Mode 1 in 25 4 mm to 99 in 2515 mm Rewind Mode 0 5 in 13 mm to 99 in 2515 mm Continuous Mode 0 25 in 6 mm to 99 in 2515...

Page 216: ...mm maximum height at rear entrance Table 21 Ribbon Specifications Ribbon length 1476 feet 450 m Ribbon description Coated side in ink on the inside of the ribbon and coated side out ink on the outside...

Page 217: ...y Refer to pages 244 to 246 for installation instructions The EMC can also come as a preloaded factory kit with one Asian TrueType font see DBCS Character Sets and Fonts on page 235 with the Andal Tru...

Page 218: ...2 Parallel Centronics compatible or IEEE 1284 bi directional 3 USB 2 0 Universal Serial Bus The RS 232 host interface shall have the following characteristics Character Set ANSI ASCII character set Wo...

Page 219: ...ts 30 print density Table 28 Environmental Information Operating Temperature 32 F to 104 F 0 C to 40 C Storage Temperature 23 F to 104 F 5 C to 60 C Operating Humidity Storage Humidity 10 to 90 non co...

Page 220: ...al Dimension Dimensions Inches Weight 6700 M40 unpacked excluding options 12 13H x 11W x 18 75D 31 8 lbs 14 5kg Standard Peel with Liner Rewinder 18 62H x 11 0W x 18 75D 50 0 lbs 22 7kg Full Media Rew...

Page 221: ...g PGL or ZGL to print characters for virtually every language used in the world today including simplified and traditional Chinese Japanese and Korean see Andal Fonts on page 235 Quick Change Memory C...

Page 222: ...in front of the printer This option may be field installed by an authorized service representative Standard Peel with Liner Rewinder In label peel off mode peels off labels one at a time before printi...

Page 223: ...s the device must not be co located or operating in conjunction with any other transmitter or antenna other than those allowed by InfoPrint Solutions Company for this device Antenna Removal or alterat...

Page 224: ...y the nearby buildings or terrain height of any external antenna if installation approved by IDA shall not be more than 10 meters above ground level to limit the radio wave propagation and 5 No repeat...

Page 225: ...ful to authorized radio station and free of interference protection The device needs to be installed by trained engineers and is restricted to fixed point to point operations Mantenimiento Perif ricos...

Page 226: ...ion and EFTA countries for InfoPrint Solutions Company 5403 M40 with RFID feature The Declaration of Conformity for the 5403 M40 with RFID feature Mantenimiento Perif ricos Inform ticos C Canteras 15...

Page 227: ...ns Company 5403 M40 voldoet aan de essenti le eisen en aan de overige relevante bepalingen van Richtlijn 1999 5 EC Estonian K esolevaga kinnitab Printronix seadme InfoPrint Solutions Company 5403 M40...

Page 228: ...oPrint Solutions Company 5403 M40 conforme ai requisiti essenziali ed alle altre disposizioni pertinenti stabilite dalla direttiva 1999 5 CE Latvian Ar o Printronix deklar ka InfoPrint Solutions Compa...

Page 229: ...drugimi ustreznimi dolo ili Direktive 1999 5 EC Spanish Por medio de la presente Printronix declara que el InfoPrint Solutions Company 5403 M40 cumple con los requisitos esenciales y cualesquiera otra...

Page 230: ...of Conformity for the Compact flash Radio Card 802 11bg LA 5127 Models LA 5127C1 LA 5127C2 This device is intended for indoor use Mantenimiento Perif ricos Inform ticos C Canteras 15 28860 Paracuellos...

Page 231: ...Specifications Radio Wideband Systems EN 301 489 1 V1 6 1 EN 301 489 17 V1 2 1 IT Emissions EN55022 2006 Class B IT Immunity EN55024 1998 A1 2001 A2 2003 Medical Electrical Equipment IEC 60601 1 2 200...

Page 232: ...gies Inc dat deze Compact flash Radio Card 802 11bg LA 5127 Models LA 5127C1 LA 5127C2 voldoet aan de essenti le eisen en aan de overige relevante bepalingen van Richtlijn 1999 5 EC Estonian K esoleva...

Page 233: ...LA 5127 Models LA 5127C1 LA 5127C2 uppfyllir allar grunnkrofur sem gerdar eru i R TTE tilskipun ESB nr 1999 5 EC Italian Con la presente Symbol Technologies Inc dichiara che questo Compact flash Radi...

Page 234: ...11bg LA 5127 Models LA 5127C1 LA 5127C2 vyhovuje technick m po iadavk m a al m ustanoveniam smernice 1999 5 ES ktor sa na tento v robok vzt ahuj Slovenian S tem dokumentom Symbol Technologies Inc izja...

Page 235: ...l languages used in the world today such as Chinese Japanese and Korean Four different versions of the font are available for purchase Each of the four versions contains all of the same characters The...

Page 236: ...ll be configured identically Rather than inputting the information through the control panel individually to each printer insert the QCMC into the first printer capture the changes then easily share t...

Page 237: ...fault message MEMORY REMOVED Check QCMC will display You cannot clear this message by reinserting the QCMC You must cycle power 1 Set the printer power switch to O Off from the front of the printer 2...

Page 238: ...rinter power switch to On 8 Make sure the Enter key is not locked and that Admin User is set to Enable 9 Follow the instructions shown on the printer control panel to set up the Quick Change feature S...

Page 239: ...prompted with a message on the front panel to save the printer s configuration to the QCMC NOTE This screen will appear every time at power up until the printer s flash is saved to the QCMC If the CA...

Page 240: ...s to the EMC file menus located under the Printer Control menu Admin User must be set to Enable to see the EMC menus see step b on page 245 Delete unnecessary EMC files then try the QCMC Save operatio...

Page 241: ...d to continue checks of the printer configuration will be made If either of the checks fail a message will display on the front panel in the hierarchy shown on page 241 and the printer will not copy a...

Page 242: ...nd printer refer to Ethernet Setting or WLAN Setting located under the Interfaces menu on page 120 Updating The Printer Configuration To The QCMC Before a new printer flash image can be saved to a QCM...

Page 243: ...EMC will be erased as well Exceptions If you remove the module with power on the MEMORY REMOVED Check EMC error message will display It is necessary to power off and reboot the printer with the cartr...

Page 244: ...message MEMORY REMOVED Check EMC will display You cannot clear this message by reinserting the EMC You must cycle power 1 Set the printer power switch to O Off from the front of the printer 2 Raise th...

Page 245: ...nstalling a QCMC follow the instructions shown on the printer control panel to set up the Quick Change feature Refer to page 236 for a detailed explanation of the control panel prompts and general QCM...

Page 246: ...v Press the Down key until EMC FLASH Installed displays The amount of memory displays in megabytes If this does not appear the EMC has not been properly installed Start over at step 1 on page 244 Usin...

Page 247: ...ning see Figure 37 4 Horizontally center the standard peel roller over the label 5 Peel the label located over the tear bar off the liner refer to Figure 37 This will prevent the labels from sticking...

Page 248: ...l door by pulling upward and it will lock in place 8 Press the Feed key to advance the media to the next TOF Top of Form position A label dispenses with the liner falling in front of the printer 9 Pre...

Page 249: ...n the Media Rewinder 1 To load media refer to Loading Roll Media on page 27 and complete steps 1 through 10 Be sure to open the side cover 2 Thread the media over the front of the media guide around t...

Page 250: ...do not complete the following step it will be extremely difficult to remove the printed labels from the rewinder 4 Remove the media rewinder clip 5 Wrap the leading edge of the media around the rewin...

Page 251: ...otate the deck lock lever clockwise to close the pivoting deck 12 Press the Feed key to advance the media to the next TOF Top of Form position 13 Press the Pause key until ONLINE displays 14 Close the...

Page 252: ...en the media cover and side cover 2 Press the Feed key to advance the last printed label past the printhead and tear the liner from behind the last printed label 3 Manually rewind the remaining printe...

Page 253: ...P menu See Configuring The Printer on page 63 for more information 2 Calibrate the printer see Running Auto Calibrate on page 50 Install The Core Adapters And Media Take Up Core Figure 42 Installing t...

Page 254: ...d be about 3 1 2 inches 4 Tighten the thumbscrew Figure 44 Installing the Media Take Up Core 5 Slide a 3 inch diameter media take up core onto the rewinder over the two core adapters until it is flush...

Page 255: ...ull it outward position the wind direction lever in the desired location and tighten the thumbscrew See Figure 45 NOTE Wind direction lever in lower position clockwise rotation Wind direction lever in...

Page 256: ...the rewinder flange 6 Tape the leading edge of the media onto the media take up core 7 Manually rotate the media take up core one full revolution until the media is taut See Figure 47 Figure 47 Tight...

Page 257: ...8 inches of printed labels including 3 inch media take up core diameter Exceeding this diameter can cause printed labels to rub on the bottom pan Rewinder Full Sensor Setup 1 Open the side cover and m...

Page 258: ...the media roll from the rewinder as shown in Figure 49 and set the roll aside 6 Close the side cover and media cover Using The Standard Peel With Liner Rewinder Option The Standard Peel with Liner Re...

Page 259: ...nterclockwise 4 Open the peel off door by pulling it upward then forward 5 Remove approximately 18 to 24 inches of labels from the liner This will prevent the labels from sticking to the tear bar duri...

Page 260: ...with Liner Rewinder 9 Wrap the leading edge of the liner over and around the rewinder 10 Slide the liner flush against the left edge of the rewinder Label Rewinder Peel Off Door Tear Bar Alternate Ri...

Page 261: ...Remove labels from the liner so that behind the tear bar the liner is without labels for approximately 1 5 inches 14 Remove labels from the liner so that below the tear bar the liner is without label...

Page 262: ...ces to the peel off position and LABEL READY Remove Label displays on the LCD The liner remains on the rewinder See Figure 53 18 Press the Pause key until ONLINE displays 19 Close the side cover and m...

Page 263: ...ear the liner at the tear bar 4 Manually turn the rewinder to rewind the remaining liner onto the rewinder 5 Pull the media rewinder clip along with the liner off the rewinder 6 Remove the liner from...

Page 264: ...ds and cleaning pens contact an InfoPrint Solutions Company service representative at the phone numbers below or visit http www infoprint com North America 877 6InfoPrint 877 646 3677 Asia Pacific For...

Page 265: ...Company Thermal Transfer Ribbons The following is a list of Genuine InfoPrint Solutions Company Thermal Transfer ribbons InfoPrint Solutions Company Wide Spectrum Wax Ribbon 8300 Provides superior pri...

Page 266: ...10 100 Base T Ethernet 802 11b g Wireless Full Media Rewinder Media Cutter RFID Standard Peel with Liner Rewinder Standard Peel Off Kit Font Cartridges Quick Change Memory Cartridge QCMC Table 30 Ribb...

Page 267: ...3 0D 45 2D M 77 4D m 109 6D SO 14 0E 46 2E N 78 4E n 110 6E SI 15 0F 47 2F O 79 4F o 111 6F DLE 16 10 0 48 30 P 80 50 p 112 70 DC1 17 11 1 49 31 Q 81 51 q 113 71 DC2 18 12 2 50 32 R 82 52 r 114 72 DC3...

Page 268: ...N Ctrl Q DC1 XOFF Ctrl S DC3 RS 30 1E 62 3E 94 5E 126 7E US 31 1F 63 3F _ 95 5F 127 7F Char Dec Hex Char Dec Hex Char Dec Hex Char Dec Hex Mantenimiento Perif ricos Inform ticos C Canteras 15 28860 Pa...

Page 269: ...om the host computer at the printer interface These properties are called configuration parameters and are set to match the operating characteristics of the host computer system Continuous Media Media...

Page 270: ...hen power is turned off Expanded Memory Cartridge EMC The expanded memory cartridge EMC is an extra 32MB Flash memory storage cartridge that allows users to download forms logos and fonts Fanfold Medi...

Page 271: ...ed Transmissive Gap media uses a liner gap notch or hole between labels and Reflective Mark media uses a horizontal black mark located on the underside of the tag stock or label liner Continuous media...

Page 272: ...rce printer is stored onto the QCMC and a simple interface is provided to copy that image to a target printer RAM Random Access Memory Also called main memory or working memory It is the active memory...

Page 273: ...Thermal Transfer mode compatibility between the ribbon and the media is critical in producing a high quality long lasting image Thermal Transfer Printing A printing method in which the printhead press...

Page 274: ...274 Appendix D Mantenimiento Perif ricos Inform ticos C Canteras 15 28860 Paracuellos de Jarama Madrid Tel 00 34 917481604 Web https mpi com es...

Page 275: ...or does business InfoPrint Solutions Company may have patents or pending patent applications covering subject matter described in this document The furnishing of this document does not give you any l...

Page 276: ...uppliers of those products their published announcements or other publicly available sources InfoPrint Solutions Company has not tested those products and cannot confirm the accuracy of performance co...

Page 277: ...tion technology IT equipment to responsibily dispose of their equipment when it is no longer needed InfoPrint Solutions Company offers a variety of location specific product return programs to assist...

Page 278: ...is connected Consult an InfoPrint Solutions Company authorized dealer or service representative for help InfoPrint Solutions Company is not responsible for any radio or television interference caused...

Page 279: ...003 du Canada Japanese VCCI Class B German Conformity Statement Zulassungsbescheinigung laut dem Deutschen Gesetz ber die elektromagnetische Vertr glichkeit von Geraten EMVG vom 30 August 1995 bzw der...

Page 280: ...ation it has not been tested for compliance with the limits for Class A computing devices pursuant to Subpart J of Part 15 of FCC Rules which are designed to provide reasonable protection against such...

Page 281: ...rightfully possess the printer No other rights under this license are granted 2 Source Code A source code version of eCos Software is available under the terms of the Red Hat eCos Public License v1 1...

Page 282: ...D HAT AND ANY EXPRESS OR IMPLIED WARRANTIES INCLUDING BUT NOT LIMITED TO THE IMPLIED WARRANTIES OF MERCHANT ABILITY AND FITNESS FOR A PARTICULAR PURPOSE ARE DISCLAIMED IN NO EVENT SHALL THE AUTHOR BE...

Page 283: ...RINTRONIX INC BE LIABLE FOR LOST PROFITS LOST DATA BUSINESS INTERRUPTIONS OR ANY OTHER DIRECT INDIRECT INCIDENTAL OR CONSEQUENTIAL DAMAGES ARISING OUT OF THE USE OF OR INABILITY TO USE THIS PRODUCT EV...

Page 284: ...omputer Software clause at FAR 242 227 7013 subdivision b 3 ii or subparagraph c 1 ii as appropriate Further use duplication or disclosure is subject to restrictions applicable to restricted rights so...

Page 285: ...OR PROGRAM MISSING 188 B20 Firmware Download 210 B22 DECOMPRESS SIZE 188 B23 ERROR DECOMPRESS CKSUM 188 BAD VFU CHANNEL 188 Batch Counter option 118 Bold Chars option 117 Bot Line Display option 119 B...

Page 286: ...t option 103 CUTTER FAULT Check Cutter 189 Cutter Option cleaning 174 D D50 STATUS CLEARING FLASH 210 D51 PROGRAMMING FLASH LOADING PROGRAM INTO FLASH 210 Data Exchange 176 Date option 118 DBCS Charac...

Page 287: ...C FLASH Installed option 146 EMC NOT FOUND PWR OFF PRINTER 197 EMULATION menu 94 submenus 100 Emulation Setup option 100 Emulations overview 94 Enter Key 39 ENTER to Stop 197 Environmental specificati...

Page 288: ...06 NOT ALIGNED 196 E07 ILLEGAL INS 196 E08 FLOATINGPNT 196 EC SOFTWARE FAIL 196 EMC NOT FOUND PWR OFF PRINTER 197 ENTER to Stop 197 ERROR DC PROGRAM NOT VALID 197 ERROR FLASH DID NOT PROGRAM 197 ERROR...

Page 289: ...oo Big 199 FILE SYSTEM FULL Optimize Reboot 199 Firmware Download Utility downloading software 156 Flash Contains Boot Code downloading software 163 FLASH Installed option 146 Flash Memory load 155 Fo...

Page 290: ...Load Config 142 Load Fanfold Media 32 Load Media 27 32 Load Ribbon 24 Load Roll Media 27 Load Saved Configuration 154 Loading Flash Memory 155 Loading New Firmware on Printer Quick Change Memory Cartr...

Page 291: ...on 143 Nibble Mode IEEE 1284 interface 58 No Label Length Indicators sensing 48 NON VOLATILE MEMORY FAILED 204 Notices 16 Num Auto Labels option 81 O OCR A Chars option 117 OCR B Chars option 117 Offl...

Page 292: ...Direction option 81 Print Error Log option 146 Print File List option 115 PRINT HEAD UP 205 Print Intensity option 72 Print Mode option 72 Print Quality control 177 Print Speed option 72 Printer alarm...

Page 293: ...on 90 Q QCMC 236 QCMC DATA ERROR ON QCMC 206 QCMC DETECTED Copy to Printer 206 QCMC DETECTED Save to QCMC 206 Quick Change Memory Cartridge QCMC 236 copying QCMC snapshot image 240 installation 237 lo...

Page 294: ...ownloading software 156 Set Label Length option 85 Set Lock Key option 115 Set Printer Configuration Parameters 63 Settings change 66 Setup Printer 23 load fanfold media 32 load ribbon 24 load roll me...

Page 295: ...ave Mode option 86 To stop Press Enter 212 TOF Adjust Mode option 86 TOF Adjust option 86 TOF Detect Fault option 85 Troubleshoot 175 control panel 181 improve processing time 175 power failures 182 p...

Page 296: ...296 Mantenimiento Perif ricos Inform ticos C Canteras 15 28860 Paracuellos de Jarama Madrid Tel 00 34 917481604 Web https mpi com es...

Page 297: ...Mantenimiento Perif ricos Inform ticos C Canteras 15 28860 Paracuellos de Jarama Madrid Tel 00 34 917481604 Web https mpi com es...

Page 298: ...Printed in U S A G550 0997 03 07G550099703 Mantenimiento Perif ricos Inform ticos C Canteras 15 28860 Paracuellos de Jarama Madrid Tel 00 34 917481604 Web https mpi com es...

Reviews: