background image

- 10 - 

You can double click the selected VPort, or use the IE web browser to 

access the VPort’s web-based manager (web server). 
Non DHCP Server Network Environment 
If your VPort 16-M12 is connected to a network that does not have a 

DHCP server, then you will need to configure the IP address manually. 

The default IP address of the VPort 16-M12 is 192.168.127.100 and the 

default subnet mask is 255.255.255.0. Note that you may need to change 

your computer’s IP address and subnet mask so that the computer is on 

the same subnet as the VPort. 
To change the IP address of the VPort manually, access the VPort’s web 

server, and then navigate to the System Configuration 

 Network 


General page to configure the IP address and other network settings. 

Check Use fixed IP address to ensure that the IP address you assign is not 

deleted each time the VPort is restarted. 
Step 2: Accessing the VPort P06HC-1MP-M12’s web-based manager 
Type the IP address in the web browser’s address input box and then 
press enter. 
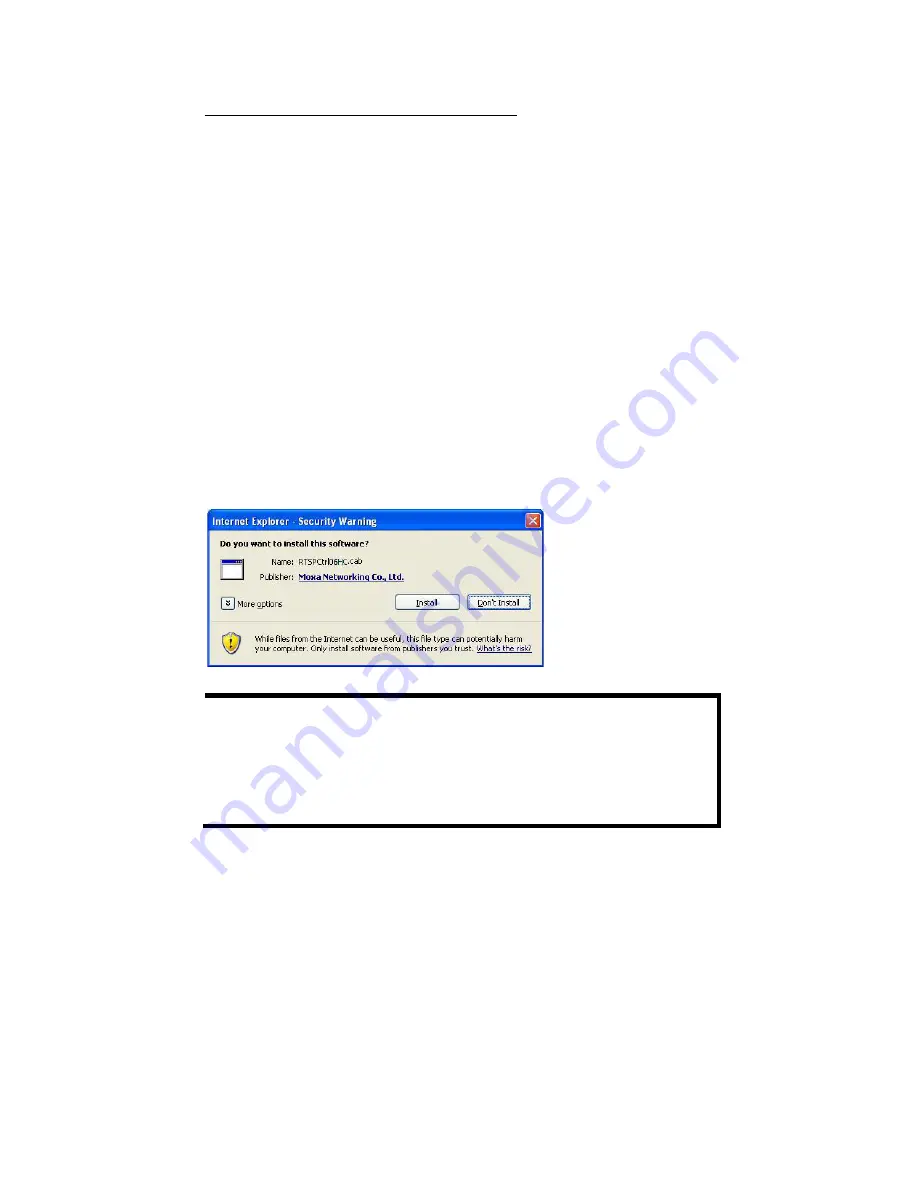
Step 3: Install the ActiveX Control Plug-in 
A security warning message will appear the first time you access the 
VPort’s web-based manager. The message is related to installing the 
VPort AcitveX Control component on your PC or notebook. Click Yes to 
install this plug-in to enable the IE web browser for viewing video images. 


NOTE  For Windows XP SP2 or later operating systems, the ActiveX 

Control component will be blocked for system security reasons. 
In this case, the VPort’s security warning message window may 
not appear. You should unlock the ActiveX control blocked 
function or disable the security configuration to enable the 
installation of the VPort’s ActiveX Control component. 


Step 4: Access the homepage of the VPort P06HC-1MP-M12’s web-based 
manager. 
After installing the ActiveX Control component, the homepage of the 
VPort P06HC-1MP-M12’s web-based manager will appear. Check the 
following items to make sure the system was installed properly: 
1.


Video Images 

2.


Video Information 

Summary of Contents for VPort P06HC-1MP-M12

Page 1: ...ort Moxa Americas Toll free 1 888 669 2872 Tel 1 714 528 6777 Fax 1 714 528 6778 Moxa China Shanghai office Toll free 800 820 5036 Tel 86 21 5258 9955 Fax 86 21 5258 5505 Moxa Europe Tel 49 89 3 70 03...

Page 2: ...ture a rugged M12 Ethernet port 1 built in microphone 1 digital input PoE power inputs IP66 rain and dust protection and a selectable lens Package Checklist Moxa s VPort P06HC 1MP M12 is shipped with...

Page 3: ...k transmission modes Supports DHCP OPT66 67 for automatic configuration from a TFTP server making it easy to batch configure several units Supports RTSP streaming Supports multicast IGMP video streami...

Page 4: ...on NOTE To connect the VPort P06HC 1MP M12 to a network use an Ethernet cable with D code M12 connector and an M12 PoE switch or RJ45 PoE switch M12 male to M12 male cable M12 PoE Switch e g TN 5508 4...

Page 5: ...t in microphone The VPort P06HC 1MP M12 is equipped with a built in microphone to receive external sounds The sound will be digitized and compressed as an audio stream for network transmission with th...

Page 6: ...ens based on the viewing angle and object distance Board plate screws these 2 screws are for loosening the board plate which can be pulled out for tuning the camera lens position Hardware Installation...

Page 7: ...tep 1 Screw the 2 L type installation plates onto the VPort P06HC Vertical mountable Horizontal mountable Step 2 Use the installation sticker to drill the holes for flush mounting the VPort P06HC with...

Page 8: ...diameter and 4 3 mm chamfer Take this into consideration when drilling these 4 screw holes Step 3 Install the VP FD1 s mounting kit Screw 4 nylock M4 screws on the 4 countersunk screw holes with 2 VP...

Page 9: ...onment with DHCP Server For this network environment the unit s IP address will be assigned by the network s DHCP server Refer to the DHCP server s IP address table to determine the unit s assigned IP...

Page 10: ...M12 s web based manager Type the IP address in the web browser s address input box and then press enter Step 3 Install the ActiveX Control Plug in A security warning message will appear the first time...

Page 11: ...ormation and installation For details of each configuration check the user s manual on the software CD Wiring Requirements ATTENTION Safety First Be sure to disconnect the power cord before installing...

Page 12: ...ctrical characteristics can be bundled together Keep input wiring and output wiring separated We strongly advise labeling wiring to all devices in the system Dimensions mm Front View Bottom View VP FD...

Page 13: ...0 176 x 144 25 CIF cropping 352 x 240 30 352 x 288 25 VGA cropping 640 x 480 30 640 x 480 25 4CIF cropping 704 x 480 30 704 x 576 25 Full D1 cropping 720 x 480 30 720 x 576 25 SVGA cropping 800 x 600...

Page 14: ...10 V IEC 61000 4 8 Rail Traffic EN 50155 EN 45545 2 This product is suitable for rolling stock railway applications as defined by the EN 50155 standard For a more detailed statement click here www mox...

Page 15: ...quirements Pentium 4 2 4 GHz 512 MB of memory Windows XP with SP3 and above Windows 7 Internet Explorer 9 x or above DirectX 9 0c or above Software Development Kit VPort SDK PLUS Includes CGI commands...

Reviews: