


ToughNet NAT Router User's Manual
Network Address Translation
6-4
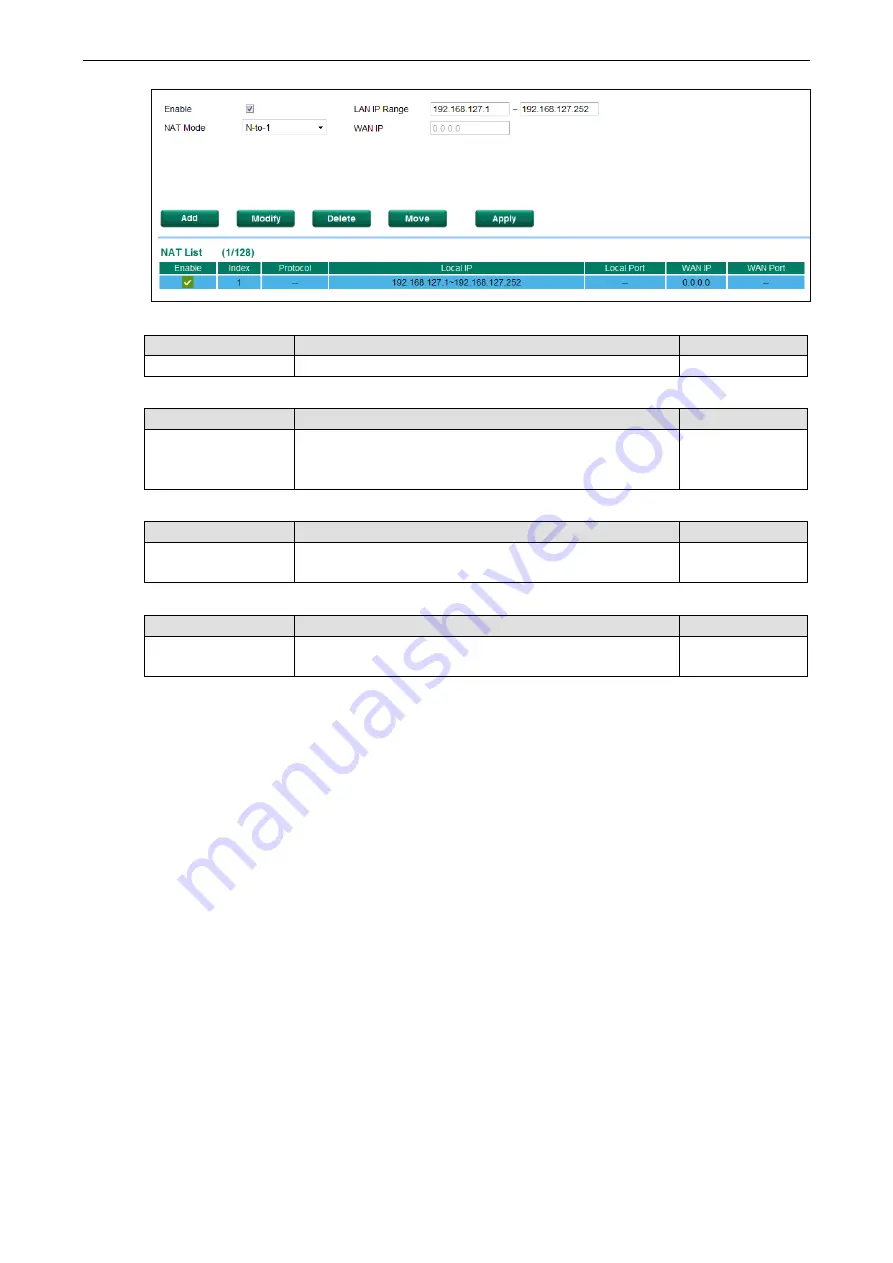
Enable/Disable NAT Policy
Setting
Description
Factory Default
Enable or Disable
Enable or disable the selected NAT policy
Enabled
NAT Mode
Setting
Description
Factory Default
N-1
1-1
Port Forwarding
Select the NAT types
N-1
IP Range
Setting
Description
Factory Default
IP address
Select the Internal IP range for IP translation to WAN IP
address
None
WAN IP (N-1 mode)
Setting
Description
Factory Default
IP address
The IP address of the user selected interface in this N-to-1
policy.
None
Add a NAT Rule
Checked the “Enable” checkbox and input the correspondent NAT parameters in the page, and then click
“New/Insert” to add it into the NAT List Table. Finally, click “Activate” to activate the configuration.
Delete a NAT Rule
Select the item in the NAT List Table, then, click “Delete” to delete the item.
Modify a NAT Rule
Select the item in the NAT List Table. Modify the attributes and click “Modify” to change the configuration.
Activate NAT List Table
After adding/deleting/modifying any NAT Rules, be sure to Activate it.
Port Forward
If the initial connection is from outside the LAN, but the user still wants to hide the Internal IP address, one way
to do this is to use the Port Forwarding NAT function.
The user can specify the port number of an external IP address in the Port Forwarding policy list. For example,
if the IP address of an IP camera on the internal network is 192.168.127.10 with port 80, the user can set up
a port forwarding policy to let remote users connect to the internal IP camera from external IP address
10.10.10.10 through port 8080. The ToughNet NAT Router will transfer the packet to IP address
192.168.127.10 through port 80.


