background image

AirWorks AWK-3131A 

Web Console Configuration 


3-29 


Check interval: 

Specify the time interval when the AWK-1131A checks the connection. The range is 

between 1 to 30 seconds, the default is every 10 seconds.


Timeout: 

Specify the duration the AWK-1131A must wait before terminating the connection. The range is 

between 100 to 10,000 ms, the default is 1000 ms.


Retry count: 

  Specify the number of times the AWK-1131A the will check the connection status. If the 

connection fails more than the specified number of tries, the device will attempt to recover the WLAN 
connection. The range is between 1 to 5, the default is 3 retries.


Retry Interval: 

Specify the time interval in between each retry. The range is between 1 to 30 seconds, the 

default is 1 second.


Reboot count: 

If

 Device reboot 

is enabled,


specify the number of times the device will reboot after failing 

to re-establish the connection. 

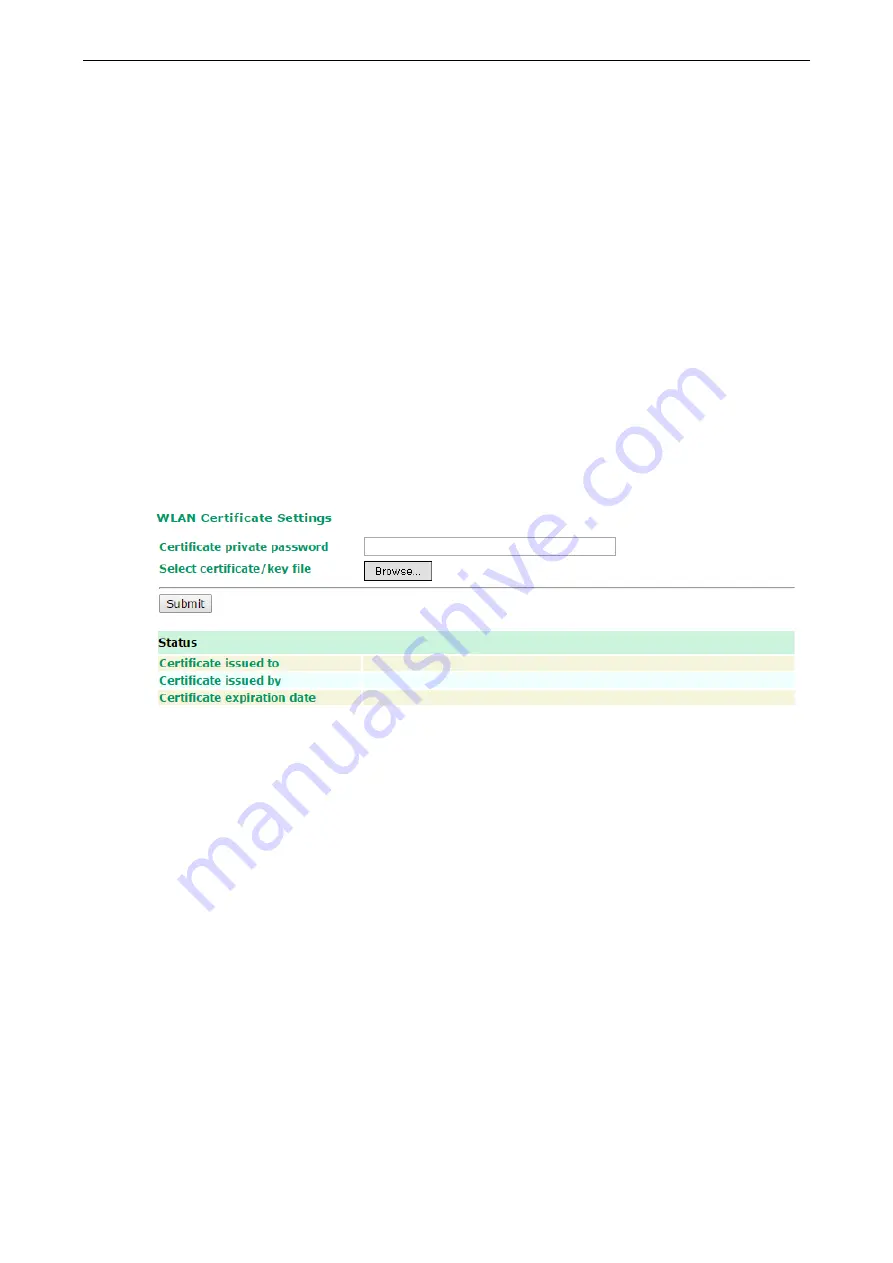
WLAN Certificate Settings (for EAP-TLS in 
Client/Client-router/Slave mode only) 

When EAP-TLS is used, a WLAN Certificate will be required at the client end to support WPA/WPA2-Enterprise. 
The AWK-1137C can support the 

PKCS #12

, also known as 

Personal Information Exchange Syntax Standard

certificate formats that define file formats commonly used to store private keys with accompanying public key 
certificates, protected with a password-based symmetric key. 


Current status 

displays information for the current WLAN certificate, which has been imported into the 

AWK-1137C. Nothing will be shown if a certificate is not available. 

Certificate issued to

: Shows the certificate user 

Certificate issued by

: Shows the certificate issuer 

Certificate expiration date

: Indicates when the certificate has expired 

You can import a new WLAN certificate in

 Import WLAN Certificate 

by following these steps, in order: 

1.


Input the corresponding password (or key) in the 

Certificate private password

 field and then click 

Submit

 to set the password. 

2.


The password will be displayed in the Certificate private password field. Click on the 

Browse 

button in 

Select certificate/key file 

and select the certificate file. 

3.


Click 

Upload Certificate File 

to import the certificate file. If the import succeeds, you can see the 

information uploaded in 

Current Certificate

. If it fails, you may need to return to step 1 to set the 

password correctly and then import the certificate file again. 

Summary of Contents for AirWorks AWK-1137C

Page 1: ...AirWorks AWK 1137C User s Manual Version 6 0 April 2021 www moxa com product 2021 Moxa Inc All rights reserved ...

Page 2: ...s to this manual or to the products and or the programs described in this manual at any time Information provided in this manual is intended to be accurate and reliable However Moxa assumes no responsibility for its use or for any infringements on the rights of third parties that may result from its use This product might include unintentional technical or typographical errors Changes are periodic...

Page 3: ...ort Settings 3 30 Operation Modes 3 30 Communication Parameters 3 46 Data Buffering Log 3 47 Advanced Setup 3 48 Using Virtual LAN 3 48 Configuring Virtual LAN 3 49 DHCP Server for Client Router mode only 3 50 Packet Filters 3 51 Static Route for Client router mode only 3 55 NAT Settings Port Forwarding for Client router mode only 3 56 SNMP Agent 3 59 Link Fault Pass through for Client Slave mode ...

Page 4: ...ation by Telnet and SSH Consoles 5 2 Configuration by Web Browser with HTTPS SSL 5 2 Disabling Telnet and Browser Access 5 3 Configuration by the RS 232 Console 5 3 A References A 1 Beacon A 2 DTIM A 2 Fragment A 2 RTS Threshold A 2 B Supporting Information B 1 Firmware Recovery B 2 Declaration of Conformity B 3 Federal Communication Commission Interference Statement B 3 RED Compliance Statement B...

Page 5: ...P IP network The AWK 1137C s standard models can operate at temperatures ranging from 0 to 60 C and wide temperature models can operate in the range 40 to 75 C The AWK 1137C is rugged enough to operate in harsh industrial environments The following topics are covered in this chapter Overview Package Checklist Product Features Functional Design LED Indicators Beeper Reset Button ...

Page 6: ...of the AWK is easy using DIN rail mounting wall mounting or distribution boxes and with its wide operating temperature range IP30 rated housing with LED indicators and DIN rail wall mounting it is a convenient yet reliable solution for all types of industrial wireless applications Package Checklist Before you install the AWK 1137C verify that the package contains the following items If any of thes...

Page 7: ...er configured events If the AWK 1137C cannot retrieve the IP address from a DHCP server the SYS LED will blink at one second intervals The following table summarizes how to read the device s wireless settings from the LED displays More information is available in Chapter 3 in the Basic WLAN Setup section LED Color State Description SYS Green On System start up complete and the system is in operati...

Page 8: ...g through the Ethernet interfaces This may be due to improper operation or issues such as an unexpected shutdown while updating the firmware To recover the firmware refer to the Firmware Recovery section in Appendix B Beeper The beeper emits two short beeps when the system is ready Reset Button The RESET button is located on the side panel of the AWK 1137C You can reboot the AWK 1137C or reset it ...

Page 9: ...your wireless network and test whether the connection is running well The Function Map discussed in the third section provides a convenient means of determining which functions you need to use The following topics are covered in this chapter First time Installation and Configuration Testing the Communication Function Map ...

Page 10: ...ght up when a connection is established Step 3 Set up the computer s IP address Choose an IP address on the same subnet as the AWK 1137C Since the AWK 1137C s default IP address is 192 168 127 253 and the subnet mask is 255 255 255 0 you should set the IP address of the computer to 192 168 127 xxx NOTE After you select Maintenance Load Factory Default and click the Submit button the AWK 1137C will...

Page 11: ... you change the settings About 30 seconds are needed for the AWK 1137C to complete the reboot procedure Step 5 Select the AWK 1137C operation mode By default the AWK 1137C s operation mode is set to client Detailed information about configuring the AWK 1137C s operation can be found in Chapter 3 Step 6 Test communications In the following sections we describe two test methods that can be used to e...

Page 12: ...ddresses as shown in the following figure After configuring the WLAN card establish a wireless connection with the AWK 1137C and open a DOS window on Notebook B At the prompt type ping IP address of notebook A and then press Enter see the figure below A Reply from IP address response means the communication was successful A Request timed out response means the communication failed In this case rec...

Page 13: ...nistering the AWK 1137C Essential settings related to establishing a wireless network Advanced features to support additional network management and secure wired and wireless communication NOTE These advanced functions are all optional Quick overview of the AWK 1137C s status ...

Page 14: ...ng e mail and SNMP notification NOTE These functions are all optional Current status information for monitoring wired wireless network performance advanced services and device management functions Functions for maintaining the AWK 1137C and for diagnosing the network On demand functions to support the web based console management operation ...

Page 15: ...em Information Interface On Off Network Settings System Time Wireless LAN Setup AeroMag Operation Mode Basic WLAN Setup Proxy ARP for Client Router mode only WLAN Security Settings Advanced WLAN Settings WLAN Certificate Settings for EAP TLS in Client Client router Slave mode only Serial Port Settings Communication Parameters Data Buffering Log Advanced Setup Using Virtual LAN Configuring Virtual ...

Page 16: ...these steps to access the AWK 1137C s web based console management interface 1 Open your web browser and type AWK 1137C s IP address in the address field and press Enter 2 The Web Console Login page will open Enter the password default Username admin Password moxa and then click Login to continue 3 You may need to wait a few moments for the web page to download to your computer Note that the Model...

Page 17: ...up function on the homepage to quickly set up the AWK or click on Overview to see the basic device status The Import Export function helps you back up the system or to perform a system recovery from an existing backup 5 Use the menu tree on the left side of the window to open the function pages to access the AWK 1137C s functions ...

Page 18: ...s shown as AWK 1137C XX where XX indicates the country code The country code indicates the AWK 1137C version and which frequencies it uses We use AWK 1137C US as an example in the following figures The country code and model name that appears on your computer screen may be different than the one shown here Overview The Overview page summarizes the AWK 1137C s current status The information is cate...

Page 19: ...Signal strength and SNR are only available under Client Client Router Slave operation modes Quick Setup The AWK 1137C provides a quick setup wizard to help you configure the basic settings including wireless and serial for devices that support a serial console settings Before you enter the setup wizard you will see a list of the tasks as shown below Choose Default Settings to see the default param...

Page 20: ...to view a tooltip for additional details regarding the corresponding field You can either use Manual to configure the basic Wi Fi settings manually or click AeroMag to opt for AeroMag to automatically set up your Wi Fi network For additional details on the AeroMag function refer to the Wireless LAN Setup section Note that Quick Setup does not support AeroMag for client router mode In the last step...

Page 21: ...ecially Device name and Device description are displayed and included on the Overview page in SNMP information and in alarm emails Setting System Information items makes it easier to identify the different AWK 1137C units connected to your network Device name Setting Description Factory Default Max 31 of characters This option is useful for specifying the role or application of different AWK 1137C...

Page 22: ...e for maintaining this AWK 1137C None Login Message Setting Description Factory Default Max of 31 characters Enter a message to display to all users when they log in Blank Login authentication failure message Setting Description Factory Default Max of 31 characters Enter the login authentication failure message to display to the user who logs in with an invalid username or password None Interface ...

Page 23: ...connected e g 255 255 0 0 for a Class B network or 255 255 255 0 for a Class C network 255 255 255 0 Gateway Setting Description Factory Default AWK 1137C s default gateway The IP address of the router that connects the LAN to an outside network None Primary Secondary DNS server Setting Description Factory Default IP address of the Primary Secondary DNS server The IP address of the DNS Server used...

Page 24: ...ault AWK 1137C WLAN interface s default gateway The IP address of the router that connects the WLAN to an outside network None Primary Secondary DNS server Setting Description Factory Default IP address of the Primary Secondary DNS server The IP address of the DNS Server used by your network After entering the DNS Server s IP address you can input the AWK 1137C s URL e g http ap11 abc com in your ...

Page 25: ...TP server or there is no NTP server on the LAN Current local time Setting Description Factory Default User adjustable time The date and time parameters allow configuration of the local time with immediate activation Use 24 hour format yyyy mm dd hh mm ss None Time zone Setting Description Factory Default User selectable time zone The time zone setting allows conversion from GMT Greenwich Mean Time...

Page 26: ...ntered when you have a MAC authenticated system or MAC Layer 2 based communication In this case you will need to change the network to use the master slave operation mode Slave A transparent point to point protocol that allows the devices MAC addresses to remain unchanged when the packets get through the slave radio If you are looking for a worry free wireless solution to replace your wired system...

Page 27: ...up your Wi Fi connections correctly in a single step During the installation phase AeroMag streamlines network operation by analyzing the optimal channel for your current operating environment From a maintenance perspective new APs clients can join the AeroMag topology without any additional configuration Once you have confirmed the number of APs and their location using a site survey tool and hav...

Page 28: ...nce before the current configuration change If you are activating AeroMag for the first time this option will not be available Generate a new configuration Discard current configuration settings and search for an AeroMag AP to get a new set of configuration settings Generate a new configuration You can also view the AeroMag Client Client Router Operating Status listed below NOTE Select the Auto Up...

Page 29: ...rd their configuration and reboot to search for new AeroMag APs 3 If an AeroMag client is disconnected from an AeroMag AP and fails to find an AeroMag AP in the Turbo Roaming channel within 150 seconds the client starts to scan all channels for AeroMag APs to recover its AeroMag connection 4 If an AeroMag client loses a connection for 10 minutes and fails to connect again the AeroMag client discar...

Page 30: ...he WAN and LAN subnets There are two scenarios 1 General case The WLAN interface connects to the WAN LAN1 and LAN2 connect to the allocated private network 2 NAT box LAN 1 connects to the WAN WLAN and LAN 2 connect to the allocated private network Setting Description Factory Default interface connects to WAN Use a wireless WLAN or wired LAN1 method to connect to the WAN WLAN interface connects to ...

Page 31: ...and set the RF type for the AWK device You can use the RF type selection to configure the AWK 1137C to operate either on the 2 4 GHz or 5 GHz frequency band An SSID is a unique identifier that wireless networking devices use to establish and maintain wireless connectivity Set the SSID of the AWK 1137C to match with the SSID of the AP that you want it to connect to so that the AWK 1137C will associ...

Page 32: ...its SSID onto the SSID field of the Basic WLAN Setup page Click the Refresh button to re scan and update the table Indoor outdoor Setting Description Factory Default Indoor Outdoor Select the usage environment available channels vary depending on the selection Indoor RF type Setting Description Factory Default 2 4 GHz B Only supports the IEEE 802 11b standard B G N Mixed G Only supports the IEEE 8...

Page 33: ...Hz Auto 20 MHz 20 40 MHz Channel bonding Channel bonding shows the channel used by the AP if Channel width is set to 20 40 MHz SSID Setting Description Factory Default Max of 31 characters The SSID of a client and the SSID of the AP must be identical for the client and AP to be able to communicate with each other NOTE An SSID cannot contain the following characters MOXA Management Frame Encryption...

Page 34: ...2 PSK You will need to specify the Pre Shared Key in the Passphrase field which will be used by the TKIP or AES engine as a master key to generate keys that actually encrypt outgoing packets and decrypt incoming packets WPA WPA2 Enterprise Also called WPA WPA2 EAP Extensible Authentication Protocol In addition to device based authentication WPA WPA2 Enterprise enables user based authentication via...

Page 35: ...d as a send key for encrypting traffic from the AP side to the wireless client side All 4 WEP keys are used as receive keys to decrypt traffic from the wireless client side to the AP side The WEP key can be presented in two Key types HEX and ASCII Each ASCII character has 8 bits so a 40 bit or 64 bit WEP key contains 5 characters and a 104 bit or 128 bit key has 13 characters In hex each character...

Page 36: ...le There must be at least 8 ASCII characters in the Passphrase and it could go up to 63 For security reasons this passphrase should only be disclosed to users who need it and it should be changed regularly WPA type Setting Description Factory Default Personal Provides Pre Shared Key enabled WPA and WPA2 Personal Enterprise Provides enterprise level security for WPA and WPA2 Encryption method Setti...

Page 37: ...or to make sure the system supports the protocol on the AP end Detailed information on these three popular EAP protocols is presented in the following sections EAP TLS TLS is the standards based successor to Secure Socket Layer SSL It can establish a trusted communication channel over a distrusted network TLS provides mutual authentication through certificate exchange EAP TLS is also secure to use...

Page 38: ...ed which can be generated by a small certificate authority Certificate reduction makes TTLS and PEAP much more popular than EAP TLS The AWK 1137C provides some non cryptographic EAP methods including PAP CHAP MS CHAP and MS CHAP V2 These EAP methods are not recommended for direct use on wireless networks However they may be useful as inner authentication methods with TTLS and PEAP Because the inne...

Page 39: ...2 is used MS CHAP V2 Anonymous Setting Description Factory Default Max of 31 characters A distinct name used for outer authentication None User name Password Setting Description Factory Default User name and password used for internal authentication None Advanced WLAN Settings Additional wireless related parameters are presented in this section to help you set up your wireless network in detail Tr...

Page 40: ... settings By setting these parameters properly you can better tune the performance of your wireless network Antenna Setting Description Factory Default A B Both Specifies the output antenna port Setting Antenna to Auto allows 2x2 MIMO communication under 802 11n and 2T2R communication in legacy 802 11a b g modes Both Different from 802 11n s multiple spatial data stream 2x2 MIMO which doubles the ...

Page 41: ...otentially affect your other wireless communications that use the same channel so only enable this feature when you have full control of the designated radio channel AP candidate threshold After the AP alive check declares the current access point is no long available the surrounding access points must have good enough connection qualities SNR Signal Strength in order to be the qualified as AP can...

Page 42: ...ould use MAC clone interface Specify the LAN interface to clone the MAC address from The AWK 1137C will copy the MAC address of the device connected to the specified interface LAN 1 NOTE Auto MAC Cloning cannot be used together with Link Fault Pass Through Remote connection check for Client Client router Slave mode only Setting Description Factory Default Enable Disable Enable remote connection ch...

Page 43: ...The AWK 1137C can support the PKCS 12 also known as Personal Information Exchange Syntax Standard certificate formats that define file formats commonly used to store private keys with accompanying public key certificates protected with a password based symmetric key Current status displays information for the current WLAN certificate which has been imported into the AWK 1137C Nothing will be shown...

Page 44: ...plication of this serial port Depending on the application the different operation modes and their settings will be displayed Setting Description Factory Default Disable This serial port will be disabled Device Control Device Control This serial port will be used to control a device using legacy software installed on a Windows Linux or UNIX system Drivers will need to be installed that will allow ...

Page 45: ...ivers are provided for Windows systems and TTY drivers are provided for Linux and UNIX systems The driver establishes a transparent connection to the attached serial device by mapping a local serial port to the AWK 1137C serial port Real COM mode supports up to four simultaneous connections so multiple hosts can collect data from the attached device at the same time ATTENTION Real COM drivers are ...

Page 46: ...sting TCP connection to close 7 min Max no of connections This field specifies the maximum number of connections that will be accepted by the serial port Setting Description Factory Default 1 or 2 1 Only one specific host can access this serial port and the Real COM driver on that host will have full control over the port 2 This serial port will allow the two connections to be opened simultaneousl...

Page 47: ...ecifies what happens to the RTS signals when the Ethernet connection goes down For some applications serial devices need to know the Ethernet link status through RTS signals sent through the serial port Setting Description Factory Default always low The selected signal will change to low when the Ethernet connection goes down always high always high The selected signal will remain high when the Et...

Page 48: ... using this field make sure that Inactivity time is disabled or set to a larger value Otherwise the connection may be closed before the data in the buffer can be transmitted Setting Description Factory Default 0 to 65535 0 If serial data is received setting this value to 0 means no data will be buffered and all data will be transmitted immediately as received 1 to 65535 If serial data is not recei...

Page 49: ...ting TCP connection to close 7 min TCP Port Setting Description Factory Default 0 to 9999 This field specifies the TCP port number that the serial port will use to listen to connections and that other devices must use to contact the serial port 4001 Packet Length Setting Description Factory Default 0 to 1024 This field specifies the maximum amount of data that is allowed to accumulate in the seria...

Page 50: ...ated in the serial port s buffer will be packed but the delimiter character s will be stripped from the data Force Transmit Setting Description Factory Default 0 to 65535 This field controls data packing by the amount of time that elapses between bits of data When using this field make sure that Inactivity time is disabled or set to a larger value Otherwise the connection may be closed before the ...

Page 51: ... the AWK 1137C serial port 2 Once the connection is established data can be transmitted in both directions from the host to the device and from the device to the host When Mode is set to TCP Server on a serial port s Operation Modes page you will be able to configure additional settings such as TCP alive check time Inactivity time and Max connection TCP Alive Check Time Setting Description Factory...

Page 52: ...s serial port will allow the specified number of connections to be opened simultaneously When multiple connections are established serial data will be duplicated and sent to all connected hosts Data from hosts will be sent to the attached serial device on a first in first out basis 1 Ignore Jammed IP This field specifies how an unresponsive IP address is handled when there are simultaneous connect...

Page 53: ... Setting Description Factory Default Enable These fields are used to define special delimiter character s for data packing Enable Delimiter 1 to control data packing with a single character enable both Delimiter 1 and 2 to control data packing with two characters received in sequence When these fields are enabled serial data will accumulate in the serial port s buffer until the buffer is full or u...

Page 54: ... in the buffer will be packed for network transmission The optimal force transmit time depends on your application but it must be at least larger than one character interval within the specified baudrate For example assume that the serial port is set to 1200 bps 8 data bits 1 stop bit and no parity In this case the total number of bits needed to send a character is 10 bits and the time required to...

Page 55: ... not respond to the packet within the specified time the AWK 1137C will force the existing TCP connection to close 7 min Inactivity Time Setting Description Factory Default 0 to 65535 ms This field specifies the time limit for keeping the connection open if no data flows to or from the serial device 0 The connection will remain open even if data is never received For many applications the serial d...

Page 56: ...r that will be used for data transmission with the serial port 0 Connection Control This field specifies how connections to the device are established and closed Setting Description Factory Default Startup None The connection will be opened as the AWK 1137C starts up The connection will only be closed manually Startup None Any Character None The connection will be opened as soon as a character is ...

Page 57: ...escription Factory Default Do Nothing Data accumulated in the serial port s buffer will be packed including delimiters Do Nothing Delimiter 1 One additional character must be received before the data in the serial port s buffer is packed Delimiter 2 Two additional characters must be received before the data in the serial port s buffer is packed Strip Delimiter Data accumulated in the serial port s...

Page 58: ...l port s Operation Modes page you will be able to configure additional settings such as Destination address 1 through 4 Local listen port and Packet length Destination Address 1 to 4 Setting Description Factory Default IP address range and port e g 192 168 1 1 to 192 168 1 64 and 4001 In UDP mode you may specify up to 4 ranges of IP addresses for the serial port to connect to At least one destinat...

Page 59: ...Delimiter value can be set ranging from 00 to FF Unchecked ATTENTION When Delimiter 1 is enabled Packet length must be set to 0 Delimiter Process This field specifies how data is packed when delimiter characters are received This field has no effect if Delimiter 1 is not enabled Setting Description Factory Default Do Nothing Data accumulated in the serial port s buffer will be packed including del...

Page 60: ...rial port is where serial communication settings are specified such as Baud rate Data bits and Stop bits The Communication Parameters page for the serial port is where serial communication settings are specified such as Baud rate Data bits and Stop bits Port Alias Setting Description Factory Default free text e g Secondary console connection This is an optional free text field to help you differen...

Page 61: ...ault None RTS CTS XON XOFF This field specifies the type of flow control used by the serial port RTS CTS FIFO Setting Description Factory Default Enable Disable This field specifies whether the serial port will use the built in FIFO A 128 byte FIFO is provided to each serial port for both Tx and Rx directions To prevent data loss during serial communication this should be set to Disable if the att...

Page 62: ...ts as opposed to physical segments In general VLANs are easier to manage The Virtual LAN VLAN Concept What is a VLAN A virtual LAN commonly known as a VLAN is a group of hosts with a common set of requirements that communicate as if they were attached to the same broadcast domain regardless of their physical location A VLAN has the same attributes as a physical LAN but it allows for end stations t...

Page 63: ...ackbone to a network switch Finally the switch would be configured to route packets from the marketing department to the appropriate corporate resources such as printers and servers Packets from the human resource department could be restricted to a gateway that allowed access to only the Internet A member of the human resource department could send and receive e mail and access the Internet but w...

Page 64: ...P DHCP Server for Client Router mode only DHCP Dynamic Host Configuration Protocol is a networking protocol that allows administrators to assign temporary IP addresses to network computers by leasing an IP address to a user for a limited amount of time instead of assigning permanent IP addresses The AWK 1137C can act as a simplified DHCP server and easily assign IP addresses to your DHCP clients b...

Page 65: ...onnect None Start IP address Setting Description Factory Default IP address Indicates the IP address which AWK 1137C can start assigning None Maximum number of users Setting Description Factory Default 1 to 999 Specifies how many IP address can be assigned continuously None Client lease time Setting Description Factory Default 2 to 14400 minutes The lease time for which an IP address is assigned T...

Page 66: ...olicy based filter that can allow or filter out IP based packets with specified IP protocol and source destination IP addresses The AWK 1137C provides 60 entities for setting IP protocol and source destination IP addresses in your filtering policy Four IP protocols are available All ICMP TCP and UDP You must specify either the Source IP or the Destination IP By combining IP addresses and netmasks ...

Page 67: ...col filters Policy Setting Description Factory Default Accept Only the packets fitting the entities on the list can be allowed Accept Drop Any packet fitting the entities on the list will be denied ATTENTION Be careful when you enable the filter function Drop no entity on list is activated all packets are allowed Accept no entity on list is activated all packets are denied ...

Page 68: ...end port cannot be larger than the start port The Application name is a text string that describes the corresponding entity with up to 31 characters Remember to check the Active check box for each entity to activate the setting TCP UDP port filters Setting Description Factory Default Enable Enables TCP UDP port filters Disable Disable Disables TCP UDP port filters Policy Setting Description Factor...

Page 69: ...ve Click the checkbox to enable Static Routing Destination Specifies the destination IP address Netmask Specifies the subnet mask for this IP address Gateway Specifies the IP address of the router that connects the LAN to an outside network Metric Specifies a cost for accessing the neighboring network Interface Specifies the designated network interface for this routing rule ...

Page 70: ...ding are supported by the AWK 1137C to facilitate the Client Router operation mode This feature translates the outgoing communication from private IPs to external IPs WAN IP Setting Description Factory Default NAT mode Enable N 1 NAT or 1 1 NAT or disable the NAT mode Disable Port Forwarding Enable or disable the port forwarding function Disable N 1 NAT ...

Page 71: ...AirWorks AWK 3131A Web Console Configuration 3 57 1 1 NAT Setting Description Active Click the checkbox to enable 1 1 NAT WAN IP Specifies the forward to WAN IP LAN IP Specifies the forward to LAN IP ...

Page 72: ... Port Specifies the external port to be forwarded to LAN IP Specifies the forward to LAN IP LAN Port Specifies the forward to LAN Port In order to allow external devices to initiate the communication Port Forwarding is used to specify a static map between external ports WAN Port and internal IP port combos LAN IP LAN Port so as to allow external devices to initiate connection with this device ...

Page 73: ... V1 V2c V1 V2c Read Community Community string No Use a community string match for authentication V1 V2c Write Read Community Community string No Use a community string match for authentication SNMP V3 No Auth No No Use account with admin or user to access objects MD5 or SHA Authentication based on MD5 or SHA No Provides authentication based on HMAC MD5 or HMAC SHA algorithms 8 character passwords...

Page 74: ...jects No authentication No Auth MD5 Provide authentication based on the HMAC MD5 algorithms 8 character passwords are the minimum requirement for authentication SHA Provides authentication based on HMAC SHA algorithms 8 character passwords are the minimum requirement for authentication Authentication username Determines one account setting among eight possible accounts as SNMP authentication accou...

Page 75: ...when exceptions occur In addition to logging these events the AWK 1137C supports different approaches to warn engineers automatically such as SNMP trap e mail and relay output It also supports two digital inputs to integrate sensors into your system to automate alarms by email and relay output System Logs System Log Event Types Detailed information for grouped events is shown in the following tabl...

Page 76: ...onfiguration Changed A configuration item has been changed Configuration file import via Web Console The configuration file is imported to the AWK 1137C Console authentication failure An incorrect password is entered Firmware upgraded The AWK 1137C s firmware is updated Configuration reset to default The configuration is reset to factory default Power events Event is triggered when Power transitio...

Page 77: ...s You will have to stop the communication traffic in order to generate a report that is suitable for use with the Turbo Roaming Analyzer if you have activated the RSSI report events event type E mail Notifications Notification Event Types Check the box for Active to enable the event items All default values are deactivated unchecked Details for each event item can be found in the System log Event ...

Page 78: ...il address 1 2 3 4 Setting Description Factory Default Max 63 characters Enter the receivers e mail addresses None Trap Traps can be used to signal abnormal conditions notifications to a management station This trap driven notification can make your network more efficient Because a management station usually takes care of a large number of devices that have a large number of objects it will be ove...

Page 79: ...actory Default IP address or host name Enter the IP address or name of the trap server used by your network None 1st 2nd trap community Setting Description Factory Default Max of 31 characters Use a community string match with a maximum of 31 characters for authentication Alert Status Wireless LAN Status The status for 802 11 Information parameters such as Operation mode and Channel are shown on t...

Page 80: ...ds The Real COM mode Reverse Real COM mode and TCP server mode support up to 2 devices connection TCP Client mode support up to 4 devices connection Serial Port Status Go to Serial Port Status under Serial Status to view the current status of each serial port Serial Port Status Buffering monitors port buffering usage bytes of the serial port Go to Serial Port Settings Port 1 Data Buffering Log to ...

Page 81: ...ks resulting from serial devices connected behind the AWK Serial Port Settings Go to Serial Port Settings under Serial Status to view a summary of the settings for each serial port Serial Data Log Data logs for the serial port can be viewed in ASCII or HEX format After selecting the serial port and format you may click Select all to select the entire log if you wish to copy and paste the contents ...

Page 82: ...ents are recorded in System Log You can export the log contents to an available viewer by clicking Export Log You can use the Clear Log button to clear the log contents and the Refresh button to refresh the log Reason Code Name Description 0 MOXA_NORMAL_JOIN The station joined normally no extra information 3 MOXA_DEAUTH_LEFT Received a de authentication frame ...

Page 83: ...e system Factors such as a high number of firewall rules IP MAC Protocol filters and traffic PPS packet per second contribute to the rise in CPU usage Network Status The network status section indicates the network status of the device with respect to ARP bridge status LLDP RSTP and the routing table ARP Table Address Resolution Protocol ARP Table indicates the current IP to MAC address mapping fo...

Page 84: ...ting Table Displays the routing information for the current device Maintenance Maintenance functions provide the administrator with tools to manage the AWK 1137C and wired wireless networks Console Settings You can enable or disable access permissions to the device and Moxa Service such as MXstudio and Wireless Search Utility For greater security we recommend only allowing access to the two secure...

Page 85: ...ed with more value added functions by installing firmware upgrades The latest firmware is available at Moxa s download center Before running a firmware upgrade make sure the AWK 1137C is off line Click the Browse button to specify the firmware image file and click Firmware Upgrade and Restart to start the firmware upgrade After the progress bar reaches 100 the AWK 1137C will reboot itself When upg...

Page 86: ...is a my file that you can import using a general SNMP tool and use to remotely control or configure the AWK 1137C In the Configuration Export section click the Export Configuration button and save the configuration file onto your local storage media The configuration file is a text file and you can view and edit it with a general text editing tool The SNMP MIB file is also available for download f...

Page 87: ...ngth check option to ensure that users are required to select high strength passwords NOTE See the Change Password section below for details Disable Password validity The number of days after which the password must be changed Passwords should be updated regularly to protect against hackers 90 days Password retry count The number of consecutive times a user can enter an incorrect password while lo...

Page 88: ...capability Admin Account name The username of the account Admin New Password The password used to log in to the device moxa Confirm Password Retype the password If the Confirm Password and New Password fields do not match you will be asked to reenter the password N A Change Password Use the Change Password function to change the password of existing user accounts First input the current password t...

Page 89: ...a factory restore on the AWK 1137C This is the default option Disable factory reset function after 60 seconds Deactivate the factory reset function of the reset button 60 seconds after the AWK 1137C restarts Troubleshooting This feature allows you to quickly obtain the current system status and provide diagnostics information to Moxa engineers To export the current device information click Export ...

Page 90: ...s box You can enter a value between 1 to 180 seconds 2 Click Capture 3 Wait for a timeout on the web console You will be able to download a report from the web browser To set up a Wi Fi mirror port for long term monitoring do the following 1 On the Wi Fi Mirror Port page set the Remote Capture option to Enable 2 Run the Wireshark tool on your computer click Capture and then click Options 3 In the ...

Page 91: ...r cases where advanced troubleshooting is required Moxa Service Center will send you an encrypted script file The script file can capture additional details on the system To run the script browse to and select the script file using Browse and click Run Script after you have filled in the following details ...

Page 92: ...ature will generate a temporary account and password that will be used by Moxa support engineers to perform remote diagnostics on your device When completed we recommend disabling this feature again which will remove all the temporary account information NOTE Remote diagnostics is only available for administrator level users Setting Description Remote Diagnostics Enable this option to allow remote...

Page 93: ... in the non volatile memory until you save the configurations Restart If you submitted configuration changes you will find a blinking string in the upper right corner of the screen After making all your changes click the Restart function in the left menu box One of two different screens will appear If you made changes recently but did not save you will be given two options Clicking the Restart but...

Page 94: ... your changes you will see just one Restart button on your screen You will not be able to run any of the AWK 1137C s functions while the system is rebooting Logout Logout helps users disconnect the current HTTP or HTTPS session and go to the Login page For security reasons we recommend you logout before quitting the console manager ...

Page 95: ...4 4 Software Installation and Configuration The following topics are covered in this chapter Overview Wireless Search Utility Installing Wireless Search Utility Configuring Wireless Search Utility ...

Page 96: ...xa com Wireless Search Utility Installing Wireless Search Utility Once the Wireless Search Utility is downloaded run the setup executable to start the installation 1 Click Next when the Welcome screen opens to proceed with the installation 2 Click Next to install program files to the default directory or click Browse to select an alternate location ...

Page 97: ...3131A Software Installation and Configuration 4 3 3 Click Next to create the program s shortcut files to the default directory or click Browse to select an alternate location 4 Click Next to select additional tasks ...

Page 98: ...staller then displays a summary of the installation options 6 Click Install to begin the installation The setup window will report the progress of the installation To change the installation settings click Back and navigate to the previous screen 7 Click Finish to complete the installation of Wireless Search Utility ...

Page 99: ...not IP address it doesn t matter if the AWK 1137C is configured as an AP or Client In either case APs and Clients connected to the LAN will be located regardless of whether or not they are part of the same subnet as the host 1 Start the Wireless Search Utility program When the Login page appears select the Device Search only option to search for devices and to view the configuration of each device...

Page 100: ...mplete all AWKs that were located will be displayed in the Wireless Search Utility window 4 Click Locate to cause the selected device to beep 5 Make sure your AWK is unlocked before using the search utility s icons setting The AWK will unlock automatically if the password is set to the default Otherwise you must enter the new password manually ...

Page 101: ...ddresses of those AWKs you would like to manage and then click Add Key in the password for the AWK device and then click OK to save If you return to the search page and search for the AWK again you will find that the AWK will unlock automatically ATTENTION For security purposes we suggest you can change the Wireless Search Utility login password instead of using the default ...

Page 102: ...ighlighted AWK click on the Web icon to open the web console This will take you to the web console where you can make all configuration changes Refer to Chapter 3 Using the Web Console for information on how to use the web console Click on Telnet if you would like to use telnet to configure your AWKs ...

Page 103: ...ick Assign IP to change the IP setting The three advanced options Search Connection and Miscellaneous are explained below Search Retry count default 5 Indicates how many times the search will be retried automatically Retry interval ms The time elapsed between retries ...

Page 104: ...irmware and Unlock to complete Upgrade timeout secs Use this option to set the waiting time for the connection to disconnect while the firmware is upgrading Use this option to set the waiting time for the Firmware to write to flash Misc Search on start Checkmark this box if you would like the search function to start searching for devices after you log in to the Wireless Search Utility ...

Page 105: ...lnet console SSH console and HTTPS console can be used to access the AWK 1137C over an Ethernet LAN or over the Internet The serial console is for use by a Moxa service representative for troubleshooting product issues The following topics are covered in this chapter Configuration by Telnet and SSH Consoles Configuration by Web Browser with HTTPS SSL Disabling Telnet and Browser Access Configurati...

Page 106: ...ility via Telnet or SSH client 1 From Windows Desktop run Start Run and then use Telnet to access the AWK 1137C s IP address from the Windows Run window you may also issue the telnet command from the MS DOS prompt 2 When using SSH client e g PuTTY please run the client program e g putty exe and then input the AWK 1137C s IP address specifying 22 for the SSH connection port 3 The Console login scre...

Page 107: ... to access each of AWK 1137C s functions Disabling Telnet and Browser Access If you are connecting the AWK 1137C to a public network but do not intend to use its management functions over the network then we suggest disabling both Telnet Console and Web Configuration Please run Maintenance Console Settings to disable them as shown in the following figure Configuration by the RS 232 Console The RS ...

Page 108: ...information about wireless related technologies The information in this chapter can help you administer your AWK 1137Cs and plan your industrial wireless network better The following topics are covered in this appendix Beacon DTIM Fragment RTS Threshold ...

Page 109: ...by preventing your PC from dropping into power saving sleep mode Higher settings allow your PC to enter sleep mode thus saving power Fragment A lower setting means smaller packets which will create more packets for each transmission If you have decreased this value and experience high packet error rates you can increase it again but it will likely decrease overall network performance Only minor mo...

Page 110: ...formation about this product You can also learn how to contact Moxa for technical support The following topics are covered in this appendix Firmware Recovery Declaration of Conformity Federal Communication Commission Interference Statement RED Compliance Statement ...

Page 111: ...s awk1137c rom for firmware recovery please set up TFTP server 192 168 127 1 contains awk1137c rom for firmware recovery please set up TFTP server 192 168 127 1 contains awk1137c rom for firmware recovery please set up TFTP server 192 168 127 1 contains awk1137c rom for firmware recovery please set up TFTP server 192 168 127 1 contains awk1137c rom for firmware recovery Take the following steps fo...

Page 112: ... into an outlet on a circuit different from that to which the receiver is connected Consult the dealer or an experienced radio TV technician for help FCC Caution To assure continued compliance example use only shielded interface cables when connecting to computer or peripheral devices Any changes or modifications not expressly approved by the party responsible for compliance could void the user s ...

Page 113: ...ctive 98 13 EEC Telecommunications Terminal Equipment and Satellite Earth Station Equipment as of April 8 2000 Safety This equipment is designed with the utmost care for the safety of those who install and use it However special attention must be paid to the dangers of electric shock and static electricity when working with electrical equipment All guidelines of this and of the computer manufactur...

Reviews: