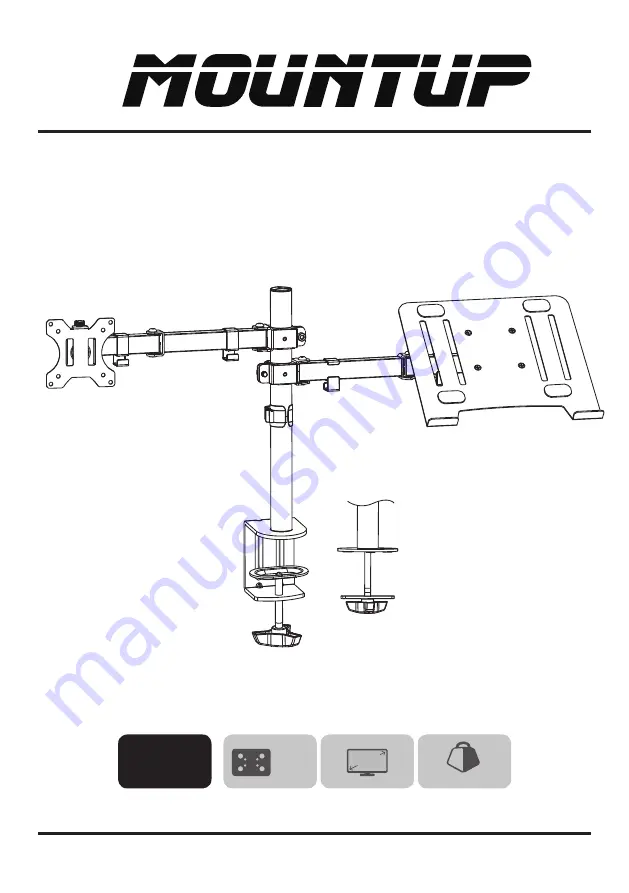
Single Monitor and Laptop Tray Desk Mount
Instruction Manual
If you have any questions , please contact us.
MU4002
V3.0
75x75
100x100
(8kg/17.6lbs)x2
27"
Page 1: ...Single Monitor and Laptop Tray Desk Mount Instruction Manual If you have any questions please contact us MU4002 V3 0 75x75 100x100 8kg 17 6lbs x2 27...
Page 2: ...by improper mounting incorrect assembly or inappropriate use This product contains small items that could be a choking hazard if swallowed NOT FOR CHILDREN UNDER 3 YEARS ADULT SUPERVISION IS REQUIRED...
Page 3: ...C to the Pole D using 3pcs Bolt G Tighten using 4mm Allen key K Secure stand to the desktop by tightening the plastic knob or by using 6mm Allen key L ASSEMBLY STEPS STEP 1 Clamp Installation OR Grom...
Page 4: ...talling the desk mount Loosen the screw separate the clamp C into two parts Install the Base Plate F to the Pole D using 1pc of Bolt G Install the pole D on the desktop using the support plate H and t...
Page 5: ...STEP 2 Arm Installation 04 Install wire clip E and two swivel arms B to the pole D Fasten the bolt with supplied 6mm Allen key L Attached the wire clips I to the swivel arm B B B I E D L...
Page 6: ...r Laptop Tray A M A M C M E L OPTION A Flat Back Monitor For flat back monitor secure VESA plate A to monitor using screws M A or M C and washers M E Tighten the screws using 6mm Allen key L A M B M D...
Page 7: ...B Install the security bolt J Make sure the security bolt is installed before you rotate the monitor Install the VESA plate A to the laptop tray M using 4pcs screws O and 4pcs nuts P tighten by 6mm A...
Page 8: ...STEP 5 Secure the Laptop on the Laptop tray 07 Q Untie the strap before you cover the laptop Blank side Loop Hook side...
Page 9: ...e bolt with the supplied 6mm Allen key L to fix the tilt angle 08 L L Note 1 Loosen the tilting bolt 2 Adjust monitor to your desired tilting angle 3 Retighten the tilting bolt to Tilts down Guideline...
Page 10: ...STEP 7 Cable Management 09 K L E Manage cables and store Allen keys K L in wire clip E for future use...
Page 11: ...nd rotation 10 Product Dimensions 90 360 90 75mm 114mm 100mm 75mm 100mm 114mm 403mm 134mm 184mm 90 36mm 90 360 90 90 90 100mm 3 94 00mm 80mm 0 3 15 DESK DESK Pay attention while clamp install 300mm 29...
Page 12: ...of monitor or stand This product is intended for indoor use only Using this product outdoors could lead to product failure and personal injury Check that the bracket is secure and safe to use at regul...