Using the Options Menu
45
The factory default for the entry method is Tap Mode. However, you can change the default. See
Entry Method Selection
in
Phone Setup
.
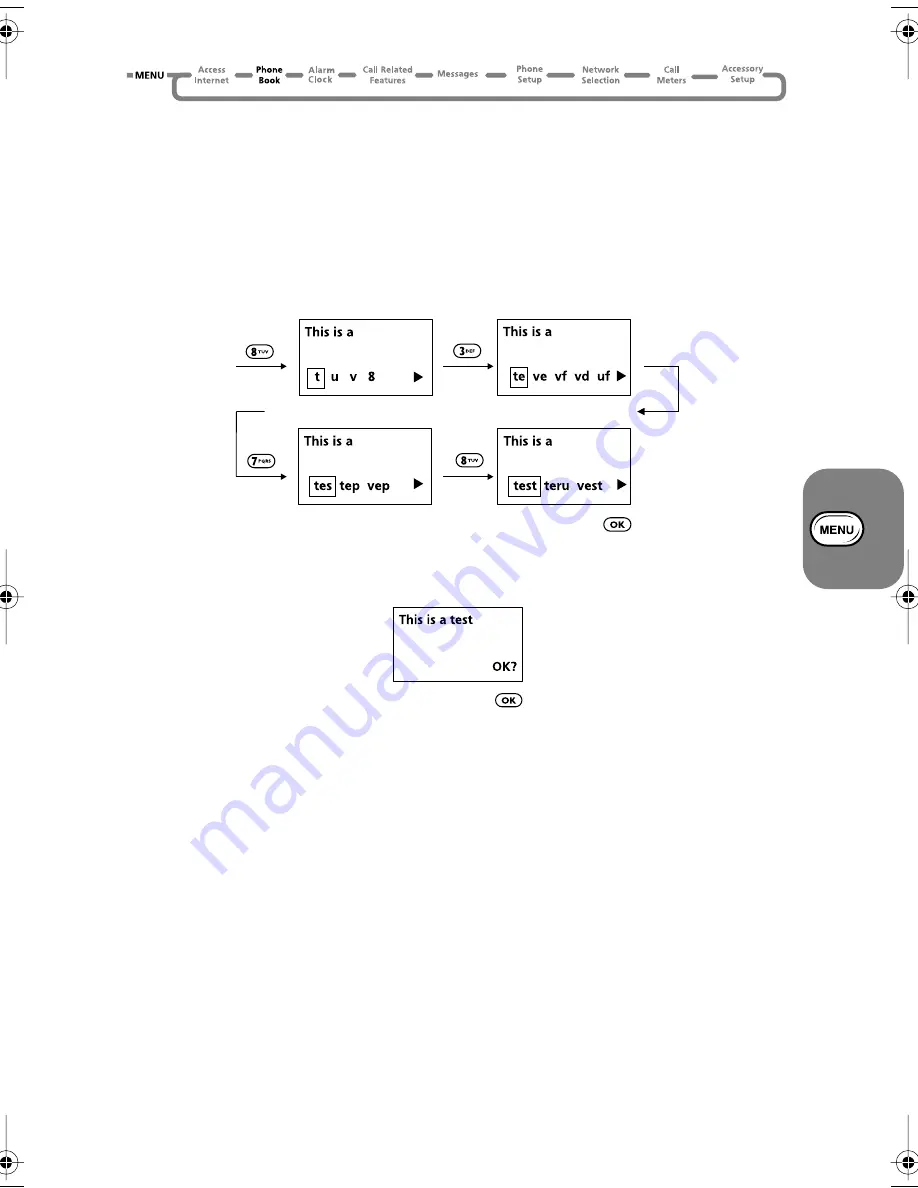
How to Enter Text in iTAP Mode
A
Only available if iTAP supports the current language set up for your phone.
In iTAP Mode, each key has a number of different characters assigned to it. See ‘Table of
Characters’. When you press a key to start a word, the available characters appear at the bottom
of the display.
As you add characters, a dynamic dictionary builds and displays a set of text options along the
bottom of the display. iTAP highlights the first choice text option.
To highlight and add characters to an alternative text option, press
<
or
>
. A left or right
arrow on the bottom line indicates that
<
or
>
will display more text options.
When you are ready to add a highlighted word to the main display area, press
O
.
To start adding another word, press the next text key you require. However, if you have finished
editing, select
OK?
.
iTAP - Locking a Word
You lock a word to give yourself a better selection of text options or to stop the dynamic
dictionary from changing the core text you are using. The core text can change if you create a
word that is not in the dynamic dictionary.
You can lock a word in two ways:
• Use
<
or
>
to highlight an alternative text option (even if you then return to the
original text option). The highlighted text then forms the basis for all subsequent text
options.
• Use
C
to return to the core text you require. For example you add
t
to
Por
but iTAP
changes the text option to
Part
. If you press
C
and highlight
Por
,
Por
is then
locked.
iTAP - Punctuation and Upper Case Characters
When you select a word to go into the main display area, iTAP automatically inserts a space.
However, iTAP does not necessarily add a space if you insert a punctuation character, for
example, a period.
(A5) 07_pg37_84 opt_menu.fm Page 45 Tuesday, December 7, 1999 3:23 PM
Summary of Contents for V8088
Page 1: ...Options Menu Quick Reference ...
Page 12: ...Contents 8 ...
Page 24: ...About Your Phone Battery and SIM Card 20 ...
Page 41: ...Using the Options Menu 37 Using the Options Menu ...
Page 46: ...Using the Options Menu 42 The Phone Book Menu ...
Page 70: ...Using the Options Menu 66 Phone Setup Menu ...
Page 88: ...Using the Options Menu 84 ...