7
Bench Testing (Optional)
NOTE:
If the power LED does not illuminate, remove the power cable and the ODU
connection from the PIDU Plus. Re-connect the power lead and check the power
LED illumination (green). If the power LED still does not light then check the power
source.
Step 6:
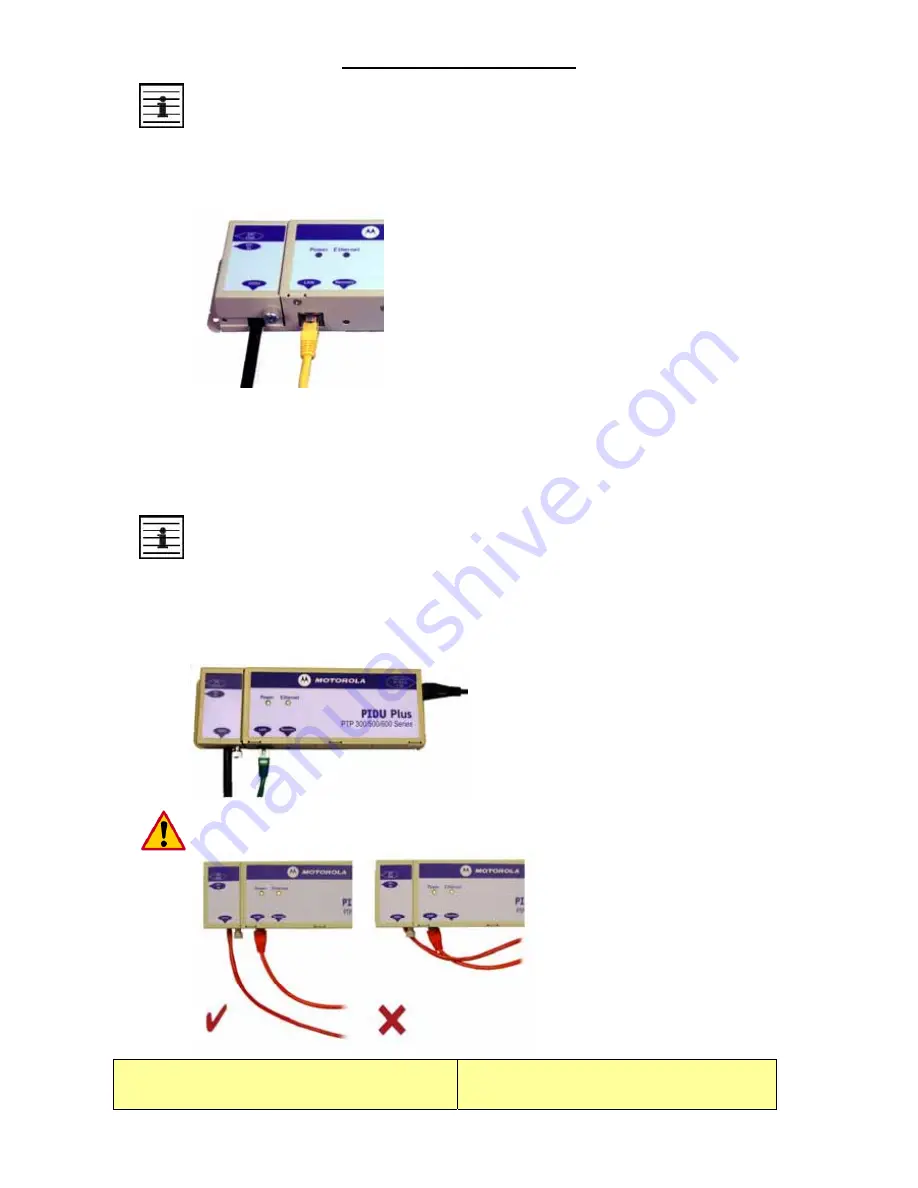
Connect a second Ethernet cable (shown in yellow) to the “LAN” socket of the PIDU
Plus.
Step 7:
30 seconds after powering, the Ethernet LED should be observed to flash slowly 10
times. If the Ethernet LED does not illuminate (orange), then either the PIDU Plus or the
cable to the ODU may be faulty. Replace cable and/or PIDU Plus and repeat from Step 1.
Step 8:
Ensure PC is set to correct IP address 169.254.1.x, where 2 < x < 254. Connect the
LAN cable to the PC (shown here in yellow).
NOTE:
If this IP address is not recognised, try 10.10.10.11 (Master) and 10.10.10.10
(Slave). Some units may have been pre-configured with these IP addresses. If it is
necessary to use IP addresses 10.10.10.11 and 10.10.10.10, ensure that the PC is
configured with an IP address of 10.10.10.n, where n is any value between 2 and
254 but excluding 10 and 11, to configure these units.
Step 9:
Check that the Ethernet LED is now ON. If the LED does not show any activity
when accessing web pages, refer to “Testing and Fault Finding (Troubleshooting)”.
CAUTION:
Do not dress the RJ45 cables too tightly, as this may make the connections
unreliable.
More information:
PTP 300 Series User Guide
or
PTP 500 Series User Guide
Section:
“Connecting Up”
4Gon www.4Gon.co.uk [email protected] Tel: +44 (0)1245 808195 Fax: +44 (0)1245 808299


