background image

28

P

RE

L

IM

IN

A

R

Y

Us

in

g the


Ha

nd

set

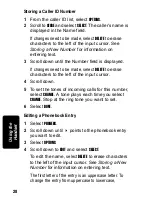
Storing a Caller ID Number

1

From the caller ID list, select 

OPTIONS

.

2

Scroll to 

STORE

 and select 

SELECT

. The caller’s name is 

displayed in the Name field. 

If changes need to be made, select 

DELETE

 to erase 

characters to the left of the input cursor. See 

Storing a New Number

 for information on 

entering text.

3

Scroll down until the Number field is displayed. 

If changes need to be made, select 

DELETE

 to erase 

characters to the left of the input cursor.

4

Scroll down. 

5

To set the tones of incoming calls for this number, 
select 

CHANGE

. A tone plays each time you select 

CHANGE

. Stop at the ring tone you want to set.

6

Select 

DONE

.

Editing a Phonebook Entry

1

Select 

PHONEBK

.

2

Scroll down until 

 points to the phonebook entry 

you want to edit.

3

Select 

OPTIONS

.

4

Scroll down to 

EDIT

 and select 

SELECT

.

To edit the name, select 

DELETE

 to erase characters 

to the left of the input cursor. See 

Storing a New 

Number

 for information on entering text.

The first letter of the entry is an uppercase letter. To 
change the entry from uppercase to lowercase, 

Summary of Contents for MD750 Series

Page 1: ...MD750 Series User Guide Digital 5 8GHz ...

Page 2: ......

Page 3: ...i Welcome Welcome Congratulations on your purchase of a Motorola product Your Motorola handset at a glance ...

Page 4: ...al dated sales receipt for your records For warranty service of your Motorola Product you will need to provide a copy of your dated sales receipt to confirm warranty status Copyright 2004 Motorola Inc All rights reserved No part of this publication may be reproduced in any form or by any means or used to make any derivative work such as translation transformation or adaptation without written perm...

Page 5: ...ments or changes in the product s described in this manual at any time MOTOROLA the Stylized M Logo and PhoneWrap are registered in the U S Patent and Trademark Office All other product or service names are the property of their respective owners ...

Page 6: ...iv Welcome ...

Page 7: ...Handset Display 5 Using the Soft Keys 6 Using the Navigation Key 7 Installation 9 Installing the Phone on a Desk 9 Installing the Phone on the Wall 10 Setting Up 13 Personalizing Your Handset 13 Setting the Ring Volume 13 Setting the Ring Tone 14 Setting Key Beeps On or Off 14 Naming a Handset 15 Storing Area Codes for Caller ID 17 Setting the Date and Time 18 Setting the Language 19 Setting Touch...

Page 8: ...ently Called Number 27 Storing a Caller ID Number 28 Editing a Phonebook Entry 28 Deleting a Phonebook Entry 29 Sorting the Phonebook 29 Calling a Number from the Phonebook 30 Using Caller ID 31 Reviewing the List of Caller ID Calls 31 Deleting Caller ID Calls 31 Using the Intercom 32 Using the Intercom 32 Enabling Auto Answer 32 Transferring Calls to Other Handsets 33 Multihandset Functions 34 Co...

Page 9: ...wimming pool 4 Do not allow anything to rest on the power cord Place the power cord so that it will not be walked on 5 Never insert objects of any kind into the product slits as that may result in fire or shock 6 Unplug this product from the wall outlet before cleaning Do not use liquid cleaners or aerosol cleaners Use a damp cloth for cleaning 7 Do not disassemble this product If service or repai...

Page 10: ...rence 2 Follow all warnings and instructions marked on the product 3 Do not install this product near a bath tub sink or shower 4 Operate this phone using only the power source that is indicated on the marking label If you are unsure of the power supply to your home consult with your dealer or local power company 5 Do not place this product on an unstable cart stand or table This product may fall ...

Page 11: ...damage the unit 9 Because cordless phones operate on electricity you should have at least one phone in your home that isn t cordless in case the power in your home goes out 10 To avoid interference to nearby appliances do not place the base of the cordless phone on or near a TV microwave oven or VCR ...

Page 12: ...x Safety Info ...

Page 13: ... bottom of this equipment is a label that contains among other information a product identifier in the form US AAAEQ TXXXX You must upon request provide this information to your telephone company The digits represented by in the product identifier indicate the Ringer Equivalency Number REN for this equipment The REN is useful in determining the number of devices you may connect to your telephone l...

Page 14: ...n of your telephone from your line The FCC requires that you connect your cordless telephone to the nationwide telephone network through a modular telephone jack USOC RJ11C RJ11W or RJ14C RJ14W Rights of the Telephone Company Should your equipment cause trouble on your line which may harm the telephone network the telephone company shall where practicable notify you that temporary discontinuance o...

Page 15: ...ion is subject to the following two conditions This device may not cause harmful interference This device must accept any interference received including interference that may cause undesired operation This equipment has been tested and found to comply with the limits for a Class B digital device pursuant to Part 15 of the FCC Rules These limits are designed to provide reasonable protection agains...

Page 16: ... different from that to which the receiving antenna is connected If these measures do not eliminate the interference please consult your dealer or an experienced radio television technician for additional suggestions Also the Federal Communications Commission has prepared a helpful booklet How to Identify and Resolve Radio TV Interference Problems This booklet is available from the U S Government ...

Page 17: ...xv FCC Info Hearing Aid Compatibility This telephone system meets the FCC standards for hearing aid compatibility ...

Page 18: ...xvi FCC Info ...

Page 19: ...re is a risk of explosion if you replace the battery with an incorrect battery type Use only the battery that came with your phone or an authorized replacement recommended by the manufacturer Keep batteries out of the reach of children Remove batteries if storing over 30 days Do not dispose of batteries in fire which could result in explosion The rechargeable batteries that power this product must...

Page 20: ...emove the battery door 2 Insert the battery into the battery compartment 3 Plug the battery connector into the receptacle in the battery compartment and replace the battery door 4 Plug the power cord into the back of the base and into an outlet ...

Page 21: ...or the initial charge charge the battery for at least 16 hours Do not connect the base station to the phone line until the handset is fully charged Note Every time a battery is plugged in the phone must be charged in the base for at least 10 seconds for the phone to properly restart ...

Page 22: ...r AAA alkaline batteries as directed on the compartment 4 To replace the compartment cover insert the tabs of the cover into the slots on the base station and press down until the cover clicks into place 5 To replace the side panel insert the tabs of the panel into the slots of the base station and press down until the panel clicks into place Note The backup batteries discharge somewhat during eac...

Page 23: ...omponents so you can set up your preferences For step by step instructions on setting personal preferences see Setting Up Your Phone Using the Handset Display The main display When the handset is not in use the standby screen is displayed Note Caller ID information is supplied only if you subscribe to caller ID service from your local phone company When the handset speakerphone is on V displays ...

Page 24: ... the currently selected item Using the Soft Keys Two soft keys are used to select the functions shown above them on the display The functions change as you move from one screen to the next In this guide soft key functions are shown as the function name For example if a step instructs you to select MENU do so by pressing the soft key below MENU ...

Page 25: ...7 Getting Started Using the Navigation Key The navigation key is used to scroll up and down through menu items lists of settings caller ID and redial lists and the phonebook ...

Page 26: ...8 Getting Started ...

Page 27: ...n install it on a desktop or mounted to a wall This section provides the step by step instructions you will need to install the phone Installing the Phone on a Desk Once the battery is fully charged plug the phone cord into the back of the phone and then into the phone jack on the wall ...

Page 28: ... works best with a wall mount bracket which is available at most electronic stores 1 Carefully slide and lift the wall mount from the base 2 Turn the wall mount over so the key slot is facing upward Align the holes of the wall mount with the feet of the base and push gently until the wall mount fits snugly into place ...

Page 29: ...k of the base and into an electrical outlet 4 Plug one end of the telephone line cord into the jack on the back of the base 5 Line up the tabs on the wall mount bracket with the holes on the back of the wall mount Snap the wall mount firmly into place ...

Page 30: ...12 Installation ...

Page 31: ... differ from daytime to nighttime you can set a separate day volume and night volume 1 Select MENU 2 Scroll to Ringer and select SELECT DAY VOLUME is displayed which sets the ringer volume from 6 AM to 9 PM 3 Select CHANGE to scroll through the settings off low medium high Each volume level plays as you select CHANGE Stop at the volume level you want to set To change the night volume scroll down t...

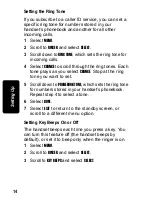
Page 32: ...ch tone plays as you select CHANGE Stop at the ring tone you want to set 5 Scroll down to PHONEBOOK TONE which sets the ring tone for numbers stored in your handset s phonebook Repeat step 4 to select a tone 6 Select DONE 7 Select EXIT to return to the standby screen or scroll to a different menu option Setting Key Beeps On or Off The handset beeps each time you press a key You can turn this featu...

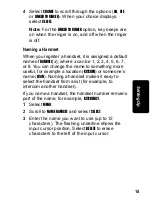
Page 33: ... 3 4 5 6 7 or 8 You can change the name to something more useful for example a location KITCHEN or someone s name EVAN Naming a handset makes it easy to select the handset from a list for example to intercom another handset If you name a handset the handset number remains part of the name for example KITCHEN 2 1 Select MENU 2 Scroll to NAME HANDSET and select SELECT 3 Enter the name you want to us...

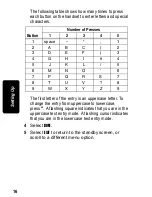
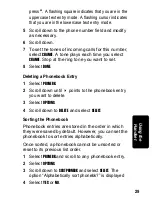
Page 34: ...rom uppercase to lowercase press A flashing square indicates that you are in the uppercase text entry mode A flashing cursor indicates that you are in the lowercase text entry mode 4 Select DONE 5 Select EXIT to return to the standby screen or scroll to a different menu option Button Number of Presses 1 2 3 4 5 1 space 1 2 A B C 2 3 D E F 3 4 G H I 4 5 J K L 5 6 M N O 6 7 P Q R S 7 8 T U V 8 9 W X...

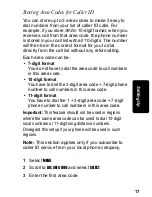
Page 35: ...al the area code to call numbers in this area code 10 digit format You have to dial the 3 digit area code 7 digit phone number to call numbers in this area code 11 digit format You have to dial the 1 3 digit area code 7 digit phone number to call numbers in this area code Important This feature should not be used in regions where the same area code can be used to dial 10 digit local numbers or 11 ...

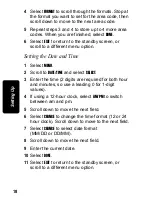
Page 36: ...t MENU 2 Scroll to DATE TIME and select SELECT 3 Enter the time 2 digits are required for both hour and minutes so use a leading 0 for 1 digit values 4 If using a 12 hour clock select AM PM to switch between am and pm 5 Scroll down to move the next field 6 Select CHANGE to change the time format 12 or 24 hour clock Scroll down to move to the next field 7 Select CHANGE to select date format MM DD o...

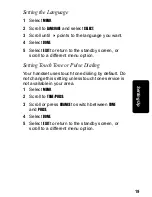
Page 37: ... or scroll to a different menu option Setting Touch Tone or Pulse Dialing Your handset uses touch tone dialing by default Do not change this setting unless touch tone service is not available in your area 1 Select MENU 2 Scroll to TONE PULSE 3 Scroll or press CHANGE to switch between TONE and PULSE 4 Select DONE 5 Select EXIT to return to the standby screen or scroll to a different menu option ...

Page 38: ...20 Setting Up ...

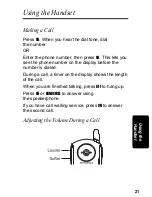
Page 39: ...press ON This lets you see the phone number on the display before the number is dialed During a call a timer on the display shows the length of the call When you are finished talking press OFF to hang up Press ON or HANDSFREE to answer using the speakerphone If you have call waiting service press ON to answer the second call Adjusting the Volume During a Call ...

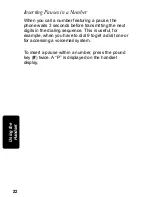
Page 40: ...ing a pause the phone waits 3 seconds before transmitting the next digits in the dialing sequence This is useful for example when you have to dial 9 to get a dial tone or for accessing a voicemail system To insert a pause within a number press the pound key twice A P is displayed on the handset display ...

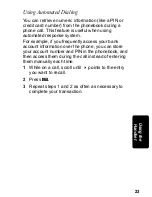
Page 41: ...ing automated response system For example if you frequently access your bank account information over the phone you can store your account number and PIN in the phonebook and then access them during the call instead of entering them manually each time 1 While on a call scroll until points to the entry you want to recall 2 Press DIAL 3 Repeat steps 1 and 2 as often as necessary to complete your tra...

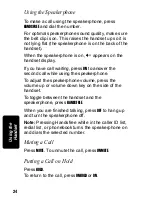
Page 42: ... waiting press ON to answer the second call while using the speakerphone To adjust the speakerphone volume press the volume up or volume down key on the side of the handset To toggle between the handset and the speakerphone press HANDSFREE When you are finished talking press OFF to hang up and turn the speakerphone off Note Pressing Handsfree while in the caller ID list redial list or phonebook tu...

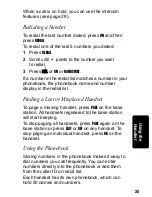
Page 43: ...me and number display in the redial list Finding a Lost or Misplaced Handset To page a missing handset press PAGE on the base station All handsets registered to the base station will start beeping To stop paging all handsets press PAGE again on the base station or press EXIT or OFF on any handset To stop paging an individual handset press OK on the handset Using the Phonebook Storing numbers in th...

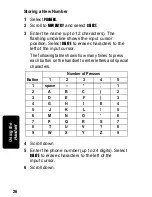
Page 44: ... erase characters to the left of the input cursor The following table shows how many times to press each button on the handset to enter letters and special characters 4 Scroll down 5 Enter the phone number up to 24 digits Select DELETE to erase characters to the left of the input cursor 6 Scroll down Button Number of Presses 1 2 3 4 5 1 space 1 2 A B C 2 3 D E F 3 4 G H I 4 5 J K L 5 6 M N O 6 7 P...

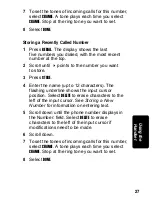
Page 45: ...want to store 3 Press STORE 4 Enter the name up to 12 characters The flashing underline shows the input cursor position Select DELETE to erase characters to the left of the input cursor See Storing a New Number for information on entering text 5 Scroll down until the phone number displays in the Number field Select DELETE to erase characters to the left of the input cursor if modifications need to...

Page 46: ...TE to erase characters to the left of the input cursor 4 Scroll down 5 To set the tones of incoming calls for this number select CHANGE A tone plays each time you select CHANGE Stop at the ring tone you want to set 6 Select DONE Editing a Phonebook Entry 1 Select PHONEBK 2 Scroll down until points to the phonebook entry you want to edit 3 Select OPTIONS 4 Scroll down to EDIT and select SELECT To e...

Page 47: ...et 8 Select DONE Deleting a Phonebook Entry 1 Select PHONEBK 2 Scroll down until points to the phonebook entry you want to delete 3 Select OPTIONS 4 Scroll down to DELETE and select SELECT Sorting the Phonebook Phonebook entries are stored in the order in which they were saved by default However you can set the phonebook to sort entries alphabetically Once sorted a phonebook cannot be unsorted or ...

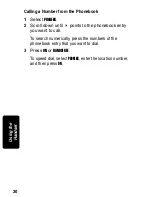
Page 48: ...onebook 1 Select PHONEBK 2 Scroll down until points to the phonebook entry you want to call To search numerically press the numbers of the phonebook entry that you want to dial 3 Press ON or HANDSFREE To speed dial select PHONEBK enter the location number and then press ON ...

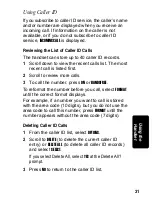
Page 49: ...d first 2 Scroll to review more calls 3 To call the number press ON or HANDSFREE To reformat the number before you call select FORMAT until the correct format displays For example if a number you want to call is stored with the area code 10 digits but you do not use the area code to call this number press FORMAT until the number appears without the area code 7 digits Deleting Caller ID Calls 1 Fro...

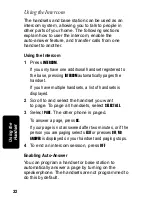
Page 50: ...COM automatically pages the handset If you have multiple handsets a list of handsets is displayed 2 Scroll to and select the handset you want to page To page all handsets select SELECT ALL 3 Select PAGE The other phone is paged To answer a page press OK If your page is not answered after two minutes or if the person you are paging selects EXIT or presses OFF NO ANSWER is displayed on your handset ...

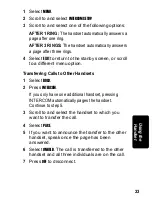
Page 51: ...een or scroll to a different menu option Transferring Calls to Other Handsets 1 Select HOLD 2 Press INTERCOM If you only have one additional handset pressing INTERCOM automatically pages the handset Continue to step 5 3 Scroll to and select the handset to which you want to transfer the call 4 Select PAGE 5 If you want to announce the transfer to the other handset speak once the page has been answe...

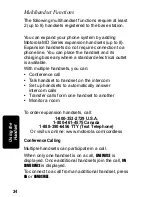
Page 52: ...ble With multiple handsets you can Conference call Talk handset to handset on the intercom Set up handsets to automatically answer intercom calls Transfer calls form one handset to another Monitor a room To order expansion handsets call 1 800 353 2729 U S A 1 800 461 4575 Canada 1 888 390 6456 TTY Text Telephone Or visit us online www motorola com cordless Conference Calling Multiple handsets can ...

Page 53: ...dditional handset pressing INTERCOM automatically pages the handset If you have multiple handsets a list of handsets is displayed 2 Scroll to and select the handset you want to page 3 Select PAGE The other phone is paged To answer a page press OK If your page is not answered after two minutes or if the person you are paging selects EXIT or presses OFF NO ANSWER is displayed on your handset and pag...

Page 54: ...ets 1 Select HOLD 2 Press INTERCOM If you only have one additional handset pressing INTERCOM automatically pages the handset Continue to step 5 3 Scroll to and select the handset to which you want to transfer the call 4 Select PAGE 5 If you want to announce the transfer to the other handset speak once the page has been answered 6 Select UNHOLD The call is transferred to the other handset and all t...

Page 55: ...ional handset pressing INTERCOM automatically pages the handset 5 If you have multiple additional handsets scroll to the handset you want to monitor and select PAGE The handset being monitored automatically answers the page the microphone is turned on and the speaker is turned off MONITORING HANDSET NAME is displayed on the handset from which you are monitoring To stop monitoring select CANCEL or ...

Page 56: ...38 P R E L I M I N A R Y Using the Handset ...

Page 57: ... remedy and applies as follows to new Motorola Products Accessories and Software purchased by consumers in the United States or Canada which are accompanied by this written warranty Products and Accessories as defined above unless otherwise provided for below Length of coverage one 1 year from the date of purchase by the first consumer purchaser of the product unless otherwise provided for below D...

Page 58: ...misuse b contact with liquid water rain extreme humidity or heavy perspiration sand dirt or the like extreme heat or food c use of the Products or Accessories for commercial purposes or subjecting the Product or Accessory to abnormal usage or conditions or d other acts which are not the fault of Motorola are excluded from coverage Use of Non Motorola Products and Accessories Defects or damage that...

Page 59: ...l Motorola Do Motorola at its option will at no charge repair replace or refund the purchase price of any Products Accessories or Software that does not conform to this warranty We may use functionally equivalent reconditioned refurbished pre owned or new Products Accessories or parts No data software or applications added to your Product Accessory or Software including but not limited to personal...

Page 60: ...Y OR SOFTWARE OR FOR ANY INDIRECT INCIDENTAL SPECIAL OR CONSEQUENTIAL DAMAGES OF ANY KIND OR LOSS OF REVENUE OR PROFITS LOSS OF BUSINESS LOSS OF INFORMATION OR DATA SOFTWARE OR APPLICATIONS OR OTHER FINANCIAL LOSS ARISING OUT OF OR IN CONNECTION WITH THE ABILITY OR INABILITY TO USE THE PRODUCTS ACCESSORIES OR SOFTWARE TO THE FULL EXTENT THESE DAMAGES MAY BE DISCLAIMED BY LAW Some states and jurisd...

Page 61: ...ty with the Products associated with such Motorola software No other use including without limitation disassembly of such Motorola software or exercise of the exclusive rights reserved for Motorola is permitted ...

Page 62: ...44 Warranty ...

Page 63: ...Visit our website at www motorola com 514778 001 07 04 MGBI ...

Page 64: ......

Reviews: