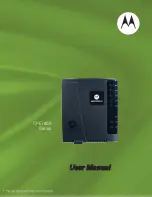
background image

User Manual

User Manual

CPE

800

Series

* Please see the Introduction Section

Summary of Contents for CPEi 23800

Page 1: ...User Manual User Manual CPEi 800 Series Please see the Introduction Section ...

Page 2: ...izard and Authentication 2 3 Chapter 3 Basic Configuration Personalize Menu 3 1 Password Tab 3 2 Device Time Tab 3 2 Device Name Tab 3 2 Restore Factory Settings Tab 3 3 Internet Menu 3 3 WiMAX Security Tab 3 4 Firewall Tab 3 4 Dynamic DNS Tab 3 5 Status Menu 3 5 Telephony Menu 3 6 Chapter 4 Advanced Configuration Port Forwarding Menu 4 1 Forwarding Tab 4 2 Local Address Menu 4 2 DHCP Server Tab 4...

Page 3: ...Important Safety and Legal Information This Product complies with the following RF energy exposure standards and guidelines 7 1 RF Exposure Compliance Guidelines and Operating Instructions 7 1 FCC Regulatory Information 7 1 Industry Canada Statement 7 2 Caring for the Environment 7 2 Disposal of Motorola Equipment in EU Countries 7 2 Disposal of Motorola Networks Equipment in Non EU countries 7 2 ...

Page 4: ...5 CPEi 25825 CPEi 35825 Table i 1 Desktop modem models Data only Data only models CPEi 23800 CPEi 25800 CPEi 35800 Data plus VoIP Voice over Internet Protocol models Throughout this manual references made to VoIP are applicable only to the CPEi 825 series of products The CPEi 800 series of products do not include the RJ 11 telephone connector on the back of the device the telephony LED or any refe...

Page 5: ...OCT 2010 Introduction iv ...

Page 6: ...onvenience with easy plug and play functionality Compact design Control remote management capability allows easy detection and authentication once the unit is set up VoIP RJ11 port allows for Voice over IP calls using your CPEi 825 The features and the physical appearance of your Desktop CPEi device may differ slightly from the illustration Figure 1 1 CPEi 800 Series For the most recent documentat...

Page 7: ... e t c e t e d s i h t g n e r t S l a n g i S X A M i W l l u F h t g n e r t S l a n g i S when all WiMAX Signal Strength LEDs are lit All WiMAX Signal Strength LEDs are off very low signal detected One to two WiMAX Signal Strength LEDs are lit low signal detected Three to five WiMAX Signal Strength LEDs are lit high signal detected X A M i W e h t o t s s e c c a g n i r i u q c a e l i h W X A...

Page 8: ...s Port Port Description t r o P t e n r e h t E t e n r e h t E r o t c e n n o C r e w o P C D r e w o P s i p i l c r e p a p A n o t t u B t e s e R e r a w d r a H t e s e R recommended for accessing this button P I o V h t i w e s u r o f t r o p 1 1 J R e n i L e n o h P DC Power Connector Power Cord Computer CPEi 825 Ethernet Connector Phone VoIP Ethernet Cable Telephone Cable Reset ...

Page 9: ...1 4 OCT 2010 1 Desktop CPEi 800 Series User Guide ...

Page 10: ...dapter into the power connector on the back of the unit Plug the AC power cord into an AC outlet Plug one end of the Ethernet cable into the Ethernet connector on the back of the unit Plug the other end of the Ethernet cable into the Ethernet connector of your computer To use VoIP functionality of the phone plug one end of the phone line into the activated phone connector on the back of the unit P...

Page 11: ...nnection of your Internet Protocol TCP IP properties Refer to the chapter titled Configuring TCP IP for additional information Logging in to the CPE Use the following procedure to log into the Desktop CPE 1 On a computer that is connected to the Desktop CPE open a web browser 2 In the Address or Location field type http mywimax and press ENTER to display the login screen Include the period after h...

Page 12: ...rk and CPE device Passwords are case sensitive To change your password Ensure the Enable Login Password Protection box is checked Enter a New Login Password in the box Passwords can be no more than 20 characters in length Re type your new password in the Confirm New Login Password box Click Next If you forget your password you can reset it back to the default motorola password To reset the passwor...

Page 13: ...are unsure of the Authentication Method select EAP TLS which is the default and click the Next button Step 4 Account The Account tab allows you to manage Voice over IP VoIP related services Please consult with your telephony service provider for these settings Click the Apply button when finished Congratulations You have now completed the setup of your WiMAX connection Click OK on the Congratulati...

Page 14: ...2 5 OCT 2010 Installation 2 Figure 2 2 Status Screen Restart Button Figure 2 3 Restart Button Restart Button ...

Page 15: ...2 6 OCT 2010 2 Installation ...

Page 16: ...our home network To log in type the device name in the address bar on your computer The default device name is mywimax This section describes the PERSONALIZE INTERNET and STATUS Menus that are available Personalize Menu The Personalize menu provides the following tabs Password Device Time Device Name Restore Factory Settings Figure 3 1 Personalize Menu ...

Page 17: ...Password Tab Field or Button Description Enable Login Password Protection Checking this box requires login password protection r u o y r e t n E d r o w s s a P n i g o L w e m u m i x a M e r e h d r o w s s a p w e n N 20 characters Passwords are case sensitive Confirm New Login Password Re enter your new password here exactly as entered in the previous step Table 3 2 Device Time Tab Field or Bu...

Page 18: ... you are sure that you want to reset factory settings Internet Menu The Internet menu provides the following tabs WiMAX Security Internet Protocol Firewall Dynamic DNS Figure 3 2 Internet Menu Table 3 4 Restore Factory Settings Tab Field or Button Description Restore Factory Settings Checking this box restores the CPE to factory default settings The device restarts when you click Apply ...

Page 19: ...uthorized access from the internet to your CPE Table 3 5 WiMAX Security Tab Field or Button Description r D d o h t e M n o i t a c i t n e h t u r e h t i e t c e l e s o t u o y s w o l l a x o b n w o d p o A EAP TLS default or EAP TTLS MS CHAPv2 User Name EAP TTLS MS CHAPv2 only Enter the User Name supplied by your service provider Password EAP TTLS MS CHAPv2 only Enter the Password supplied b...

Page 20: ... allow testing only Do not leave this enabled Table 3 6 Firewall Tab Field or Button Description Table 3 7 Dynamic DNS Tab Field or Button Description o t x o b s i h t k c e h C S N D D e l b a n s i t l u a f e d S N D D e l b a n E E unchecked u o y t a h t r e d i v o r P e c i v r e S S N D D t c e l e S r e d i v o r P e c i v r e S S N D D belong to from the drop down box f i d i l a v y l ...

Page 21: ...status associated with your telephony connection Telephony Menu The telephony menu allows you to manage your Voice over Internet Protocol VoIP services The Telephony menu provides the following tabs Account Ring Tone Caller ID Call Forwarding Voice Mail Special Numbers Contact your service provider to obtain VoIP service if you do not already have this service NOTE CPEi 825 Models only CPEi 825 Mo...

Page 22: ...r Button Description e m a N r e s U r e s U e h t r e t n e P I o V e v i t c a n a s i e n i L f I Name as provided by your service provider Enter the Line password as provided by d r o w s s a P your service provider Passwords are case sensitive Confirm Line Password entered in the field from the previous step Be sure to click the Apply button once you have made changes Reenter your Line passwo...

Page 23: ...L t l u a f e D tone for Line The default is ringtone R0 e n o t g n i r d e t c e l e s e h t w o h r a e h o t k c i l C t s e T sounds NOTE Table 3 10 Caller ID Tab Field or Button Description Enable Line Anonymous Incoming Call Rejection If Line is your active telephone port check this box if you would like to reject telephone calls from anonymous incoming callers The default is checked Enable...

Page 24: ...his function is not available if Enable Line Basic Forwarding is checked Line No Answer Forwarding to Number If Line No Answer Forwarding to Number is checked enter the telephone number you would like to forward calls to when there is no answer on Line This function is not available if Enable Line Basic Forwarding is checked Line No Answer Forwarding Ring Count the call forwards to the number iden...

Page 25: ...e The Special Number Tab contains the following Table 3 13 Special Number Tab Field or Button Description Service Provider Contact Number Use this number to contact customer service for your service provider y c n e g r e m e l a c o l h c a e r o t r e b m u n s i h t l a i D r e b m u N y c n e g r e m E services r e b m u n t s a l e h t l a i d e r o t r e b m u n s i h t l a i D l a i d e R c...

Page 26: ...phone number to which calls will be forwarded when there is no answer on Line Automatic Callback Activate Dial this number to hear the most recent call you missed and to return the call If the number is busy you can hang up When the number is available your phone will ring Pick up your phone and the call will be connected Automatic Callback Deactivate Dial this number to de activate automatic call...

Page 27: ...3 12 OCT 2010 3 Basic Configuration ...

Page 28: ...vide local services such as web hosting for a LAN group The Port Forwarding menu provides the following tabs Basic Forwarding Figure 4 1 Port Forwarding Be sure to click the Apply button once you have made changes Table 4 1 Port Forwarding Menu Field or Button Description h t s e l b a n E D G I P n P U e l b a n y a l P d n a g u l P l a s r e v i n U e E UPnP Internet Gateway Device IGD profile ...

Page 29: ... d o t t n a w u o y S specific row T P C T t c e l e S l o c o t o r l o r t n o C n o i s s i m s n a r P Protocol or UDP User Datagram Protocol r o f e g n a r t r o p g n i n n i g e b e h t r e t n E t r a t S t r o P N A W external network access l a n r e t x e r o f e g n a r t r o p g n i d n e e h t r e t n E d n E t r o P N A W network access e c i v r e s e h t t s o h o t s s e r d d ...

Page 30: ...e s f I r e v r e S P C H D e l b a n E gateway assigns IP addresses to the computers and other hosts on your network if they have DHCP enabled By default the gateway server is enabled If there is another DHCP server running on your network on another router disable one of the DHCP servers DHCP Server IP Address Enter the default port forwarding LAN Client IP Address DHCP Starting IP Address Sets ...

Page 31: ...ns increase the Ending IP or reduce the Lease Time k r o w t e n a t a h t s d n o c e s n i e m i t e h t s t e S e m i T e s a e L P C H D computer remains connected to the gateway using its current assigned IP address At the end of this time the DHCP server renews the lease or assigns the computer a new IP address The default is 3600 seconds one hour The maximum is 999999 seconds about 278 hour...

Page 32: ...t c e l e S t c e l e S established lease reservation Be sure to click the Delete button once you have selected the exception to be deleted c e h t r e t n E e m a N t s o H t n e i l e m a N e h T e m a n t s o h t n e i l C field is limited to 20 characters only 5 appear in display s s e r d d a C A M l o r t n o C s s e c c A a i d e M s s e r d d A C A M Enter the MAC address of the device t n...

Page 33: ...es in the Available Software Packages table If you cannot see the list click the View button Select the software you would like to install and click the Install button If you would like to remove software select the software package you would like to remove and click Uninstall Certificate Tab The Certificate tab is where you manage the certificates that are stored on the device Use the BROWSE butt...

Page 34: ...scription Language Used in User Interface Select the desired language for the user interface The default language is English e s n i r e t n E l a v r e t n I h s e r f e R o t u s u t a t s r o f l a v r e t n i e h t s d n o c A Auto Refresh Valid range is 2 seconds 9999 seconds The default value is 3 seconds Enable WiMAX Radio Interface Check this box to enable the WiMAX Radio Interface Backgro...

Page 35: ...4 8 OCT 2010 4 Advanced Configuration ...

Page 36: ...at controls communication among computers Two examples are provided in this document Configuring TCP IP in Windows 2000 Configuring TCP IP in Windows XP Configuring TCP IP in Windows 2000 1 On the Windows Desktop click Start 2 Select Settings and then Control Panel from the pop up menus to display the Control Panel window Figure 5 1 Windows Control Panel 3 Double click the Network and Dial up Conn...

Page 37: ...mputers with multiple network interfaces Computers with only one network interface may only see the label Local Area Connection 4 Click Local Area Connection number The value of number varies from system to system The Local Area Connection number Status window is displayed Figure 5 3 Local Area Connection 5 Click Properties Information like the following window is displayed ...

Page 38: ... IP is installed You can skip to Step 10 Figure 5 5 Select Network Connection Type If Internet Protocol TCP IP is not in the list click Install The Select Network Component Type window is displayed 7 Click Protocol on the Select Network Component Type window and click Add The Select Network Protocol window is displayed ...

Page 39: ...d 10 Be sure the box next to Internet Protocol TCP IP is checked 11 Click Properties The Internet Protocol TCP IP Properties window is displayed Figure 5 7 Internet Protocol TCP IP Properties 12 Be sure Obtain IP address automatically and Obtain DNS server address automatically are selected You might have to use the scroll bar to locate the Internet Protocol TCP IP setting NOTE ...

Page 40: ...ows XP 1 On the Windows desktop click Start to display the Start window Figure 5 8 Windows XP Start Window 2 Click Control Panel to display the Control Panel window The display varies depending on your Windows XP view options If the display is a Category view as shown in Figure 5 9 continue with Step 3 Otherwise skip to Step 5 Figure 5 9 Control Panel 3 Click Network and Internet Connections to di...

Page 41: ...Step 6 5 If a classic view like Figure 5 11 is displayed double click Network Connections to display the LAN or High speed Internet connections Figure 5 11 Control Panel Classic View 6 Right click the Local Area Connection If more than one connection is displayed be sure to select the one for your network interface ...

Page 42: ...he pop up menu to display the Local Area Connection Properties window Figure 5 13 Local Area Connection Properties 8 On the Local Area Connection Properties window select Internet Protocol TCP IP if it is not selected 9 Click Properties to display the Internet Protocol TCP IP Properties window ...

Page 43: ...Configuring TCP IP Figure 5 14 Internet Protocol TCP IP Properties 10 Be sure Obtain IP address automatically and Obtain DNS server address automatically are selected 11 Click OK to close the TCP IP Properties window ...

Page 44: ...to the Desktop CPE unit and the computer Cannot Connect to the Internet Check the Desktop CPE connection status from the Web Interface refer to the Connection Status section to verify the connection status If the Desktop CPE connection is down and the gateway has not received an IP for 5 minutes to 10 minutes Re Run the Setup Wizard If the Setup Wizard does not help then reset the Desktop CPE usin...

Page 45: ...6 2 OCT 2010 6 Troubleshooting ...

Page 46: ...nected Consult the dealer or an experienced radio TV technician for help This Gateway desktop transmitter must not be co located or operating in conjunction with any other antenna or transmitter FCC Caution Any changes or modifications not expressly approved by the party responsible for compliance could void the user s authority to operate this equipment FCC Regulatory Information To comply with F...

Page 47: ...y radiated power e i r p is not more than that permitted for successful communications This Class B digital apparatus complies with Canadian ICES 003 Cet appareil numérique de la classe B est conforme à la norme NMB 003 du Canada IC Radiation Exposure Statement In non EU countries dispose of Motorola Networks equipment in accordance with national and regional regulations Disposal of Motorola Equip...

Page 48: ... Motorola Inc assumes no liability resulting from any inaccuracies or omissions in this document or from use of the information obtained herein The information in this document has been carefully checked and is believed to be entirely reliable However no responsibility is assumed for inaccuracies or omissions Motorola Inc reserves the right to make changes to any products described herein and rese...

Page 49: ...c High Risk Materials Components units or third party products used in the product described herein are NOT fault tolerant and are NOT designed manufactured or intended for use as on line control equipment in the following hazardous environments requiring fail safe controls the operation of Nuclear Facilities Aircraft Navigation or Aircraft Communication Systems Air Traffic Control Life Support or...

Page 50: ...MOTOROLA and the Stylized M Logo are registered in the US Patent Trademark Office All other product or service names are the property of their respective owners 2010 Motorola Inc 6814927F08 ...

Reviews: