background image

5.5

Camera Functions:

5.5.1

Connecting the Camera Unit to power

•  Connect the power adapter to a suitable electrical outlet and insert the plug 

into the micro USB socket on the back of the Camera Unit.

•  Slide the ON/OFF switch to the ON position. The power indicator LED will 

light up in green. (

Note:


To switch off the device, slide the ON/OFF switch to 

OFF.

•  Run the Hubble App on your smart device.

5.5.2

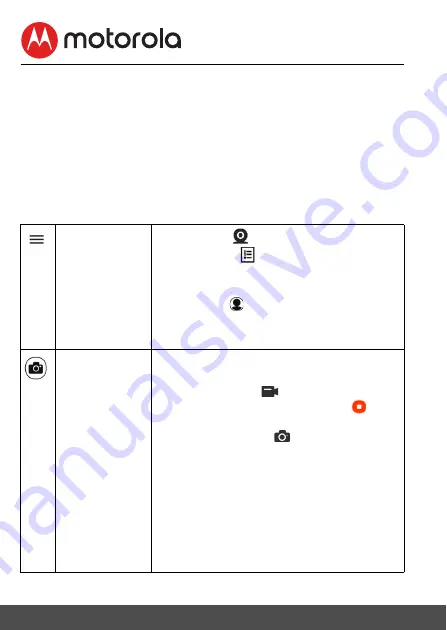
Overview of the Features on Hubble App

Menu

•  Tap 

Cameras


to access the camera list. 

•  Tap 

Event Log


to access the video record 

list that is triggered by Motion or Sound 
detection. 

•  Tap 

Account


to access user 

Profile

subscription 

Plan

Notifications

 setting, 

Remote 

Connection Setting

 and 

About Hubble

Photo/Video

•  Take a photo or record a video from your 

Camera.

•  Tap the Video icon 


to activate Video 

function. Tap and hold the red button 


to 

start recording and release to stop.

•  Tap the Camera icon 


to switch to Camera 

mode. You can capture photos from Camera 
view.

NOTE 

Photos and videos will be stored in the internal 
flash memory of your smart device, and can be 
accessed via the Gallery or Media Player 
(Android

TM

 Device). To play videos, please use 

the Hubble App.

32                                                                                                                                                                                                         Wi-Fi® Internet Viewing

Summary of Contents for CONNECT40

Page 1: ...tures described in this User s Guide are subject to modifications without prior notice 5 HD W i Fi Video Baby and Home Monitor Models COMFORT85 CONNECT COMFORT85 2 CONNECT COMFORT85 3 CONNECT COMFORT85 4 CONNECT CONNECT40 ...

Page 2: ...s User s Guide provides you with all the information you need to get the most from your product Before you can use the baby monitor we recommend you insert and fully charge the battery in the Parent Unit so that it continues to work if you disconnect it from the power supply to carry it to another location Please read the Safety Instructions on pages 7 9 before you install the units Got everything...

Page 3: ...l key panel UP VOLUME Press to increase speaker volume in camera viewing mode When in a menu press to scroll up When in remote scan mode press to tilt up DOWN VOLUME Press to decrease speaker volume in camera viewing mode When in a menu press to scroll down When in remote scan mode press to tilt down LEFT Decrease brightness in camera viewing mode When in a menu press to scroll left When in remote...

Page 4: ...or Battery Camera Patrol Mode Camera Identification Number Speaker on off Lullabies menu mode Zoom menu mode Night vision Alarm timer Parent unit battery status Brightness Level Speaker volume Video on timer Add camera Delete camera View camera Talk back function S ...

Page 5: ... fluorescent lights or dimmer switches Use of other 2 4 GHz products such as wireless networks Wi Fi routers Bluetooth systems or microwave ovens may cause interference with this product so keep the Baby Monitor at least 5 feet from these types of products or turn them off if they appear to be causing interference If the signal is weak try moving the Parent and or the Baby Unit to different positi...

Page 6: ...imum System Requirements 20 5 2 Getting Started Connecting Devices 21 5 2 1 Setup 21 5 3 User Account and Camera Setup on Android Devices 22 5 3 1 Power ON and Connect the Camera 22 5 3 2 Download Hubble for Motorola Monitors App 22 5 3 3 Run Hubble for Motorola Monitors App on Android device 22 5 3 4 Add the Camera to your account 23 5 4 User Account and Camera Setup on iPhone iPad 26 5 4 1 Power...

Page 7: ...y Instructions WARNING Strangulation Hazard Children have STRANGLEDin cords Keep this cord out of the reach of children more than 3ft away Do not remove this tag Never use extension cords with AC Adapters Only use the AC Adapters provided ...

Page 8: ...the Unit and cords should be more than 1 metre away Keep the cords out of reach of children Do not cover the Baby Monitor with a towel or blanket Test this monitor and all its functions so that you are familiar with it prior to actual use Do not use the Baby Monitor in damp areas or close to water Only use the chargers and power adapters provided Do not use other chargers or power adapters asthis ...

Page 9: ...utlets CAUTION The ParentUnit includesabuilt in lithium ionrechargeablebatterypack which is not a user accessible item If you think the battery needs replacing please contact the helpline Do not try to replace it yourself Risk of explosion if battery is replaced by an unapproved battery type Dispose of used batteries according to their instructions ...

Page 10: ...g to be monitoring your baby most of the time It should also be at least 3 feet away from your baby ȼˏ Plug the micro USB plug of power adapter DC5V 10 0 0 mA into the Baby unit connect other end to a suitable electrical outlet ȼˏ Slide the Power ON OFF switch on the side of the baby unit up to turn it on IMPORTANT Only use the supplied power adapter ...

Page 11: ...end you keep the cable plugged into an electrical outlet if you re going to use for longer than this or throughout the night When the battery gets very low it ll take about 30 minutes to charge enough for you to use it for a short time To charge the Parent unit in the shortest amount of time turn it off while it s charging ȼˏ After the Parent unit has charged for 16 hours you can switch it on ȼˏ B...

Page 12: ...is not a fault The units are designed to be operated at some distance apart So move the units further apart 3 2 Power On or Off the Baby Unit Slide the Power ON OFF switch to the ON position to switch on the Baby Unit The power indicator lights up in blue Slide the Power ON OFF switch to the OFF position to switch off the Baby Unit The power indicator goes off 3 3 Power On or Off the Parent Unit P...

Page 13: ... On Off button 0 to turn the LCD screen on or off whilst still leaving the audio monitor on 3 7 Remote Pan Scan The baby monitor and camera with pan scan to keep an eye on your child from screen you can remotely pan scan the video image as needed 1 Press the O button to enter scan mode 2 Press the LEFT RIGHT button to pan scan 3 Press the UP DOW N button to tilt Up Down the image 4 Press the O but...

Page 14: ...tent can be downloaded and stored in the Baby Unit via Hubble App You have 10 preloaded lullabies soothing sounds and 10 audio books in the Baby Unit 4 3 1 Lullaby Soothing Sounds Playback Press M button Audio Playlist appears at the menu bar Press O button to select Lullaby Soothing Sound option the song name appears on the screen Press UP or DOWN button to view the desired Lullabies Soothing Sou...

Page 15: ... button Press UP button or DOWN button until Press OK to stop playing appears on screen then confirm with O button to stop Press M button to exit 4 4 Set Mood Light The mood light feature provides a soft glow to help soothe your baby to sleep and help keep them calm throughout the night the mood light has 7 colour options or auto looping and 3 levels of brightness available Press M button Audio Pl...

Page 16: ... 1 minute after every 6 4 or 2 hour period and the will appear at top of screen 5 The alarm will sound for about 1minute when the time is reached or can be stopped by pressing any button 4 6 Power Saving Mode 1 Press the M button and the menu bar will pop up 2 Press the LEFT button or RIGHT button until is highlighted 3 Press the UP button or DOWN button to select auto video off after 5 mins 30 mi...

Page 17: ...tible camera to the Parent Unit proceed as follows 1 Press the M MENU button and the menu bar will pop up 2 Press the LEFT or RIGHT button to select add camera icon the camera list appear on the screen 3 Press the UP or DOWN button to select the desired amera and press the O button to start searching for a camera unit with press PAIR on cam shown Note If a baby unit is currently paired with the Pa...

Page 18: ...P Quick Method to View Cameras instead of entering into the menu bar Directly press the O button repeatedly to select the available Camera options from NOTE You are not allowed to delete the camera if there is only one registered camera in the system 4 11Delete Camera If you wish to delete the connection to a camera proceed as follows 1 Press the M button and the menu bar will pop up 2 Press the L...

Page 19: ...o delete the connection to a camera proceed as follows 1 Press the M button and the menu bar will pop up 2 Press the LEFT button or RIGHT button until is highlighted the camera list appear on the screen 3 Press the UP button or DOWN button to select the camera that you wish to delete 4 Confirm with O button 5 Press DOW N button to select and then O to confirm delete ...

Page 20: ...ac OS 10 7 Chrome 24 Internet Explorer 9 Safari 6 Java 7 Firefox 18 0 Adobe Flash Player 15 0 Android System Version 5 0 or above iPhone iPad iOS Version 8 0 or above High Speed W i Fi Internet At least 0 6 Mbps upload bandwidth per camera you can test your internet speed on this site http www speedtest net ...

Page 21: ...position The Camera Unit must be within range of the Wi Fi router with which you want to connect Make sure that you have the password of the router for the setup process Behavior of the status Indicator LED Note You can only setup via a compatible smartphone or tablet and not via a PC Pairing and setting up Flashes slowly in red and blue Connected Flashes slowly in blue Paired but not connected Li...

Page 22: ...mera is ready for setup 5 3 2 Download Hubble for Motorola Monitors App Go to Google Play Store to search for Hubble for Motorola Monitors Download Hubble for Motorola Monitors App from Google Play Store and install it on your Android device 5 3 3 Run Hubble for Motorola Monitors App on Android device Ensure that your Android device is connected to yourWi Fi router Run the Hubble for Motorola Moni...

Page 23: ...screen to add camera Picture A2 The following setup instructions will appear on the screen Picture A3 Plug in and switch on the camera and wait for a couple of minutes for it to warm up Tap Continue when the Camera LED starts to blink A2 A3 ENGLISH Wi Fi Internet Viewing 23 ...

Page 24: ...nit for 3 seconds You will then hear a beep tone followed by a voice prompt indicating that the Camera is ready for pairing Tap Continue The App will automatically search for and connect to your Camera as shown in the pictures below Pictures A5 A6 The blue red color LED on the Camera Unit will flash A4 A5 A6 24 Wi Fi Internet Viewing ...

Page 25: ...o connect to the Wi Fi network before showing the connection status Pictures A9 A10 If connection fails please tap Retry and repeat the steps starting from 5 3 4 Tap View Camera to view the video captured by the Camera Unit The LED indicator on the Camera Unit will flash in blue A7 A8 A9 A10 ENGLISH Wi Fi Internet Viewing 25 ...

Page 26: ... Camera is ready for setup 5 4 2 Download Hubble for Motorola Monitors App Go toApp Store to search for Hubble for Motorola Monitors Download Hubble for Motorola Monitors App and install it onyour iPhone iPad 5 4 3 Run Hubble for Motorola Monitors App on iPhone iPad Ensure that your iPhone iPad is connected to yourWi Fi Router Run the Hubble for Motorola Monitors App select create an account and e...

Page 27: ...our account Tap on the top right corner of the screen to add camera Picture i2 The following Bluetooth setup instructions will appear on the screen if your Bluetooth is not on Picture i3 i2 i3 ENGLISH Wi Fi Internet Viewing 27 ...

Page 28: ... setup The following setup instructions will appear on the screen Picture i6 Note that if Bluetooth is on you will be brought to this step directly Wait for a couple of minutes for the Camera Unit to initialise and when the Camera LED indicator starts to blink press and hold the PAIR button on the underside of the camera then tap Continue i4 i5 i6 28 Wi Fi Internet Viewing ...

Page 29: ...l appear on the screen Select the Camera ID detected on your iOS device and tap Connect Pictures i7 i8 Name the location of your Camera Unit and tap Continue Pictures i9 i10 i7 i8 i9 i10 ENGLISH Wi Fi Internet Viewing 29 ...

Page 30: ...tworks Picture i12 Select yourWi Fi network and tap Continue Picture i13 Enter your Wi Fi password and tap Next Picture i14 It will take a few minutes for the Camera Unit to connect to the Wi Fi network before showing the connection status Pictures i15 i16 i11 i12 i13 i14 30 Wi Fi Internet Viewing ...

Page 31: ...ils tap Retry and repeat the steps starting from 5 4 4 Tap View Live Camera to view the video captured by the Camera Unit The LED indicator on the Camera Unit will flash in blue i15 i16 ENGLISH Wi Fi Internet Viewing 31 ...

Page 32: ...nt Log to access the video record list that is triggered by Motion or Sound detection Tap Account to access user Profile subscription Plan Notifications setting Remote Connection Setting and About Hubble Photo Video Take a photo or record a video from your Camera Tap the Video icon to activate Video function Tap and hold the red button to start recording and release to stop Tap the Camera icon to ...

Page 33: ...rature that was set in your Account Two way communication Tap to activate the function Press the round button once to speak through the Camera Unit Toggle the button again to listen to the audio feedback from the Camera Unit Speaker Tap to toggle speaker on or off Zoom Slide the scroll bar on the right hand side of the screen to zoom in or zoom out You can also use the pinch in and pinch out gestu...

Page 34: ...ty of Sound Detection Motion Detection and to set Alerts for High temperature Up to 33 o C or 91 o F Low temperature down to 10o C or 50 o F Tap Settings to set Ceiling mount Brightness and Volume Add Camera Enter Add Camera procedures Delete All Events Tap to delete all events Select Events Check the box to select recorded event s Edit Events Tap to select and delete event s Delete Events Tap to ...

Page 35: ...structions 5 7 Procedure for Resetting the Camera Note If your Camera is moved from one router e g home to another e g office oryouhaveCamerasetupissues thentheCameramustbereset Please reset the Camera with the following procedures 1 Slide the ON OFF switch to OFF 2 Press and hold the PAIR button While continuing to hold the PAIR button slide the ON OFF switch to ON 3 Release the PAIR button when ...

Page 36: ...The symbol on the Product User s Guide and or box indicates this Someof theproduct materialscanbe reusedifyou takethemto a recycling point By reusing some parts or raw materials from used products you make an important contribution to the protection of the environment Please contact your local authorities in case you need more information on the collection points in your area Dispose of the batter...

Page 37: ...e permanent damage to the product which is not covered by the Warranty Keep your Baby Monitor away from hot humid areas or conditions strong sunlight and avoid moisture Every effort has been made to ensure high standards of reliability for your Baby Monitor However if something does go wrong please do not try to repair it yourself contact Customer Service for assistance IMPORTANT Always switchoffa...

Page 38: ...onnect the Parent Unit to the electrical outlet with the supplied power adapter for recharging icon on the Parent Unit flashes Battery pack in the Parent Unit is running low Connect the Parent Unit to the electrical outlet with the supplied power adapter for recharging The Parent Unit switches itself off It could be that the Parent Unit is in standby mode Check whether the video on timer has been ...

Page 39: ...et too high which consumes power Decrease the volume level of the Parent Unit Refer to section 4 1 for volume level settings Parent Unit image is not in color The Baby Unit is in a dark room which causes the infra red illumination to turn on and the picture image to change from color to black and white When the room becomes brighter the picture will return to color There is no transmission from th...

Page 40: ...at this Motorolabrandedproduct Product orcertifiedaccessory Accessory sold forusewiththisproductismanufacturedtobefreefromdefectsinmaterialsand workmanship under normal consumer usagefor the period outlined below This Warranty is your exclusive warranty and is not transferable Who is covered This Warranty extends only to the first consumer purchaser and is not transferable What will BINATONE do BI...

Page 41: ...IGENCE FOR DAMAGES IN EXCESS OF THE PURCHASE PRICE OF THE PRODUCT OR ACCESSORY OR FOR ANY INDIRECT INCIDENTAL SPECIAL OR CONSEQUENTIAL DAMAGES OF ANY KIND OR LOSS OF REVENUE OR PROFITS LOSS OF BUSINESS LOSS OF INFORMATION OR OTHER FINANCIAL LOSS ARISING OUT OF OR IN CONNECTION WITH THE ABILITY OR INABILITY TO USE THE PRODUCTS OR ACCESSORIES TO THE FULL EXTENT THESE DAMAGES MAY BE DISCLAIMED BY LAW...

Page 42: ...ault of MOTOROLA or BINATONE are excluded from coverage Use of Non Motorola branded Products and Accessories Defects or damage that result from the use of Non Motorola branded or certified Products or Accessories or other peripheral equipment are excluded from coverage Unauthorized Service or Modification Defects or damages resulting from service testing adjustment installation maintenance alterat...

Page 43: ...e and risk to a BINATONE Authorized Repair Center To obtain service you must include a the Product or Accessory b the original proof of purchase receipt which includes the date place and seller of the Product c if a warranty card was included in your box a completed warranty card showing the serial number of the Product d a written description of the problem and most importantly e your address and...

Page 44: ...receiving antenna Increase the separation between the equipment and receiver Connect the equipment into an outlet on a circuit different from that to which the receiver is connected Consult the dealer or an experienced radio TV technician for help Changes or modifications to this equipment not expressly approved by the party responsible for compliance could void the user s authority to operate the...

Page 45: ...standard s Operation is subject to the following Two conditions 1 this device may not cause interference and 2 this device must accept any interference including interference that may cause undesired operation of the device The term IC before the certification registration number only signifies that the Industry Canada technical specifications were met This product meets the applicable Industry Ca...

Page 46: ...R LED 8 pcs Power Adapter Ten Pao International Ltd S005BNU0500100 Input 100 240V AC 50 60Hz 150mA Output 5 0V DC 1000mA Or CSEC WARNING Use only with provided power supply Operating Temperature Arange 0 C 50 C CS6F050100FUF Input 100 240V AC 50 60Hz 200mA Output 5 0V DC 1000mA 46 Technical Specifications ...

Page 47: ...e non rechargeable batteries for the Parent Unit Risk of explosion if battery is replaced by an incorrect type Dispose of used batteries according to the instructions Power Adapter Ten Pao International Ltd S005BNU0500100 Input 100 240V 50 60Hz 150mA Output 5 0V 1000mA Display colors 16 7M color LCD Brightness control 8 steps Volume control 8 steps Operating Temperature Arange 0 C 50 C Or CSEC CS6...

Page 48: ...vice mark of Apple Inc Google Play Android and Chrome are trademarks of Google Inc Wi Fi is a trademark of the Wi Fi Alliance Internet Explorer and Windows are trademarks of the Microsoft group of companies Firefox is a registered trademark of the Mozilla Foundation Adobe and Flash are either registered trademarks or trademarksof Adobe Systems Incorporated Java is a registered trademarkofOracleand...

Reviews: